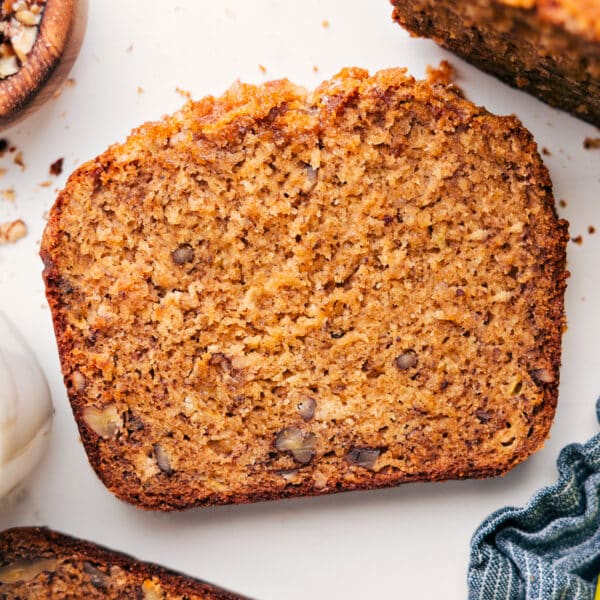
This Irish Soda Bread Recipe comes together in minutes with no rising time needed—just mix and bake! Add raisins or sunflower seeds for a fun twist or enjoy it plain.


author’s note
The Easiest Homemade Bread Ever!
Every year around St. Patrick’s Day, I start seeing Irish Soda Bread pop up everywhere. It always looks so cozy and rustic, but for years I thought it would be complicated or require some special technique.
Then I finally made it myself and realized it might be one of the easiest breads you can bake.
No yeast.
No proofing.
And no waiting.
Just stir everything together, shape the loaf, and bake.
The first time I made this version, I added raisins because that’s how I’d always seen it. I posted a quick poll on social media asking how everyone felt about raisins in bread, and the results were…strong. Most people were firmly against them.
Which honestly cracked me up, because I don’t want raisins anywhere near my oatmeal cookies, but in this bread? They’re so good.
That’s when I started testing different variations so everyone could enjoy it their own way. Plain, with seeds, with oats on top, or with raisins. Now it’s a recipe I make all the time because it’s so fast, reliable, and perfect with soups, stews, or just a thick smear of butter.

. Add in some raisins or sunflower seeds for a tasty addition or leave them out for a plain soda bread. Recipe via ChelseasMessyApron #quick #easy #simple #best #appetizer #irish #soda #bread")
Ingredients
| Ingredient | Tips or Swaps |
|---|---|
| Buttermilk | Essential for the rise and flavor. Don’t swap with regular milk. |
| Butter | Melted butter makes this bread extra tender and rich. |
| Flour | Spoon and level or weigh for best results. Too much flour makes the bread dry. |
| Baking soda & powder | These replace yeast and help the bread rise. |
| Raisins | Optional. Leave them out or swap for seeds or oats. |
. Recipe via ChelseasMessyApron #quick #easy #simple #best #appetizer #irish #soda #bread")
How To Make This Irish Soda Bread Recipe
If you’ve ever made my drop biscuits, this method will feel familiar. Instead of cutting cold butter into the flour, I use the same trick: melted butter mixed with cold buttermilk.
- Butter & buttermilk: Pour buttermilk into melted butter. Let it sit until clumps form.
- Dry ingredients: Combine flour, sugar, baking powder, baking soda, salt, and raisins.
- Add wet ingredients: Stir in the egg mixture and the clumpy butter mixture.
- Form the dough: Mix until just combined, then gently knead a few times.
- Shape & score: Form into a round loaf and cut an “X” on top.
- Bake: Bake until golden and the bottom sounds hollow when tapped.
Irish Soda Bread Recipe Tips
- Don’t overmix: Stir until just combined to keep the bread tender.
- Keep the dough slightly sticky: A wetter dough makes a softer loaf.
- Measure flour carefully: Too much flour makes the bread dense.
- Let it cool before slicing: The inside finishes cooking as it rests.
Variations
- Leave out the raisins and prepare the bread as is (plain white no-yeast bread!).
- Add some seeds — mix through about 1/3 up to 1/2 cup of poppy seeds, sunflower seeds, or sesame seeds into the dough and then sprinkle another tablespoon on top before baking.
- Brush the top of the bread with buttermilk and sprinkle with old-fashioned oats.

Chelsea’s Recipe Tip
My Favorite Way To Enjoy This Irish Soda Bread Recipe
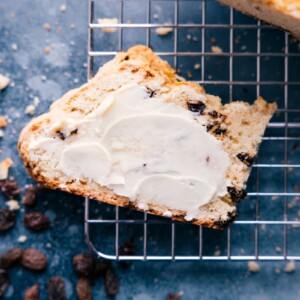
- Spread with room-temp butter and a pinch of salt
- Toasted with citrus marmalade or berry jam
- Filled with cheese and deli meat for a quick sandwich
- Turned into French toast with syrup or vanilla sauce
- Dunked into a bowl of soup or hearty stew
Storage
- This Irish soda bread recipe is best eaten fresh, but it keeps for up to 3 days at room temp in a cool, dry place. Don’t refrigerate it to avoid it getting stale.
- After 2-3 days, freeze slices for up to 3 months. Toast slices straight from the freezer or let them thaw at room temp.
Quick Tip
Irish Soda Bread is notoriously crumbly, so cut long slices in half down the middle and then toast the bread first for more stability.
Use Leftover Buttermilk In One Of These:

Breakfast
Buttermilk Syrup
Breakfast
Chocolate Chip Pancake Recipe

Muffins And Quick Breads
Red Lobster Biscuit Recipe
Quick And Easy
Buttermilk Ranch Dressing Recipe
Irish Soda Bread
Video
Equipment
- Large sheet pan (15″ x 21″) or a 5-quart cast-iron pot
- Parchment paper or a silicone baking mat
Ingredients
- 8 tablespoons unsalted butter 1/2 cup, melted
- 1-3/4 cups buttermilk divided, see note 1
- 1 large egg
- 4-1/2 cups all-purpose flour plus more for dusting, see note 2
- 3 tablespoons granulated sugar
- 2-1/2 teaspoons baking powder
- 1 teaspoon baking soda
- 1-1/2 teaspoons salt
- 1 cup raisins soft and fresh
Instructions
- Preheat oven to 425°F. Line a large sheet pan with parchment paper or a silicone liner, or line a 5-quart cast-iron pot with parchment paper. Set aside. Melt butter in a medium microwave-safe bowl.
- Take the butter from the microwave and pour in 1 cup (237g) cold buttermilk. Stir with a fork and set aside for about 5 minutes. In another medium bowl, add the remaining 3/4 cup (176g) buttermilk and the large egg. Whisk together until smooth and set aside.
- Add flour, sugar, baking powder, baking soda, salt, and raisins to a very large bowl. Whisk together until combined. Make a well in the middle of the bowl and pour in the buttermilk + egg mixture.Stir the butter and buttermilk mixture again, stirring until small clumps form (you want this mixture as clumpy as possible!). Use a spatula to scrape every bit of this mixture on top.
- Use a strong spatula or wooden spoon to mix ingredients until just combined and no streaks of flour remain. Be careful to not overmix or overwork the dough. Sprinkle 2 tablespoons extra flour onto a clean work surface. Scrape out all the dough right onto the flour and sprinkle with 2 more tablespoons of flour. Gently knead the bread, about 6–8 times to bring everything together into a wide, smooth ball.
- Gently transfer ball to the prepared sheet pan or pot and pat it down to about 1-1/2 inches in height. Use a sharp serrated knife to cut an “X” across the surface about 1/4-inch deep. Bake for 25 minutes. After 25 minutes, do not open the oven, but reduce heat to 400°F and bake another 20–30 minutes or until the base sounds hollow when tapped in the middle (25 mins in my oven).
- Remove tray from oven and let stand 10 minutes before carefully transferring to a wire cooling rack. Let bread cool for at least 30 minutes before slicing into it (the steam is still cooking the bread!)—see note 3.
Recipe Notes
Nutrition
Nutrition information is automatically calculated, so should only be used as an approximation.