This simple No-Yeast Bread can be prepared in a matter of minutes and doesn’t require any rising time! Bake it up and enjoy a delicious slice of hot baked bread in under 90 minutes!
If you’re looking for a yeasted bread check out our White Bread recipe, Honey Whole Wheat Bread recipe, or our delicious Dinner Rolls. And don’t forget the Honey Butter to slather on a hot slice!

Bread Recipe With No Yeast!
If you’re wondering what bread contains no yeast, it’s typically a variety of quick bread (or more precisely called soda bread). This particular No-Yeast Bread recipe I’m sharing is a quick bread/soda bread recipe. The bread rises from the gasses produced in a chemical interaction between the acids of the dough (buttermilk) and the baking agents (baking powder and baking soda). This results in a lovely rise without any yeast!
And don’t worry, this easy bread recipe with no yeast is quick to make — in fact, there is no rising time required. The bread whips together quickly in a large bowl with a wooden spoon and/or spatula (no hand or stand mixers required!)
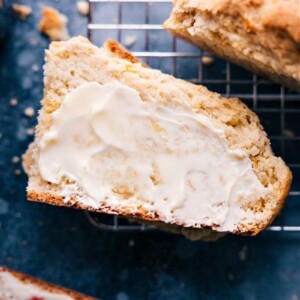
Texture and Taste: Taste is buttery and rich with a mild flavor most similar to a biscuit flavor. While we love this bread plain, it is definitely next level served with butter or jam — it’s not necessarily intended to be eaten on its own. The texture is wonderful — it has a nice and crisp crust with a dense, tender, and moist-like interior. The bread has a much tighter crumb and a softer texture than your typical sandwich bread. We do enjoy this bread best the same day (similar to biscuits!) and it becomes a chewier/softer day 2-3.

The “Secret” To the Easy Preparation
Remember the “secret” preparation method for creating these amazing Drop Biscuits?
Quick re-cap: Most drop biscuits use cold cubed butter and a food processor or pastry blender to cut the butter into the biscuits. But instead of doing this, we actually melt the butter. This would typically be bad for the texture, but we form new butter clumps by mixing in cold buttermilk. When the cold buttermilk hits the melted butter, it forms small clumps (see the photo above). Those clumps will imbue the wonderful texture that results from pockets of butter without the extra work. (Thanks to Cooks Illustrated for teaching me this cool trick!)
We use this method again in this No-Yeast White Bread — we mix hot melted butter with cold buttermilk and get perfect clumps of butter. This is not only going to help the bread rise, but it will also give it a great texture. And, it’s SO much easier than cutting in cold butter!
By the way, if you’re looking for no-yeast bread rolls, I’d recommend trying out that drop biscuit recipe!
Quick Tip
Fat (butter) forms small pockets throughout the biscuit dough. As it melts in the oven, the CO2 from the baking powder takes the place of the fat so the bread will rise. Without butter clumps in the biscuit dough, the biscuits will end up hard and flat — there is no place for the CO2 to go except out!

How To Make Bread With No Yeast
You’ll be amazed how quickly this bread comes together! Be sure to watch the quick video overview and check out the step-by-step process photos. Below are our top tips:
- Watch the bake time. Keep an eye on the bread while it’s in the oven. There is a lot of variation in bread baking times due to several factors. Look for a nice golden brown crust and the bread should sound hollow when lightly tapped in the middle. If it browns too quickly before the middle is done, cover it loosely with foil.
- Cut an “X” in the loaf before baking. This helps to ensure the middle is cooked through.
- Let the bread stand after baking. Leave it on the pan for 5-10 minutes, then transfer to a wire rack for at least 30 minutes. The heat and steam ensure the center is fully baked. Resist cutting too soon to avoid a doughy center.
- Use buttermilk straight from the fridge—the colder the better. This will ensure the clumps form well in the melted butter.
- Adding flour can be tricky. Things like humidity, altitude, and temperature can change the amount needed. Start with a bit less than the recipe suggests, then slowly add more until the dough pulls away from the bowl and isn’t too sticky. It shouldn’t be wet, but should still have some moisture.
- Too much flour results in a dense and less-flavorful loaf of No-Yeast Bread. Too little and the bread will spread excessively.
- When measuring flour for this bread, be sure to spoon and level the flour. If you press a measuring cup into a container and push the flour into the cup, you’ll end up with way too much flour. Here’s how to spoon and level flour.

Serving Suggestions
No-Yeast Bread is fairly plain in flavor (delicious, but plain!) and is enhanced by a topping of some sort. Here are our favorite ways to enjoy this bread:
- Slice a piece while the bread is still hot and spread on a thick layer of room-temperature butter. If the butter is unsalted, add a pinch of salt to bring out the creamy flavors. You could also add on some freshly cut herbs like rosemary or thyme.
- Add a citrus marmalade or berry jam. If the bread isn’t fresh out of the oven, toast a slice first.
- Make a sandwich with it! Add your favorite cheese and meat or prepare an open-faced sandwich with toasted bread and cheese!
- Prepare biscuits and gravy but with a slice of toasted No-Yeast Bread instead of the biscuits! We loved this meal!
- Use for French toast. Top with plenty of buttermilk syrup, pancake syrup, or blueberry syrup.
- Dunk in some soup—here’s a list of 30 or our favorite soup recipes.
Quick Tip
Use leftover buttermilk in one of these recipes: Our favorite Homemade Pancakes, this tasty Corn Casserole with creamed corn, or these Chocolate Chip Pancakes.

Storage
Storing No-Yeast Bread
- Best Fresh: Enjoy right out of the oven. Without preservatives, it won’t last as long as store-bought bread.
- Room Temp Storage: Store in a cool, dry place for 3-5 days. Use a container that allows ventilation to prevent mold. Avoid the fridge; it speeds up staleness.
- Freezing: For bread older than 2-3 days, freeze sliced. It stays fresh for up to 3 months. Thaw at room temperature or toast directly from the freezer.
Quick Tip
No-Yeast Bread is notoriously crumbly, so toast the bread first for more stability.
More Quick Bread Recipes
- Pumpkin Bread with a crusty sugary top
- Healthy Banana Bread made with Greek yogurt
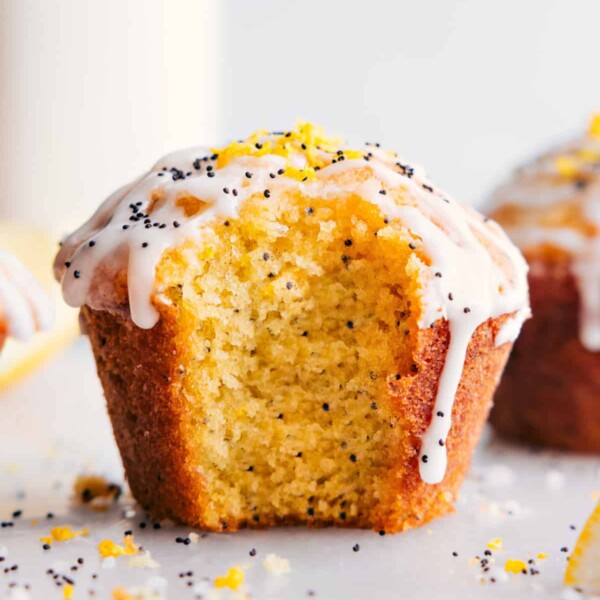
- Lemon Blueberry Bread with fresh lemon
- Applesauce Bread with fresh apple chunks
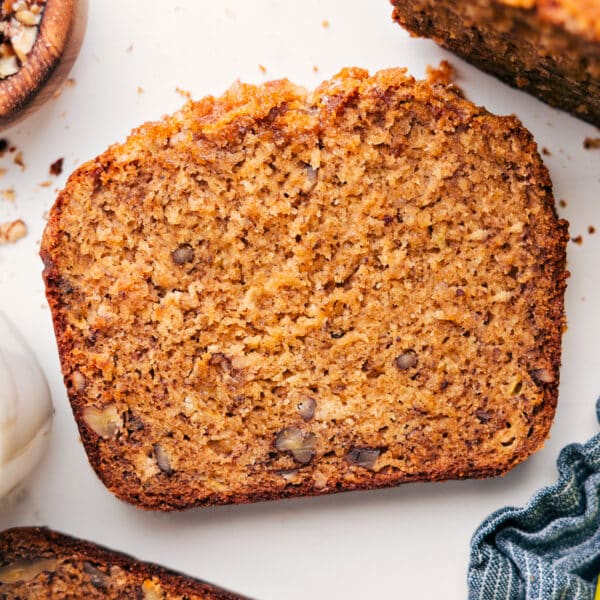
- Chocolate Banana Bread with chocolate chips
No-Yeast Bread
Video
Equipment
- Large sheet pan (15" x 21") or 5-quart cast-iron pot
- Parchment paper or silicone baking mat
Ingredients
- 8 tablespoons unsalted butter 1/2 cup, melted
- 1-3/4 cups buttermilk divided, see note 1
- 1 large egg
- 4-1/2 cups all-purpose flour plus more for dusting, see note 2
- 3 tablespoons granulated sugar
- 2-1/2 teaspoons baking powder
- 1 teaspoon baking soda
- 1-1/2 teaspoons salt
Instructions
- Preheat oven to 425°F. Line a large sheet pan with parchment paper or a silicone liner or line a 5-quart cast-iron pot with parchment paper. Set aside. Melt butter in a medium microwave-safe bowl.
- Take the butter from the microwave and pour in 1 cup (237g) cold buttermilk. Stir with a fork and set aside for about 5 minutes. In another medium bowl, add the remaining 3/4 cup (176g) buttermilk and the egg. Whisk together until smooth; set aside.
- Add flour, sugar, baking powder, baking soda, and salt to a very large bowl. Whisk together until combined. Make a well in the middle of the bowl and pour in the buttermilk + egg mixture. Stir the butter and buttermilk mixture again, mixing until small clumps form (we want this mixture as clumpy as possible!). Use a spatula to scrape every bit of this mixture on top.
- Use a strong spatula or wooden spoon to mix ingredients until just combined and no flour streaks remain. Take care not to overmix or overwork the dough. Sprinkle 2 tablespoons extra flour onto a clean work surface. Scrape out all the dough on top and sprinkle with 2 more tablespoons of flour. Gently knead the bread about 6–8 times to bring everything together into a wide, smooth ball.
- Gently transfer the ball to the prepared sheet pan or pot and pat it down to about 1-1/2 inches in height. Use a sharp serrated knife to cut an “X” across the surface, about 1/4-inch deep. Bake for 25 minutes. After 25 minutes, do not open the oven, but reduce heat to 400°F and bake another 20–30 minutes or until the base sounds hollow when tapped in the middle (25 mins in my oven); see note 3.
- Remove tray from oven and let stand for 10 minutes before carefully transferring to a wire cooling rack. Let the bread cool for at least 30 minutes before slicing into it (the steam is still cooking the bread!)—see note 4.
Recipe Notes
Nutrition
Nutrition information is automatically calculated, so should only be used as an approximation.


Absolutely delicious and so easy ! Once again another recipe of yours thats amazing !
Ahh you’re so sweet! I am so happy to hear this! Thanks Victoria! 🙂