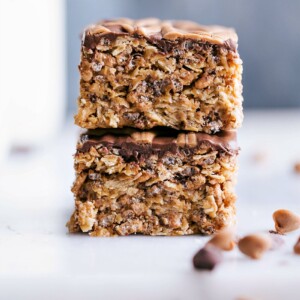
This Cereal Bar Recipe is a no-bake snack made with crunchy cereal, creamy peanut butter, and natural sweeteners, all topped with chocolate for a sweet, filling treat!
Use leftover peanut butter in peanut butter granola, lunch lady peanut butter bars, or peanut butter overnight oats.


author note
Cereal Bars Without Corn Syrup!
Many cereal bars contain corn syrup and brown sugar, which are fine for a fun treat (hi, Scotcheroos), but I wanted to create a more naturally sweetened version.
While these bars are still a treat, I use honey as the primary sweetener, so no corn syrup needed!
They’re sweet, crunchy, nutty, and full of chocolate. Plus, the classic peanut butter and chocolate combo never disappoints.

Ingredients
- Honey and White Sugar: These sweeteners bring all the ingredients together and add sweetness to balance the peanut butter. Make sure you don’t boil this mixture to ensure your bars aren’t hard and grainy.
- Creamy Peanut Butter: Use a well-stirred, creamy brand of peanut butter for consistent flavor and texture throughout the bars.
- Vanilla Extract and Salt: Vanilla is optional but both the salt and vanilla can add so much extra flavor to this cereal bar recipe.
- Rice Krispies Cereal or Honey-Roasted Cheerios: Either works in this recipe, and both are so delicious! If you have younger kids eating these, the rice krispies are a little easier to bite into!
- Optional Topping: Mix chocolate and peanut butter and heat them up slowly in the microwave, stopping often to stir. This makes a tasty topping for the bars.
How To Make This Cereal Bar Recipe
- Prepare Pan: Grease a 9×13-inch pan and line it with parchment paper that hangs over the edges.
- Cook Honey and Sugar: In a large pot, mix honey and sugar. Heat on medium-low until it starts to simmer, but don’t let it boil. Let it simmer for 1 minute, then remove from heat.
- Add Peanut Butter and Cereal: Quickly stir in peanut butter, vanilla, and salt until smooth. Fold in the cereal until well coated.
- Press into Pan: Transfer the mixture to your prepared pan. Spread it out evenly and press down lightly.
- Add Topping (Optional): If using, melt chocolate chips and peanut butter in the microwave, stirring every 15 seconds until smooth. Spread this over the cereal base. You can sprinkle a little sea salt on top if you like.
- Chill and Serve: Cover the pan and refrigerate until firm, about 1-2 hours. Lift out using the parchment paper, cut into squares, and enjoy!
More Snack Recipes:

Snacks
Chocolate Energy Balls
Breakfast
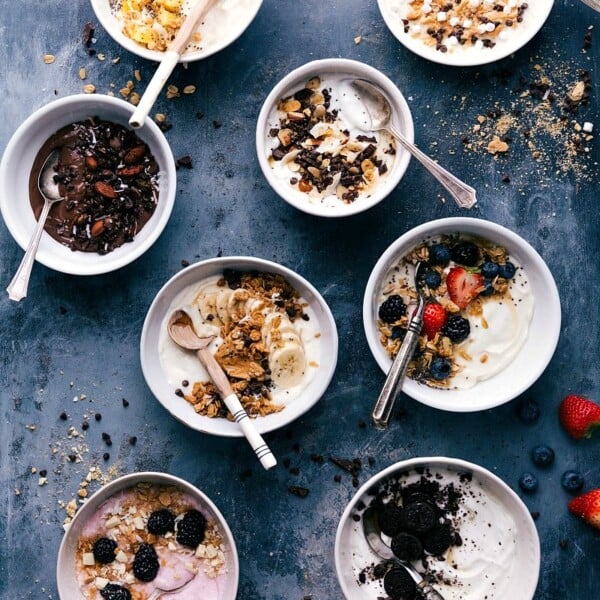
Honey Almond Granola
Breakfast
Protein Breakfast Cookies
Breakfast
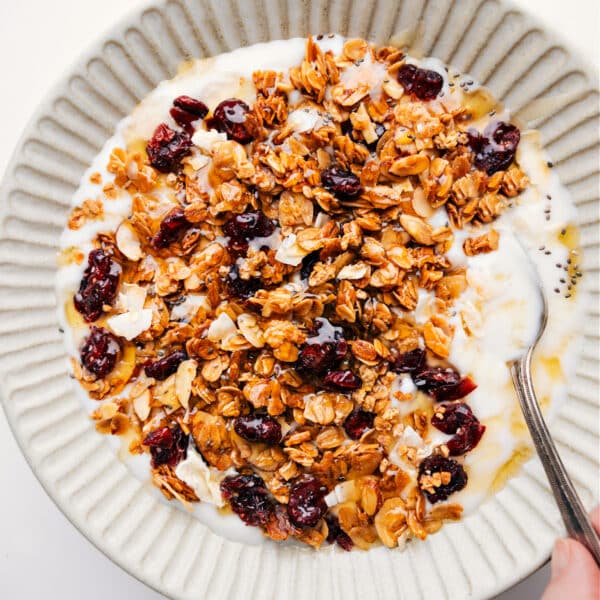
Yogurt Bowl
Homemade Cereal Bar Recipe
Equipment
- 9 x 13-inch baking pan lined
Ingredients
- 1 cup honey
- 1/2 cup sugar
- 1 cup creamy peanut butter
- 1 teaspoon vanilla extract optional
- 1/8 teaspoon salt
- 5-1/2 cups Rice Krispies cereal or honey-roasted Cheerios
- 2 cups chocolate chips
- 2 tablespoons creamy peanut butter
- 1/16 teaspoon Flaky sea salt
Instructions
- Lightly grease a 9×13-inch baking pan and line it with parchment paper, leaving an overhang.
- In a large pot, combine honey and sugar. Heat the mixture over medium-low heat, stirring frequently, until it begins to gently simmer—look for small bubbles forming around the pot’s edges, but be careful not to let it reach a full boil. Allow these small bubbles to simmer for exactly 1 minute, then quickly remove the pot from heat.
- Working quickly, add 1 cup peanut butter, vanilla extract, and salt to the pot, stirring until smooth. Fold in the cereal, gently, until all the cereal is really well coated.
- Transfer the mixture to the prepared pan. Using a silicone spatula, spread evenly, and lightly press down to secure in the pan without compacting it too firmly.
- In a microwave-safe bowl, combine the chocolate chips and 2 tablespoons of peanut butter. Melt in the microwave in 15-second bursts, stirring between each burst, until smooth. Spread the melted chocolate evenly over the cereal base. Optionally, sprinkle a tiny amount of salt over the chocolate.
- Cover the pan and refrigerate until firm, about 1–2 hours. Using the overhanging parchment paper, lift the entire block from the pan and cut into squares.
Recipe Notes
Nutrition
Nutrition information is automatically calculated, so should only be used as an approximation.


These bars are delicious! My only problem was when I cut them into bars they didn’t cut as nicely as yours. I don’t know how yours looked so perfect. What is your secret?
Thanks.
So happy to hear you liked these Wendy! I appreciate the comment 🙂 Honestly, I just use an extremely sharp knife, I wish I had more tricks than that, but that’s it! Sometimes I’ll run my knife under hot water and dry it off and then cut, but usually just for ice cream treats 🙂
This recipe is amazing!! I’m a huge snacker and get hangry all the time haha. And as someone who doesn’t like to/doesn’t know how to cook, this is absolutely perfect. Thank you for this deliciousness!!
So glad to hear you enjoyed these! We love them 🙂 Thanks for the comment! 🙂
This are just totally insanely delicious looking! YUM YUM YUM.
Such an inspiring site you have.
And sleangry is TOTALLY a thing. I will be using that now! x
I thought these looked good until it mentioned honey…was going to possibly make for my sister until I read that 🙁 she’s severely allergic