Four-ingredient Peppermint Cookies are the ultimate holiday treat! They look fancy but are super easy to make. Perfect for cookie platters or gifting!
Want homemade Peppermint Cookies? Try these soft, frosted Peppermint Sugar Cookies or this chocolate Peppermint Cookies Recipe.

Easy Peppermint Cookies
I love baking from scratch—it’s one of my favorite things! But during the busy holidays, I love a good shortcut, and I know many of you feel the same. These Peppermint Cookies are just that kind of shortcut.
With only 4-ingredients and a couple mins of hands on prep you can have these ready in no-time.
They’re beautifully festive, taste amazing, and take a fraction of the time it would to bake cookies from scratch—especially compared to those fancy cut out sugar cookies!
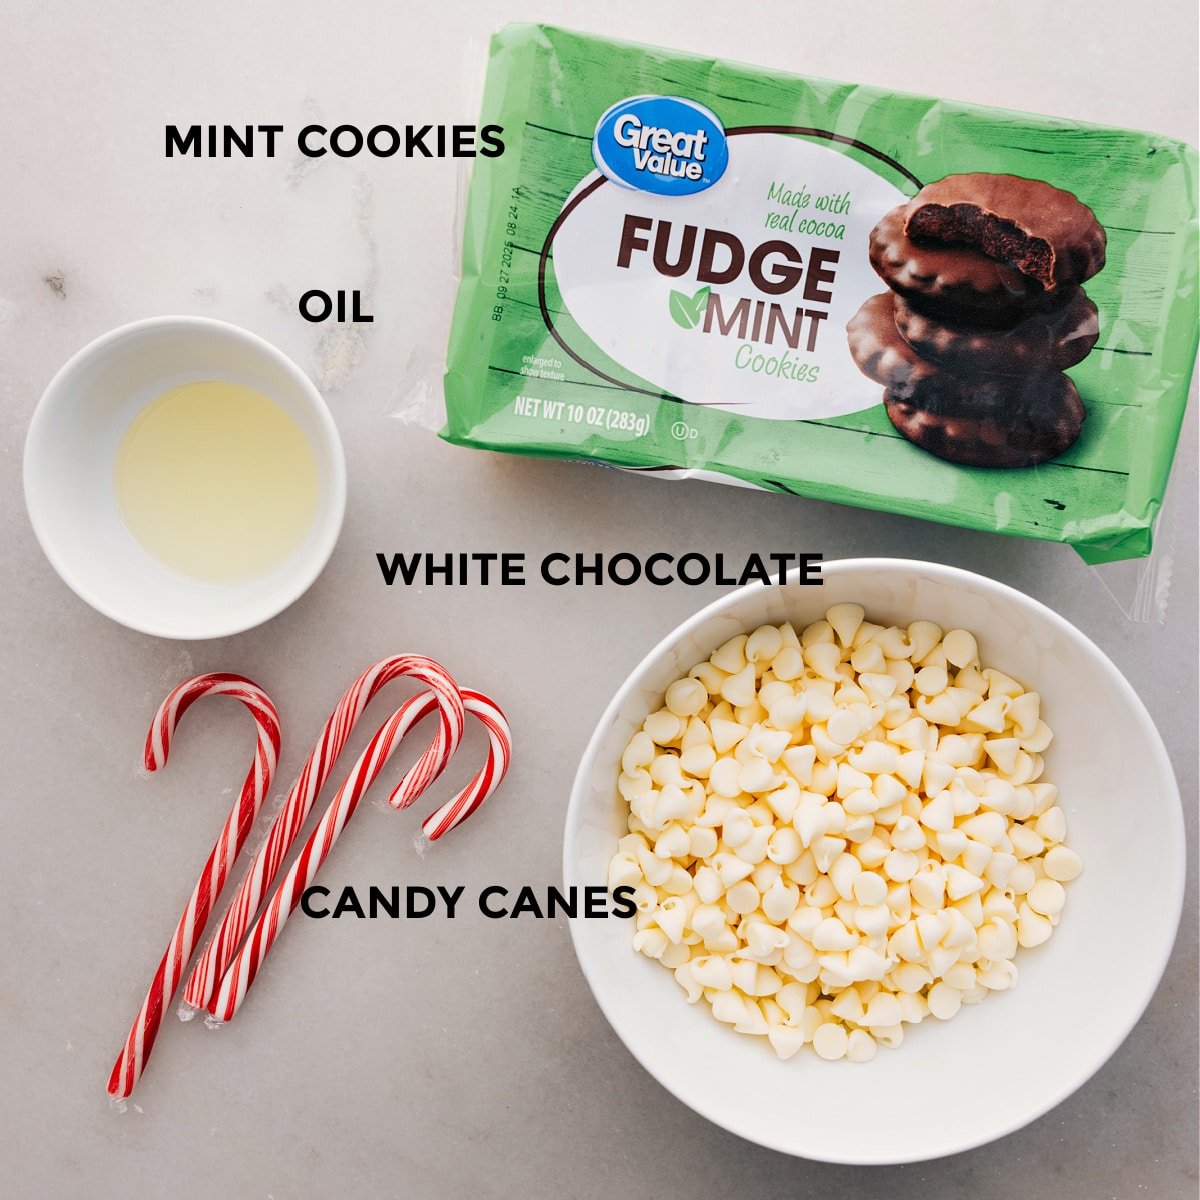
Peppermint Cookie Recipe Ingredients
- Mint/grasshopper cookies: Use fudge mint or grasshopper cookies, or make your own with this Thin Mint Cookie recipe from my friend Sally!
- White chocolate: Use good quality baking bars or melting wafers.
- Coconut oil: Adding a little oil to chocolate makes coating smoother and easier.
- Candy canes or peppermint bark: Top dipped cookies with crushed candy canes or chopped peppermint bark.
Variations
Add a drizzle! Melt dark or milk chocolate, put it in a small bag, cut off a corner, and drizzle it over the cookies for a fun look and extra flavor.
How To Crush Peppermint
Crush peppermint before coating cookies.
Use candy canes or hard peppermint candies and aim for chunky pieces. Put unwrapped candies in a strong bag (double bag if needed to stop ripping), squeeze out air, and crush with a rolling pin or mallet.
Don’t use blenders or food processors—they turn the candy into powder.
Quick Tip
Work in batches: Leave most cookies in the freezer and take out a few at a time. This keeps them firm and stops them from melting while dipping.
How To Make Peppermint Cookies
- Prep: Freeze cookies for at least 30 mins. Crush candy canes into small chunks.
- Melt chocolate: Heat chocolate and oil until smooth. Let it cool a bit.
- Coat: Dip the cookies in the chocolate, shake off extra, and place on a lined tray.
- Decorate: Sprinkle crushed candy canes on top before the chocolate sets.
- Set: Let cookies harden at room temp and enjoy.
Storage
Leftover Peppermint Cookies?
Enjoy these cookies within a week. Keep them in a sealed container at room temp or the fridge.
To store longer, freeze them for up to 3 months. They’re super good straight from the freezer!
More Holiday Cookies
- Melted Snowman Cookies with peanut butter cookie base
- Rocky Road Cookies with chocolate chips and peanuts
- Cut Out Sugar Cookie Recipe with an easy icing
- Christmas Crack crunchy treat with M&M’s
- Mexican Wedding Cookies cookies rolled in powdered sugar

Peppermint Cookies
Equipment
- Parchment paper or aluminum foil
Ingredients
- 1 (10-ounce) package grasshopper cookies 40 cookies, see note 1
- 1 (10-ounce) package white chocolate melting wafers 2 cups, see note 2
- 1-1/2 teaspoon vegetable oil or coconut oil or shortening
- 3 full-sized candy canes or peppermint bark, see note 3
Instructions
- Line a large sheet pan with parchment paper or foil. Place the mint cookies in the freezer for at least 30 minutes; the longer, the better.
- Add unwrapped candy canes to a large plastic bag (double-bag if needed to avoid tears). Seal without air and crush with a rolling pin or meat mallet into coarse crumbs. Set aside.
- Combine white chocolate melts and oil in a microwave-safe bowl. Heat in short bursts, stirring until fully melted. Let cool slightly so it’s warm but not hot. (Hot chocolate will melt the mint cookie coating.)
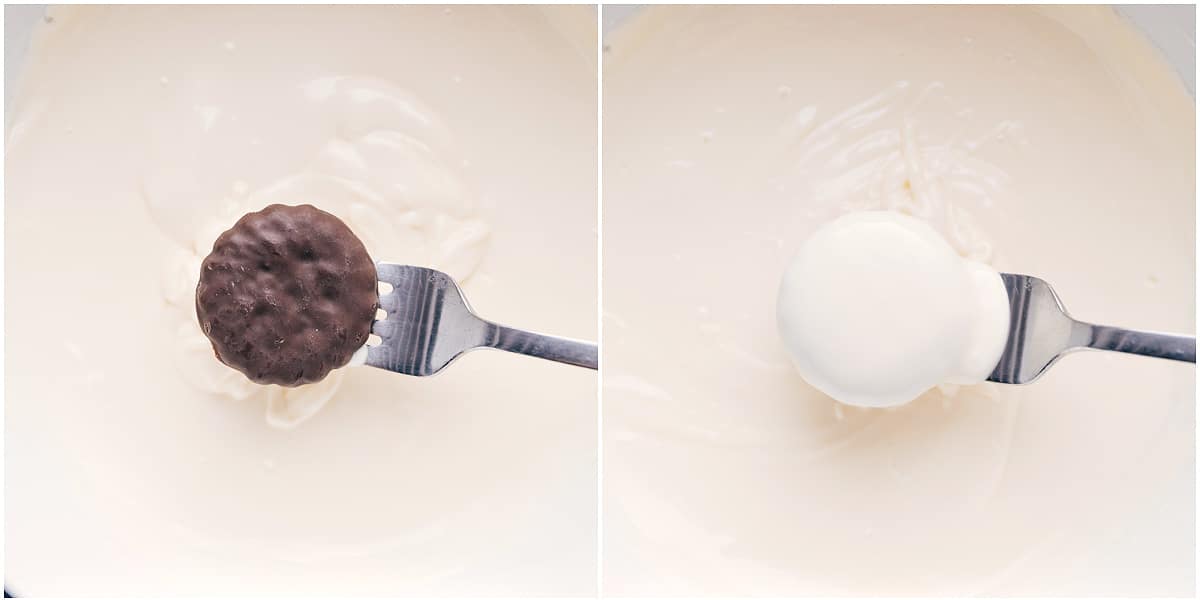
- Remove a few cookies from the freezer at a time. Using a fork, dip each cookie in the melted chocolate, coating it completely. Tap the fork gently on the side of the bowl to remove excess chocolate. Use a knife to slide the coated cookie onto the prepared sheet pan. Work quickly to avoid melting the mint cookie coating into the white chocolate. (See Note 4 for troubleshooting.)
- Immediately sprinkle crushed peppermint on top of each cookie before the chocolate hardens. Repeat until all cookies are coated and topped.
- Let cookies sit at room temperature until the chocolate is firm. Do not refrigerate or freeze to set the chocolate.
Video
Recipe Notes
- If the chocolate is too thick to coat the cookies, add 1/2 teaspoon additional oil.
- If the chocolate hardens while working, reheat in the microwave for 15-second intervals.
- If the mint cookie coating melts into the white chocolate, freeze the cookies longer or allow the white chocolate to cool more before dipping.
Nutrition
Nutrition information is automatically calculated, so should only be used as an approximation.


