No-Bake Peppermint Cheesecake is a festive, make-ahead treat! A sweet Oreo® crust, light peppermint filling, whipped cream, and peppermint make this holiday treat.
For more peppermint treats, check out Peppermint Snowball Cookies and Peppermint Bark Brownie Cookies.
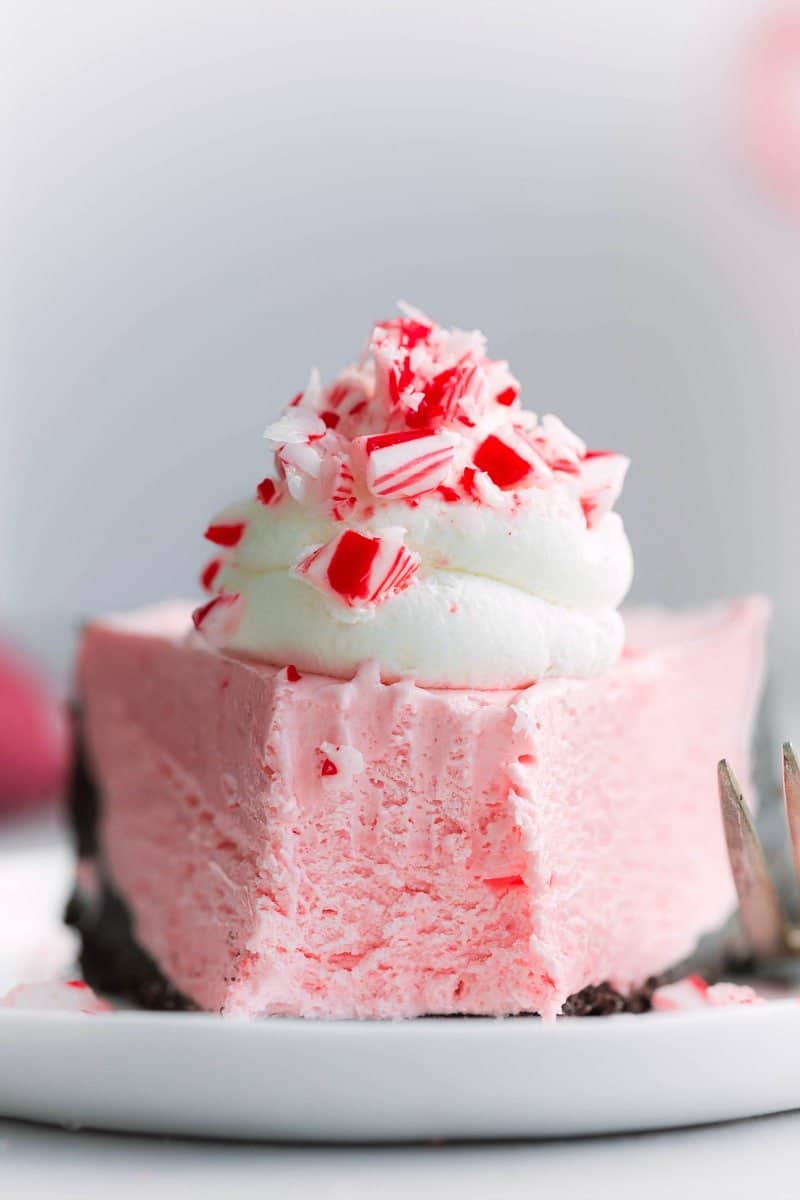
Best No Bake Peppermint Cheesecake
During the busy holiday season, I’m always looking for quick and easy dishes I can make ahead. No-Bake Peppermint Cheesecake does both—it’s a tasty dessert your guests will love.
This cheesecake is much simpler to make than a regular one—no baking needed! It’s also frozen, so you can make it ahead and keep it in the freezer until you’re ready to serve.
Oreo Crust
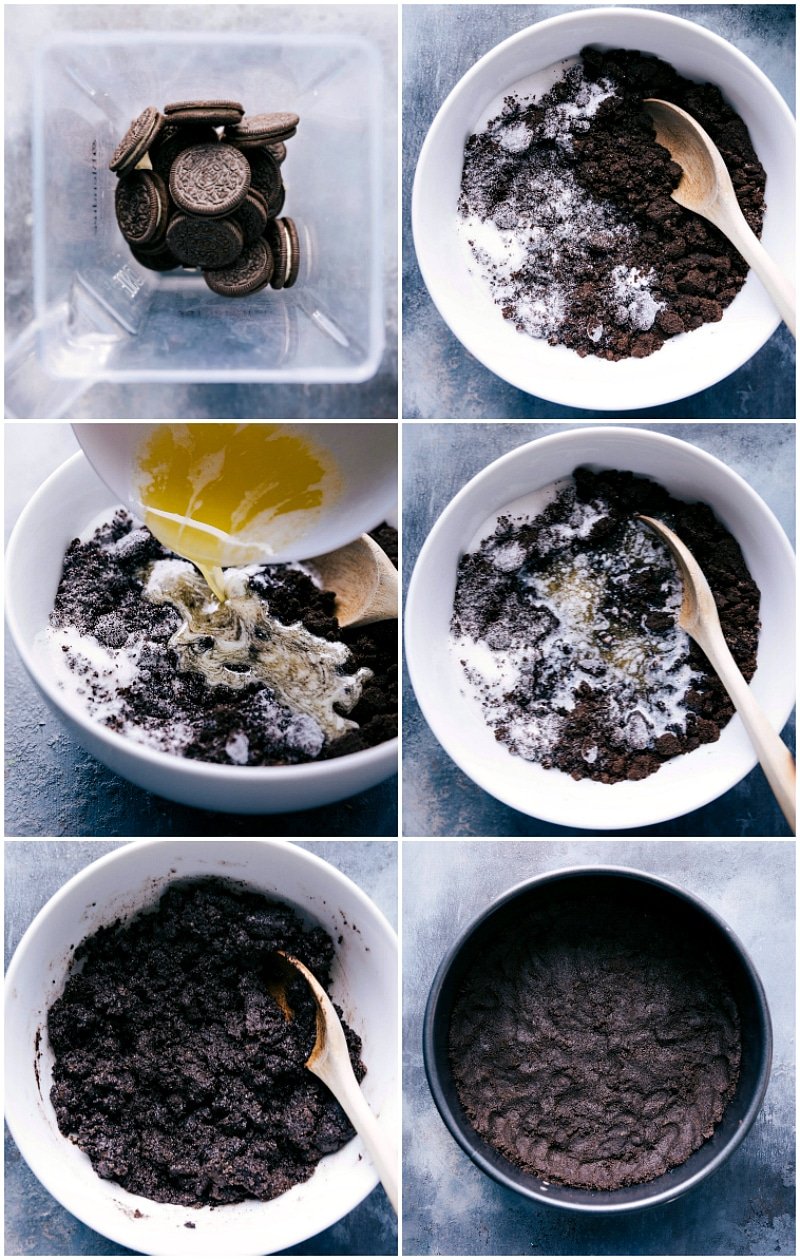
The base of No-Bake Peppermint Cheesecake is an Oreo crust—hard to beat for flavor! Just pulse Oreos, mix with sugar and butter, and press into the pan.
Quick Tips:
- Break down Oreos completely: Large chunks make slicing tricky.
- Cool melted butter: Adding hot butter can melt the sugar, making the crust greasy.
- Press firmly: Use the bottom of a metal measuring cup for an even crust.
- Line with parchment paper: This makes removal easier and gives clean slices.
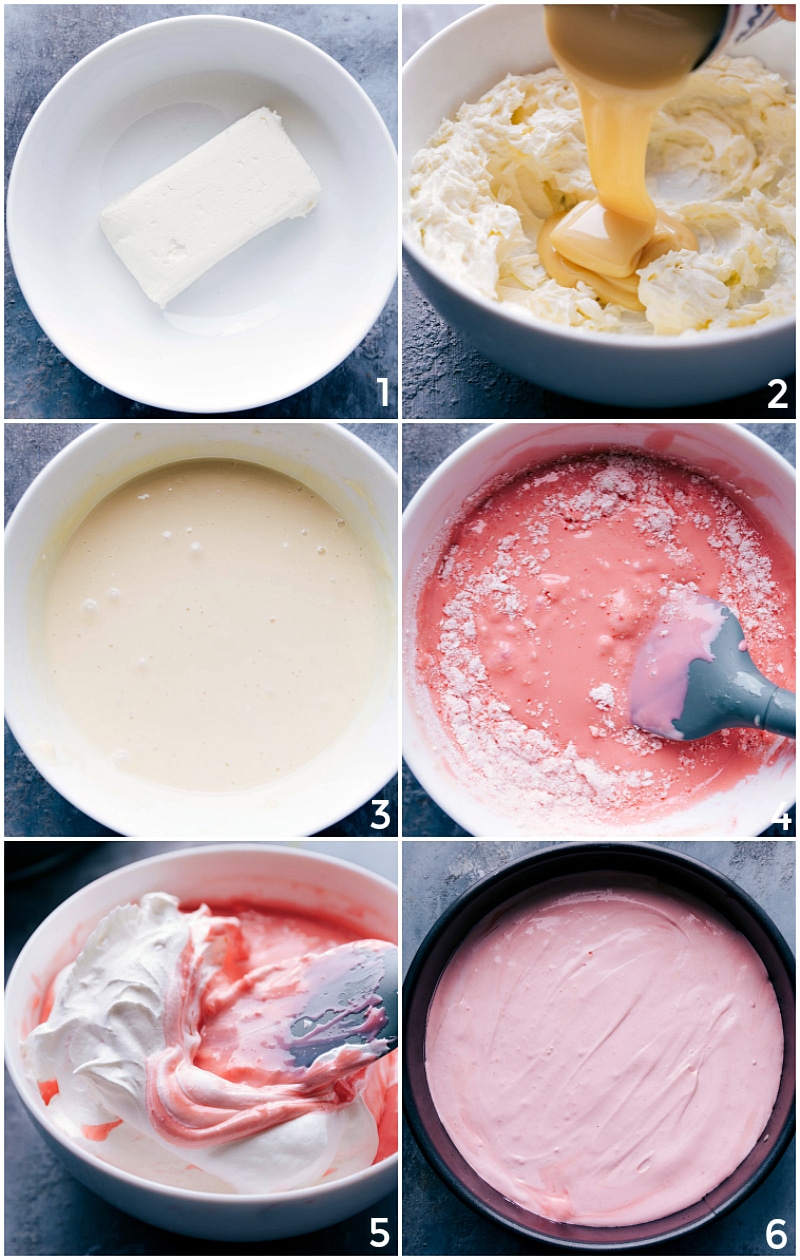
How To Make No Bake Peppermint Cheesecake
- Cream Cheese: Start with room-temp cream cheese and beat until smooth.
- Sweetened Condensed Milk: Add it in and mix until smooth.
- Color & Peppermint Extract: Add food coloring and peppermint extract.
- Crushed Peppermint: Blend in crushed candy canes.
- Whipped Cream: Gently fold in Cool Whip®.
- Assemble & Freeze: Pour into crust and freeze. Ready to serve!
No-Bake Peppermint Cheesecake Tips
- Use peppermint extract, not mint extract: Mint extract tastes like toothpaste.
- Bring cream cheese to room temp: Cold cream cheese or microwaving it causes lumps. Let it sit at room temp for at least an hour.
- Allow time to set: Freeze the filling for at least 8 hours.
- Use a sharp knife to slice: Run the knife under hot water, dry it, and cut. Repeat for each slice.
- Choose full-fat products: Low-fat or fat-free ingredients make the cheesecake too soft and wet, so avoid them for this recipe.
Storage
Store leftover No-Bake Peppermint Cheesecake tightly covered in the freezer.
It’s best within the first 7 days but will last up to a month.
More Christmas Desserts
- Peppermint Sugar Cookies with a cream cheese frosting
- Five-ingredient Peppermint Bark Cookies
- Microwave Fudge simple and delicious
- Christmas Snack Mix no baking required
- Santa Cookies fun to make with kids
No-Bake Peppermint Cheesecake
Equipment
- Springform pan 9-inch
- Blender
Ingredients
- 25 regular Oreo cookies
- 3 tablespoons granulated sugar
- 4 tablespoons unsalted butter
- 1 (8-ounce) package cream cheese full-fat, at room temperature
- 1 (14-ounce) can sweetened condensed milk
- 1-1/2 to 2 teaspoons peppermint extract do not use mint extract
- Red food coloring optional for richer color
- 1/16 teaspoon salt tiny pinch of salt
- 6 candy canes or peppermint candies, crushed, plus some additional crushed candy for topping if desired
- 1 (8-ounce) container frozen whipped topping thawed
- Whipped cream or additional whipped topping, for topping, optional
Instructions
- Blend or pulse the Oreos (no need to remove the filling) until they resemble fine crumbs. Mix the crumbs with the sugar and melted butter. Spray a pie pan or springform pan (I use a 9-inch) with cooking spray and press the cookie crust evenly along the bottom and slightly up the sides. Place in freezer while preparing the filling.
- In a large bowl, beat the room-temperature cream cheese until smooth and creamy.
- Once the batter is smooth, slowly add the sweetened condensed milk while continuing to beat the mixture. Blend until smooth. Beat in the peppermint extract, food coloring (if using), a pinch of salt, and crushed candy canes (you can crush them in a food processor or powerful blender). With a spatula, fold in the whipped topping to the mixture gently until completely combined. Taste the mixture and increase any of the peppermint flavors if desired. Make sure to not overmix once the whipped topping has been added.
- Pour the cheesecake mixture over the Oreo crust, smooth into an even layer with a spatula, and freeze for at least 8 hours.
- When ready to serve, remove cheesecake from the freezer and cut into slices (see note 1). If desired, garnish individual slices with whipped cream and crushed peppermint.
Video
Recipe Notes
Nutrition
Nutrition information is automatically calculated, so should only be used as an approximation.




These look so good, and the pictures are beautiful! I think the pink color makes them even more attractive – heard that red/pink should stimulate the appetite!
I’ve literally died and gone to heaven! Omg!
Ermagherd Chelsea… ERMAGHERDDDDD! These looks beyond incredible!!! Want times 1000!!!
Holy yum!! I want a piece of this cheesecake asap!! Ok, really I want 3 pieces!! 😉 Pinned!