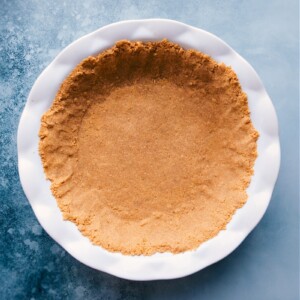
This is our favorite Graham Cracker Crust — with the perfect proportions and just the right amount of sweetness! Plus all the tips and tricks you need to make a perfect crust anytime you need one.
For when you don’t want to whip out the food processor for this buttery Pie Crust Recipe, you can depend on this Graham Cracker Crust recipe!
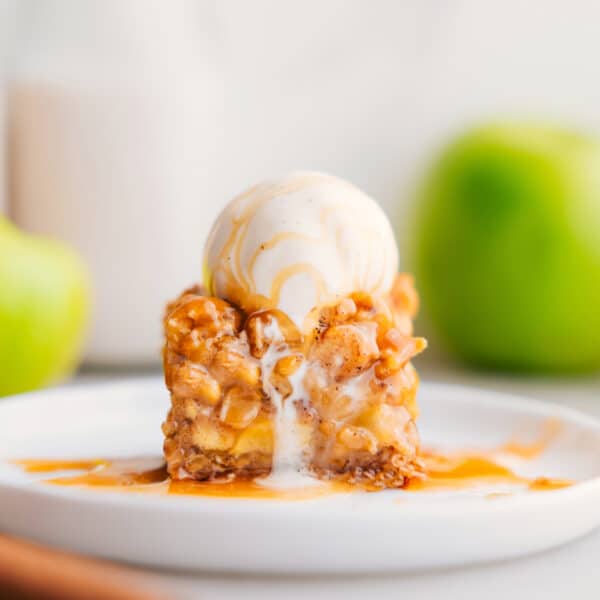
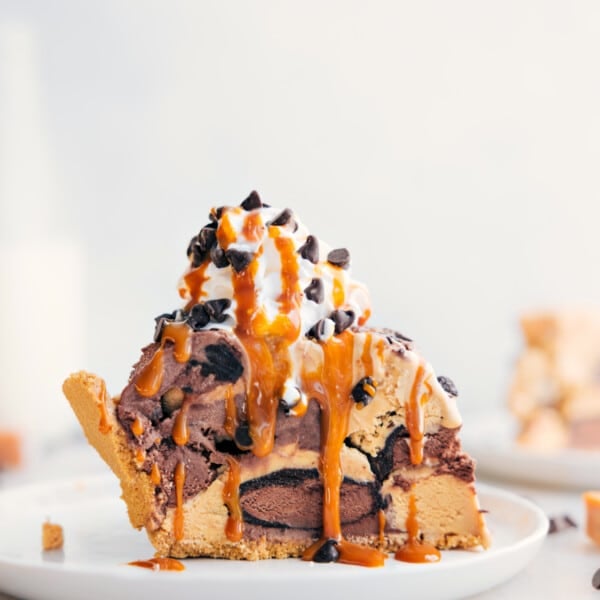
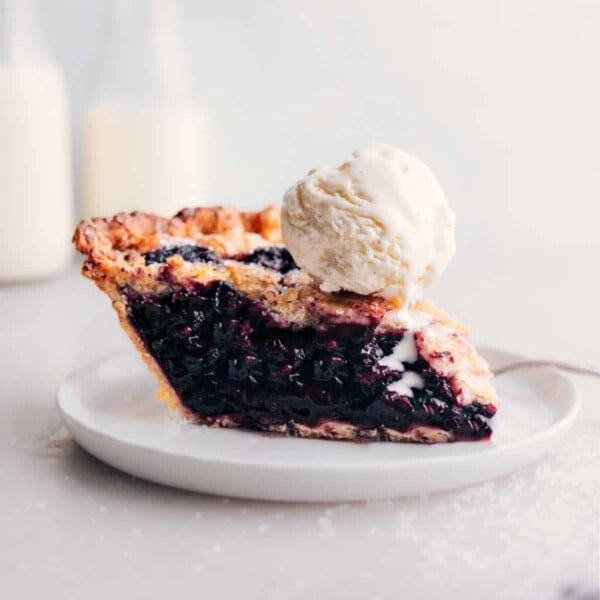
Give this recipe a try with our favorite Lemon Pie, this sweet Coconut Cream Pie, an easy Ice Cream Pie, or these Magic Bars.

What Is Graham Cracker Crust?
In case you aren’t familiar, this is a style of pie crust made primarily from crushed graham crackers which are sweet American crackers. The crust is usually sweetened with sugar and stiffened with butter. This crust is delicious right after being made (without baking), and then there are times you’ll want to bake it up before adding in the filling — we’ll break all this down below!
This Graham Cracker Crust recipe is our all-time favorite — just the right amount of butter to crumbs with the perfect amount of sweetness. If you’ve ever had problems with a cracker crust coming together, be sure to check out the FAQs for common questions and troubleshooting.
Graham Cracker Crust FAQs
To keep the crust from crumbling, here are my top tips:
- Thoroughly crush the graham crackers into fine crumbs (larger pieces will make the crust fall apart).
- Use melted butter.
- Compress the crust tightly (I like to use the bottom of a flat measuring cup).
Sometimes. A graham cracker crust replaces a pie crust especially well for cream pies and cheesecakes, but not so much for an apple pie. When a pie bakes for longer than 25-30 minutes, the graham cracker crust will burn before the pie is done.
The UK doesn’t sell graham crackers, but the closest thing to one is a digestive biscuit– which you can use in this recipe!
Graham Cracker Crusts can hold moisture and become soggy quickly. If you will be adding a moist or wet filling to the crust, I recommend baking the crust and letting it cool completely before adding in the filling.
A crust can also become soggy if hot melted butter is used when combining the crumbs. Let the butter slightly cool before mixing it with the crumbs and sugar.
Butter is certainly best here, but in a pinch, margarine can be used. The flavor won’t be as good, but it will work. I don’t recommend replacing the butter with oil.
It’s important to take the time to throughly compress the crust, then bake, and then allow time for the crust to fully cool before adding the cheesecake filling.
One of the great things about this recipe is that it works with other dry ingredients. Replace the graham cracker crumbs with crushed pretzels, crushed ice cream cones, cereals, granola, vanilla wafers, or store-bought crisp cookies.
While no ingredient in the graham cracker crust needs to be baked, you can and often should bake the crust.
Baking the crust is solely to enhance flavors and/or ensure the crust does not get too soggy when the filling is added in.

How To Make Graham Cracker Crust
These tips below will help to ensure a perfect crust every single time!
- Let the melted butter cool. Once the butter is melted, it needs to cool back to room temperature. If the butter is hot, it will melt the sugar and crushed crackers, which will cause a greasy crust.
- Measure the crumbs. While it’s easiest to just add graham cracker sheets to the blender and hope for the best, there can be a good amount of variation from cracker to cracker and brand to brand. Measure the crumbs instead of counting out graham cracker sheets.
- Blend graham crackers thoroughly. To ensure there aren’t large chunks of graham cracker in the crust, which will affect how nicely pies or bars cut out, thoroughly blend the graham crackers until they are fine crumbs. Add anything that didn’t blend completely back into the blender and blend again.
- Press up the sides. Start by pressing the majority of the crumbs into the bottom of the pan and then start working the crumbs up the sides. Ensure the sides have an even amount of crumbs so the side crust doesn’t crumble away once slices are cut.
Quick Tip
Use leftover graham cracker crumbs in our favorite graham cracker cookies!

Fun Variation Ideas
- Muffin tin crumb crust: Grease or line cavities of a miniature muffin tin. Add 1 tablespoon of the prepared crust mixture into each cavity and firmly press down against the base and barely up the sides with your fingers. Use the top of a milk bottle cap to firm the bottom. Chill the pan for 15-20 minutes and then bake at 350 degrees F for 10 minutes. Fully cool before then using an offset spatula to carefully and gently remove the shells. Then fill with filling.
- Graham cracker crust no-bake: Don’t want/need to bake? Cover tightly and freeze for 10 minutes or refrigerate for 20 minutes before filling. This allows time for the crust to firm up and butter to re-solidify before adding in the pie filling.
- Graham cracker crust with brown sugar: Replace the white sugar with brown sugar in equal quantities! You could even use dark brown sugar for a deeper molasses flavor.
- Chocolate graham cracker crust: Use chocolate graham crackers (or another flavor like cinnamon) instead of honey graham crackers.
How To Make Graham Cracker Crust For Cheesecake
The way you make this crust is the same from dessert to dessert; the only things that will change are quantities, depending on pan size and whether you need to bake or chill the crust.
Here’s a quick reference guide for different sized pans:
- 8×8-inch square pan: Double the recipe.
- 9×9-inch pan: double the recipe.
- Graham Cracker crust for a 9×13-inch pan: Triple the recipe.
- Jelly Roll Pan (10.5×15.5): Quadruple the recipe.
- Half-Sheet Pan (18×13): Quadruple the recipe.
Quick Tip
Before adding in the crumbs, line whatever pan you’re using with parchment paper. Once the dessert is done, you can use pull the parchment paper overhang from the lined pan to easily and cleanly remove the dessert. Then cut into clean slices.

Storage
Storage
Use this crust the same day it’s made or bake it up to a day ahead and store tightly covered at room temperature. Avoid leaving unbaked crust uncovered for more than a few hours to prevent drying.
Graham Cracker Crust Desserts
- Frosted Honey Graham Cookies with a drizzle of honey
- S’mores Cookie Bars with chocolate and marshmallow fluff
- Cheesecake Bars vanilla with berry sauce
- S’mores Energy Bites with cashew butter
- Frozen Pumpkin Pie with graham cracker crust
Graham Cracker Crust
Ingredients
- 1-3/4 cups graham cracker crumbs (about 12-13 full graham cracker sheets -- Note 1)
- 6 tablespoons unsalted butter, melted
- 1/4 cup white granulated sugar or light brown sugar
- 1/8 teaspoon fine sea salt
Instructions
- MELT BUTTER: Start by melting the butter in a microwave-safe bowl. Once melted, set aside to cool for 5 minutes. (Hot butter will cause a greasy crust.) If you will be baking the crust, preheat the oven to 350 degrees F (175 degrees C).
- BLEND GRAHAM CRACKERS: In a blender or food processor, process the graham crackers until they are all fine crumbs (re-blend any large chunks). Measure to get a level 1 and 3/4 cups of graham cracker crumbs (Note 2) and add to a large bowl.
- MIX: Add in the sugar and salt. Use a spatula to scrape every bit of the melted, and cooled butter into the bowl. Gently stir with a wooden spoon until well combined. Spread the mixture into the prepared pan.
- PRESS TOGETHER: Using your fingers, press the crumbs into the bottom of the pan and then up the sides. Use the bottom of a flat 1-cup measuring cup to thoroughly compress the graham cracker crumbs into a firm crust.
- BAKE OR CHILL: Bake in the preheated oven for 8 minutes and set aside to cool or chill the crust. (If baking, allow the crust to fully cool before adding the filling.) To chill: Cover formed crust tightly and freeze for 10 minutes or refrigerate for 20 minutes before filling to allow time for the crust to firm up and butter to re-solidify.
- STORAGE: This crust is best used the same day it's made, but it can be baked up to 1 day ahead and stored, tightly covered, at room temperature. Don't store an unbaked crust, uncovered, for more than a few hours -- it will start to dry out and can become crumbly.
Video
Recipe Notes
- 8x8-inch square pan: Double the recipe.
- 9x9-inch pan: Double the recipe.
- Graham Cracker crust for a 9x13-inch pan: Triple the recipe.
- Jelly Roll Pan (10.5x15.5): Quadruple the recipe.
- Half-Sheet Pan (18x13): Quadruple the recipe.
- Muffin tin crumb crust: Grease or line cavities of a miniature muffin tin. Add 1 tablespoon of the prepared crust mixture into each cavity and press against the base and barely up the sides with your fingers. Use the top of a milk bottle cap to firmly press down the bottom. Chill the pan for 15-20 minutes and then bake at 350 degrees F for 10 minutes. Fully cool before then using an off-set spatula to carefully and gently remove the shells to then fill with filling.
Nutrition
Nutrition information is automatically calculated, so should only be used as an approximation.