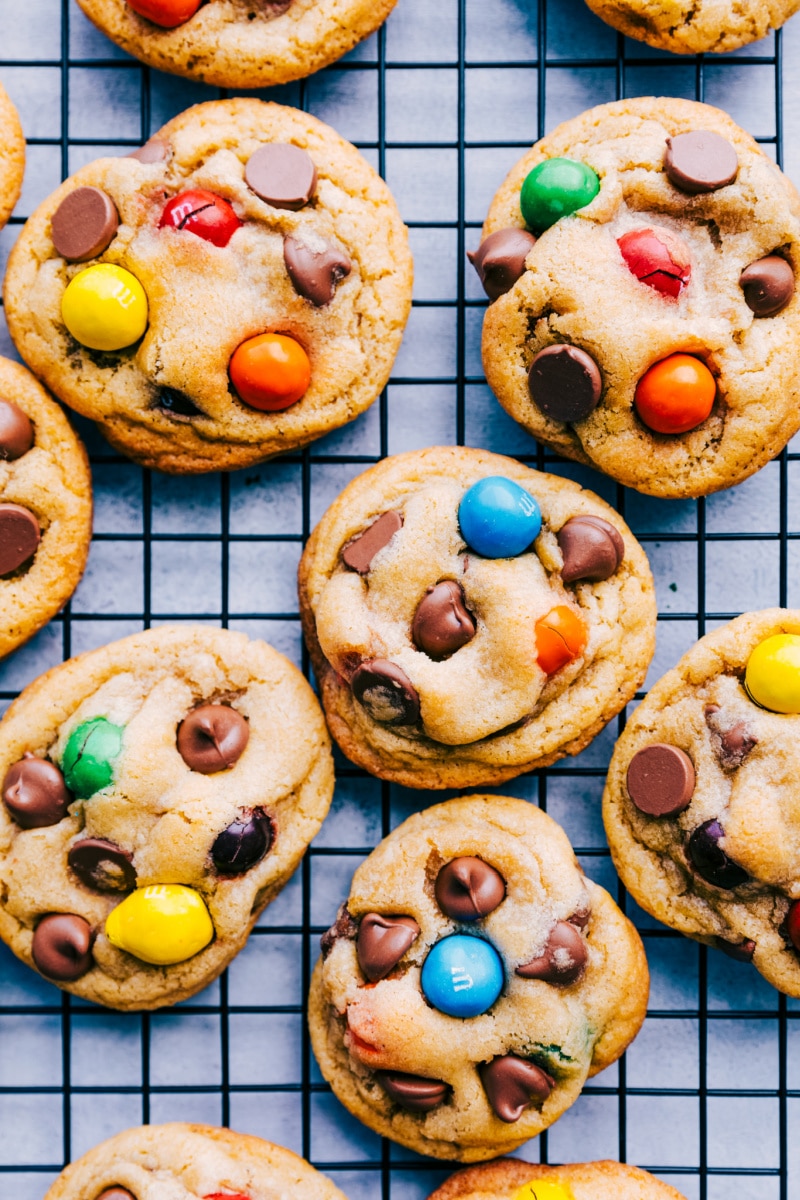
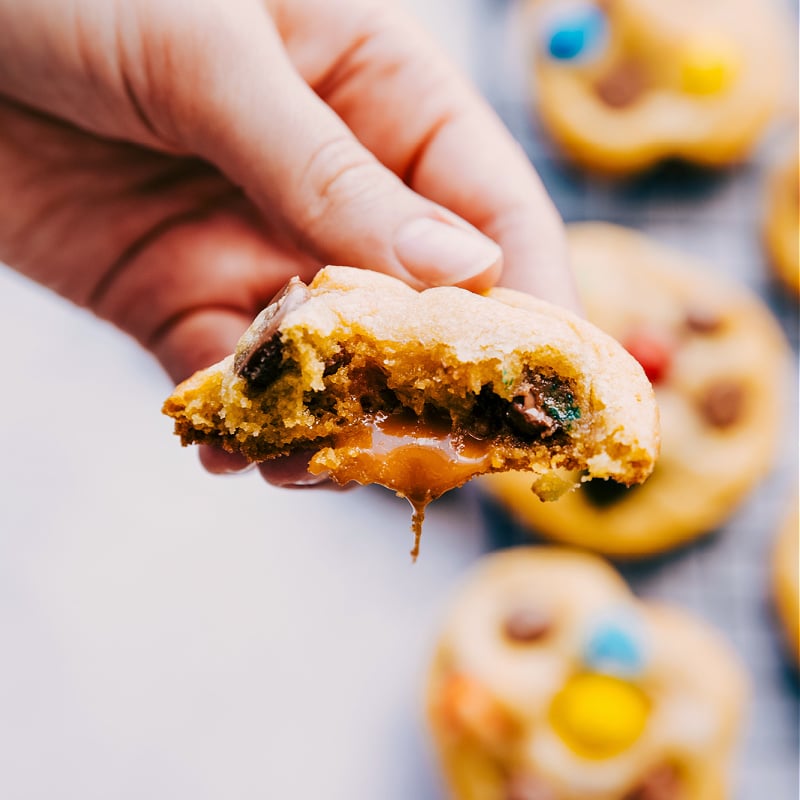
Big, soft, and chewy, Caramel Stuffed Cookies with M&M’s, chocolate chips, and an ooey-gooey caramel center! Plus all the tips and tricks you need to make these taste (and look) like they’re straight from a bakery!
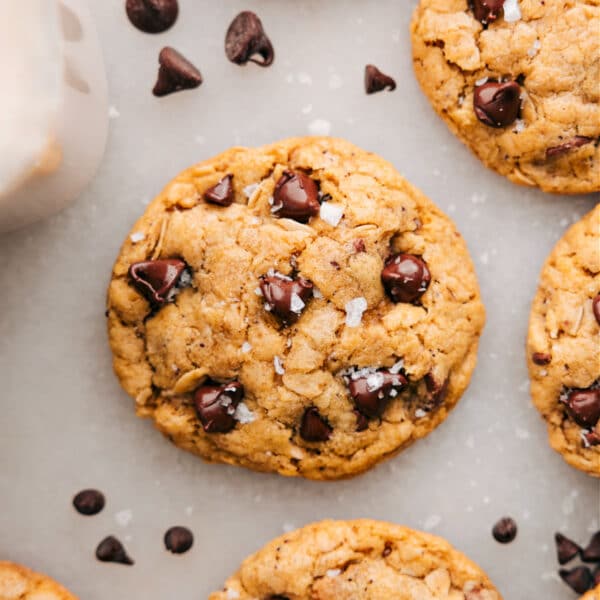
Try some other popular cookie recipes — these classic Chewy Chocolate Chip Cookies, Funfetti Cookies, or these simple Cookie Bars.
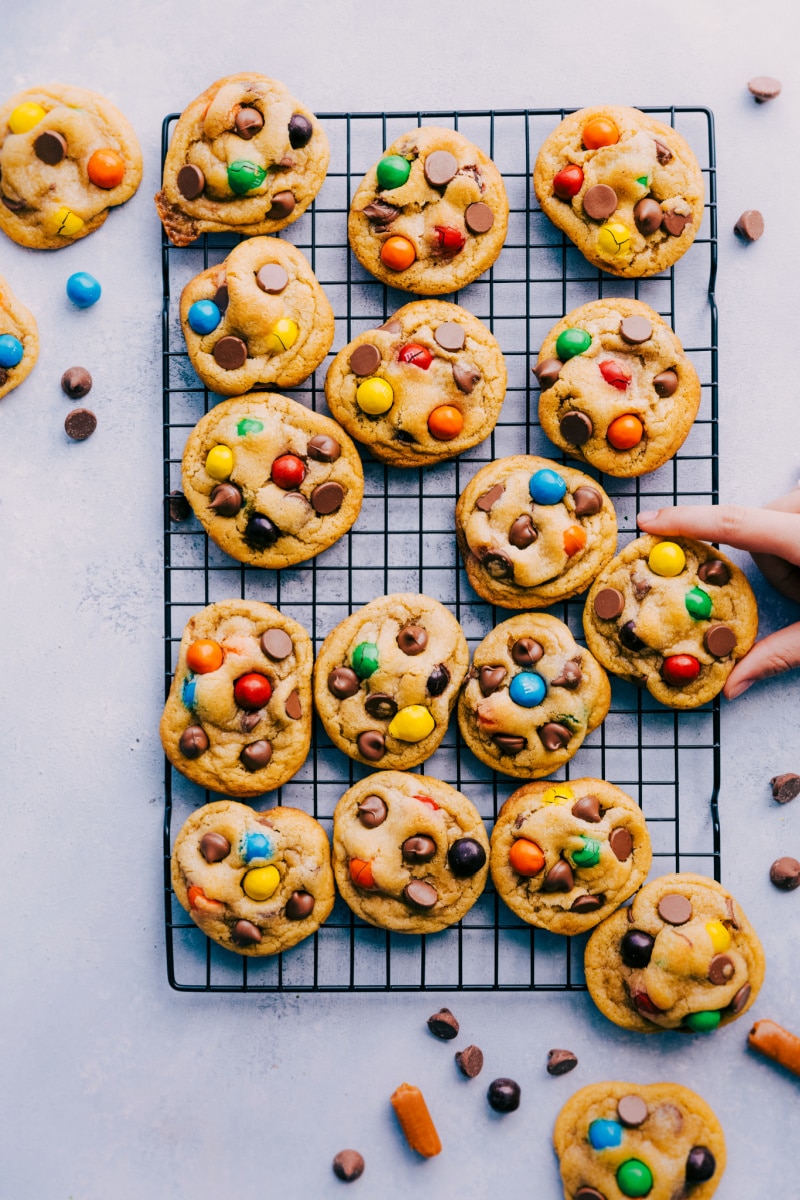
Caramel Stuffed Cookies
These soft and chewy cookies are fully loaded with all the things. More is more when it comes to cookies right?! 🙂 They’ve got a gooey caramel center, loads of chocolate, and M&M’s®. And if you’re into salted caramel, a sprinkle of sea salt flakes on top of these cookies makes the perfect finishing touch!
Overall, these cookies are simple to make — just one bowl and a wooden spoon are all you’ll need. The only hitch is the chilling time — the dough needs about an hour in the fridge before baking — more on this below!
Let’s Talk Butter
Any butter will work in Caramel Stuffed Cookies, but it has to be butter, not margarine or any kind of artificial butter. Not only will the cookies not bake properly, but they also won’t taste good.
I also recommend unsalted butter even if you’re going after a salted caramel flavor. Why unsalted? We need to be able to perfectly control the amount of salt in the cookies and the salt content in salted butter varies tremendously. It would be easy to end up with too much salt in the dough.
Once you’ve got real butter, we melt it for these cookies. Melted butter not only makes the dough easy to mix together, but it also results in ultra-chewy cookies. The number one tip here: let the melted butter cool back to room temperature. If you add sugars to hot (or even warm) butter, it will melt the sugars and cause greasy/flat cookies.
Let’s Talk Cookie Mix-Ins
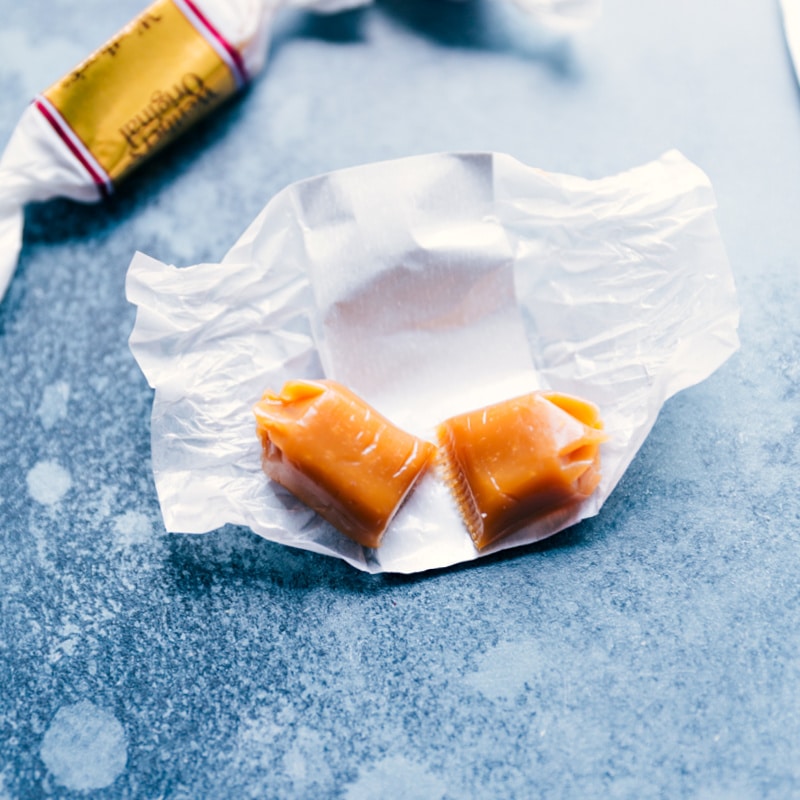
- Caramel: Our favorite (affordable) caramels to use in these Caramel Stuffed Cookies are Werther’s® Soft (not original) caramels (not sponsored). (Here’s a visual of the bag.) These caramels have a great flavor, go into the cookie dough nicely and melt perfectly in the center of the cookies. Whatever caramels you use, make sure they are not old, stale, or hard, because they won’t melt nicely in the cookies.
- Plenty of chocolate: My favorite chocolate chips are either Ghirardelli® or Guittard® because of their size, flavor, and quality. I also like milk chocolate best, but use whatever type of chocolate is your favorite — semi-sweet, milk, or dark (or even white!) — any type will work.
- M&M’s: Whatever M&M’s you like the best will work great in these cookies! Peanut butter M&M’s are my family’s favorite — we love the combo of chocolate, peanut butter, and caramel! Other ideas: peanut M&M’s, plain milk chocolate, mini, pretzel, crispy, etc. You can use extra chocolate chips in place of the M&M’s if preferred.
Quick Tip
As the Caramel Stuffed Cookies cool, the caramel center hardens. To get that soft, gooey caramel center, warm leftover cookies in the microwave for 8-12 seconds.
Chilling the Dough
Chilling cookie dough can definitely be an inconvenience. I mean, when you want these Caramel Stuffed Cookies, you want them now, right?! That said, chilling this dough is especially important. It’s like marinating meat; the wait is worth it. Here are a few reasons why we chill the dough:
- The dough becomes more flavorful as it sits.
- If the dough is baked immediately with melted butter in it, the cookies will spread and become thin, hard, and crispy while baking. This is because the fat (butter) hasn’t had a chance to re-solidify. The longer the fat stays solid, the less the cookies will spread.
- The sugar in the dough gradually absorbs liquid, so when you chill the dough, the sugar has a chance to absorb more liquid, and that further prevents spreading.
- With sufficiently chilled dough, the caramel will stay nicely in the center and not seep out as easily.
Caramel Stuffed Cookie Recipe Tips
- Correctly measure the flour. If you press a measuring cup into a bag of flour and scoop, you will pack in way too much flour, which affects the texture of these cookies. To properly measure the flour, spoon the flour into the measuring cup until it’s overfilled. Then use the back of a table knife to level the measuring cup at the top. (Video visual here)
- Thoroughly mix the butter and sugars. It may seem like the butter and sugar is never going to combine, but keep whisking or stirring until the two emulsify.
- Slightly underbake. Slightly underbaked Caramel Stuffed Cookies are the best! They’re soft and chewy with an irresistible gooey caramel interior. As soon as the top no longer looks gooey and the edges are ever-so-slightly browned, pull out the cookies! Watch the cookies closely; there can be a great deal of variation from oven to oven.
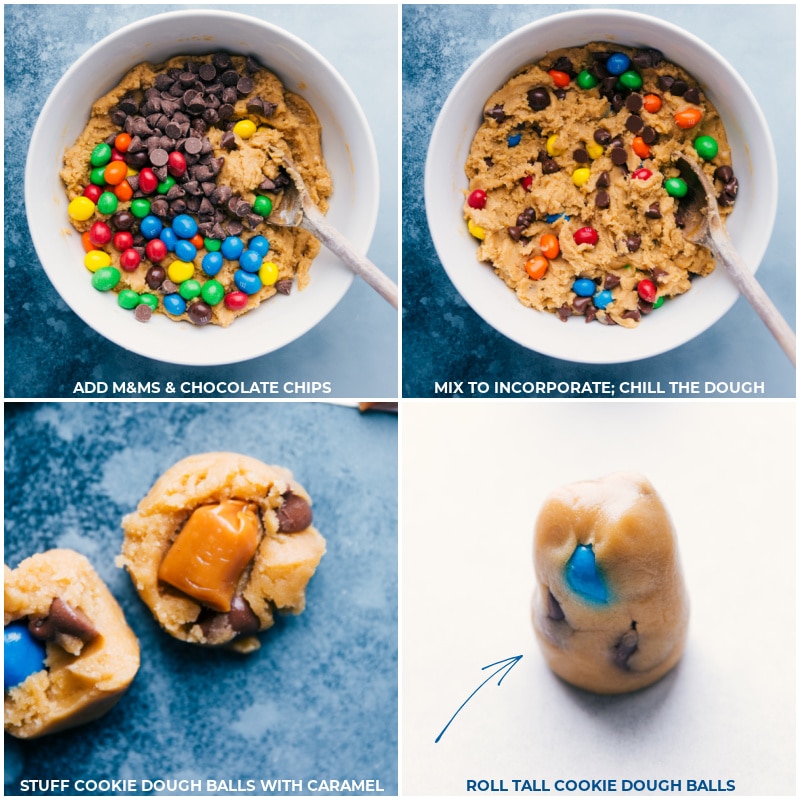
- Don’t add too much caramel into the centers or it will likely seep out. Use only 1/2 of an unwrapped caramel and ensure the dough covers it completely.
- Use a Silpat® liner. The cookies end up with much softer bases when baked on a lined sheet pan. Also, if a bit of caramel does happen to leak out, the clean-up is much easier with a lined pan.
Rolling Out and Baking The Perfect Cookies
- While it’s not essential to use a food scale to make these caramel stuffed cookies, you’ll be surprised at what a difference it makes. It might sound like extra work, but I find the process goes even faster than using measuring spoons to create each cookie dough ball. With a spoon, scoop out the cookie dough, place it on the food scale and remove or add more dough (to reach the desired weight). Roll it up, and repeat! The more even the sizes of cookies, the more perfectly they will all bake. Plus, they’ll all look so nice — like straight out of a bakery!
- Roll tall cookie dough balls. Roll the large dough balls to be tall and skinny instead of in a perfect round ball. There is a lot of dough — 1.5 tablespoons per cookie, but this ensures a large, thick, and ultra-chewy cookie. I don’t recommend making smaller cookie dough balls– they don’t end up the same and the caramel tends to leak out easier.
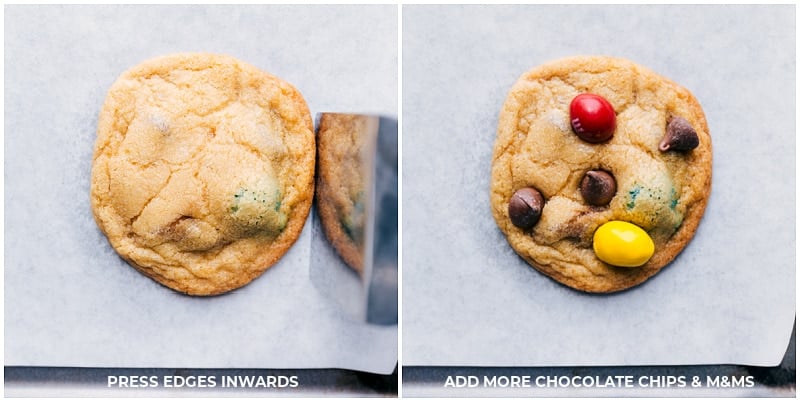
- Press the edges inwards. Working quickly, right out of the oven, use the back of a large spoon or metal spatula to press the edges of the cookies in towards the center. This creates really great crispy edges and ensures the cookie has a nice chewy center. It also makes the cookies prettier. You’ll need to work quickly, as the cookies set up fast and resist being pressed inwards after sitting out for more than a minute or two.
- Add extra chocolate chips and M&M’s. Right after pressing any wayward edges inwards, add some extra chocolate chips and/or M&M’s on top — not only does this make the cookies look prettier, it also ensures plenty of chocolate in every bite! Additionally, there is some additional texture — the M&M’s and chocolate on top are less melted than the chocolate inside the cookies — yum!
Quick Tip
If you don’t have a 1/2 tablespoon measuring spoon, 1-1/2 teaspoons is the equivalent measurement. Alternatively, use a cookie scoop that scoops out 1-1/2 tablespoons of dough!
Caramel Stuffed Cookie Storage
- Store Caramel Stuffed Cookies in an airtight container at room temperature. They’re best enjoyed within 2-3 days. That said, if you’re looking to get that gooey caramel center, you’ll want to eat them soon after pulling them out of the oven or warmed again in the microwave! Freeze cookie dough as opposed to baked cookies (see next bullet point). Fresh-baked cookies beat reheated ones any day.
- Instead of freezing already-baked cookies, freeze the dough! Drop the cookie dough balls on a large sheet pan and freeze until solid. Once solid, transfer the frozen cookie dough balls to an airtight container or bag and freeze for up to three months. To bake: You can bake these Caramel Stuffed Cookies straight from the freezer. There is no need to thaw, but you may need to add a few extra minutes to the baking time.
Storage
Storing Caramel Stuffed Cookies
- Store in an airtight container at room temperature for and enjoy within 2-3 days.
- Freeze shaped dough balls on a sheet pan until solid, then transfer to a freezer-safe bag or container and store for up to 3 months. Bake directly from the freezer, adding extra time as needed.
More Cookie Recipes
- Caramel Oatmeal Cookies with a Rolo center
- Magic Cookie Bars with a graham cracker crust
- Maple Cookies with a maple glaze
- Salted Caramel Cookies with a cream cheese frosting
- Caramel Cookie Bars buttery shortbread bars

Caramel Stuffed Cookies
Equipment
- Sheet pan lined
Ingredients
- 12 tablespoons unsalted butter
- 3/4 cup light brown sugar packed
- 1/2 cup granulated sugar
- 1 large egg
- 1 large egg yolk see note 1
- 1 teaspoon vanilla extract
- 1/2 teaspoon salt
- 3/4 teaspoon baking soda
- 2-1/4 cups flour see note 2
- 3/4 cup milk chocolate chips
- 3/4 cup M&M's of choice
- 14 regular-sized chewy caramels halved, see note 3
- Sea salt flakes optional
Instructions
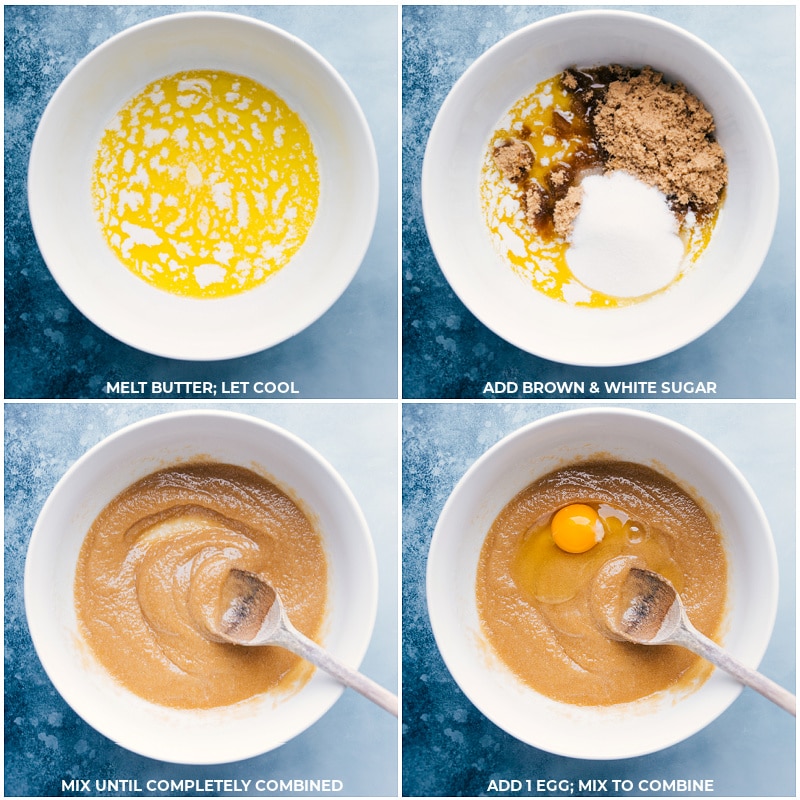
- Melt the butter in a very large, microwave-safe bowl. Once melted, set aside for 5–10 minutes to cool to room temperature. It's important the butter isn't hot or even warm when you add in the sugars, or it will melt and make greasy cookies.
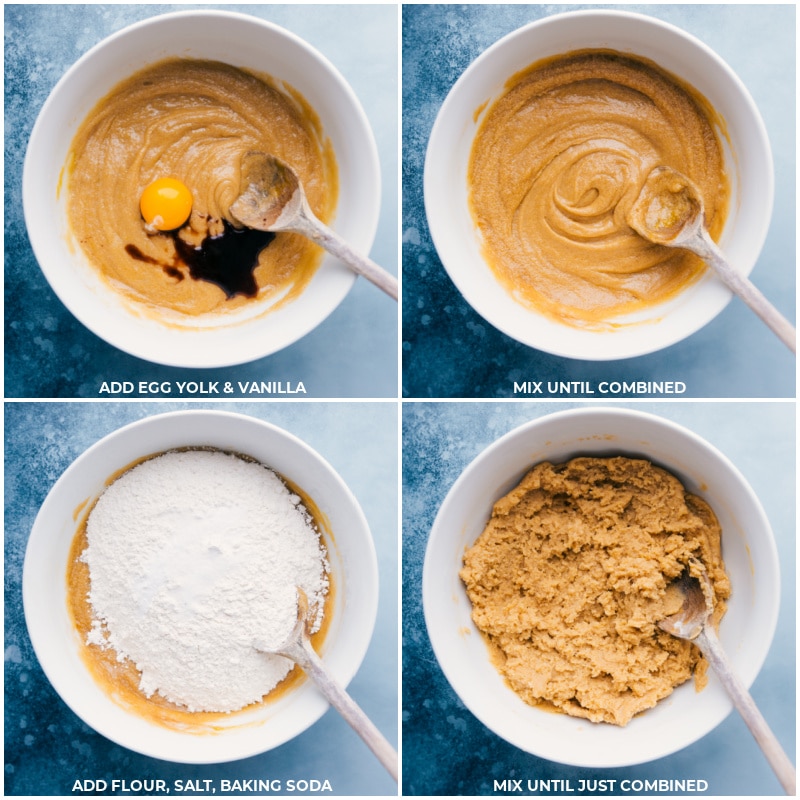
- Once butter is completely cooled to room temperature, stir in both sugars. Whisk until smooth and fully incorporated, about 1–2 minutes. This takes time, but keep mixing until completely integrated. Add in one egg and mix to fully integrate. Add in the other egg yolk and vanilla extract. Mix until completely combined.
- Add in the salt, baking soda, and flour. Mix until just combined, don't overmix the dough. Once you've got a thick dough, add in the chocolate chips and M&M's. Stir together and cover the bowl tightly. Place in the fridge and chill for 30 minutes up to 2 hours.
- Unwrap the caramels and cut in half. Measure out 1-1/2 tablespoon balls of dough. Roll into tall cylindrical balls, fully encasing one caramel half in each ball of dough. Place rolled cookie dough balls on a parchment paper-lined plate and place in the fridge for another 30 minutes. Roll out all the dough; you should get around 28 cookies from this dough.
- Preheat the oven to 350℉. Line a baking sheet with parchment paper or use a silicone baking mat. Remove 6 cookie balls from the fridge and place them on the pan, giving the cookies plenty of room to spread.
- Bake for 8–12 minutes, erring on the side of underbaking to keep them soft and chewy. Remember, the cookies will bake a little more out of the oven, so take them out as soon as the edges start to lightly brown or the top no longer looks wet. Remove from the oven and immediately press any edges that have strayed out a bit inwards with the back of a metal spatula. If desired, press a few additional chocolate chips or M&M's onto the tops of the cookies. If desired, add a tiny sprinkle of sea salt flakes on top of the cookies while the chocolate is still melty. Let cool on the pan for 5 minutes before transferring to a cooling rack. Repeat with the remaining dough until all the cookies are baked or check the storage notes for freezing instructions.
Video
Recipe Notes
Nutrition
Nutrition information is automatically calculated, so should only be used as an approximation.




I used you recipe and I took out the chocolate chips and the Carmel and used carmel m&Ms for the filling and I had to double the filling bc I took out the other fillings and sprinkled some kosher salt on top before I baked them and they turned out DELICIOUS! So many people liked them! Thank you for sharing your AMAZING recipe!!!!!
Delish! I’m so glad you enjoyed! Thanks Lauren! 🙂
Hi is only 1 egg separated or both?
Only 1. So you’ll add 1 full egg and 1 egg yolk
Chelsea–Thanks for the fun recipes you put out. I have a couple of queations about the optional coarse sea salt listed–about how much per cookie?….. and when do you put it on? I am afan of salty and sweet together!
Thanks
Hey Nancy! I’m glad you’re a fellow sweet and salty lover! I just sprinkle a pinch of salt over them when they first come out of the oven! Hope you enjoy! 🙂
This recipe looks amazing!! Half way through making them (in the fridge as I type!) however, the mix is REALLY crumbly after adding the flour. It almost looks like I should add some liquid… Is that normal??
Thanks Taylor! No, the dough should definitely not be crumbly…did you melt the butter? (12 tablespoons?) And also, how did you measure your flour? If you pressed a measuring cup into a bowl/bag you’ll have packed way too much flour in as opposed to spoon and leveling the flour measurement (see recipe note).