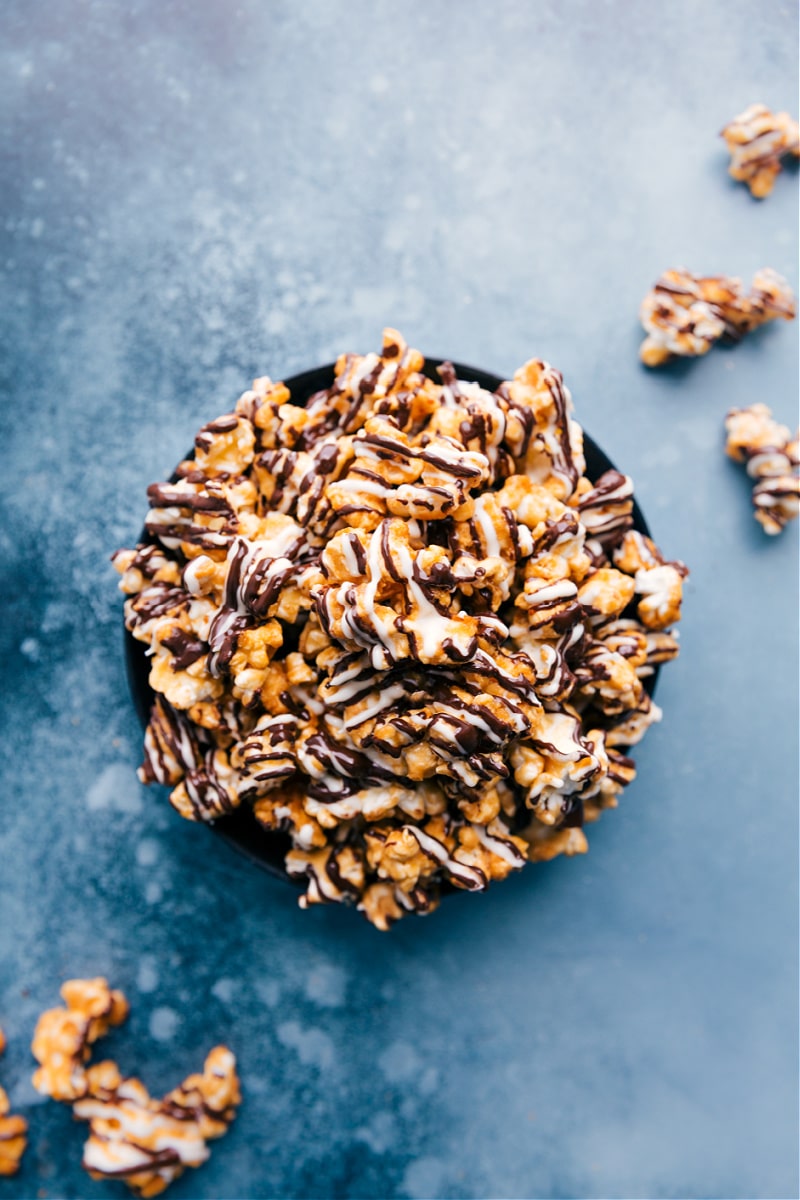
Zebra Popcorn starts with irresistibly sweet and crunchy caramel corn, and then it’s drizzled in melted white and dark chocolate. This is a great recipe to make ahead of time and it transports beautifully–bring it to munch on during sporting events, serve as a snack for parties, or package it up as a beautiful edible gift for the holidays.
We’re obsessed with gourmet-style popcorn recipes. Try our Chocolate Popcorn (with 3 types of chocolate!), Cinnamon Roll Popcorn, or Oreo Popcorn next!
What Is Zebra Popcorn?
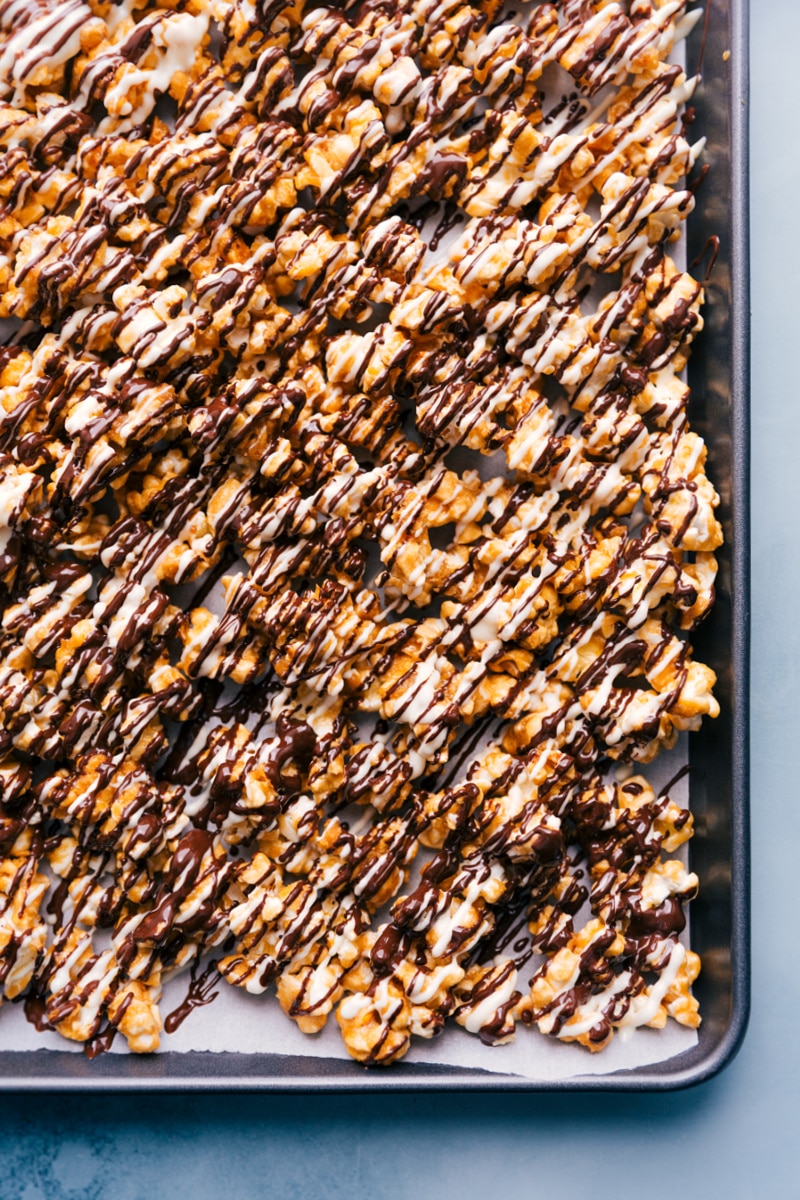
Zebra popcorn is actually homemade Caramel Corn that has been drizzled with melted white and dark chocolate. The melted white and dark chocolate resemble the coloring and stripes of a Zebra– which is how it got its name!
There are lots of brands that sell this popular flavor of candied popcorn in the store (Popcornopolis Zebra Popcorn at Costco is a personal favorite!), but nothing beats homemade! Not only is it more economical to make it at home, but it also tastes fresher and truly–it’s even more delicious!
This is also the perfect treat to make in bulk to serve at events, parties, or potlucks. It’s also great packaged up in cellophane bags to gift out for birthdays, special events, or the holidays.
The full Zebra Popcorn recipe is in the recipe box at the bottom of this post. Below are our top tips for success.
How To Make Zebra Popcorn
- Assemble everything before starting. This recipe moves very quickly, so it’s best to have everything set out, measured, and ready to add. This way the caramel mixture won’t over-cook.
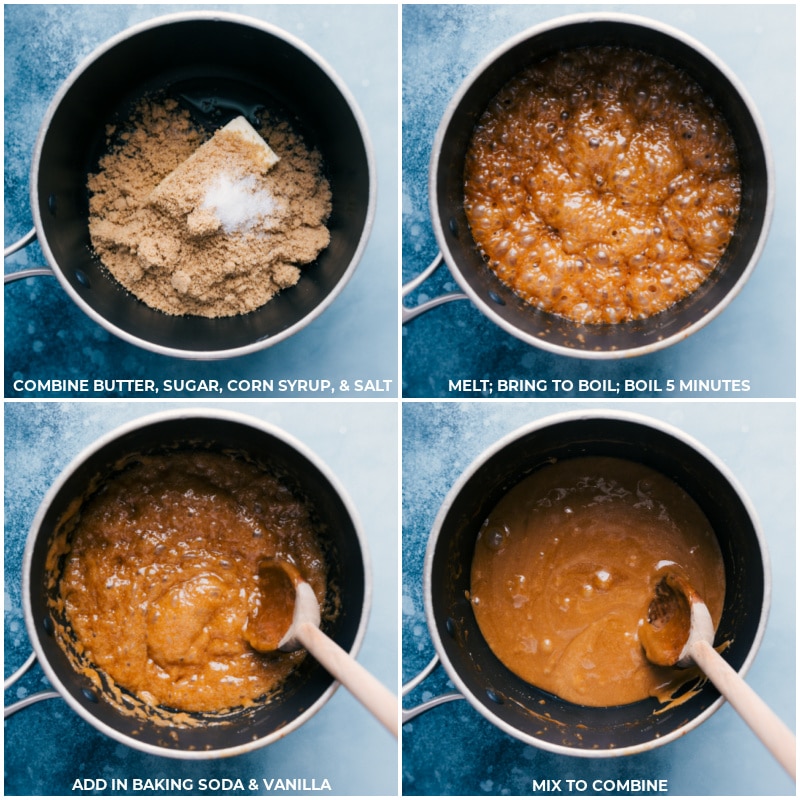
- Use a timer. Once the mixture reaches a full boil, set a timer for precisely 5 full minutes. If the mixture doesn’t boil long enough or it over-boils the caramel might not set up properly on the popcorn. Don’t want to leave it up to chance? Use a candy thermometer (see “quick tip” box below)! We’re looking for the mixture to hit 235 degrees F.
- Keep the caramel heat at medium. While it might be tempting to bump up the heat to speed the process along, it’s important the temperature keeps consistent so ingredients can gradually and evenly warm up.
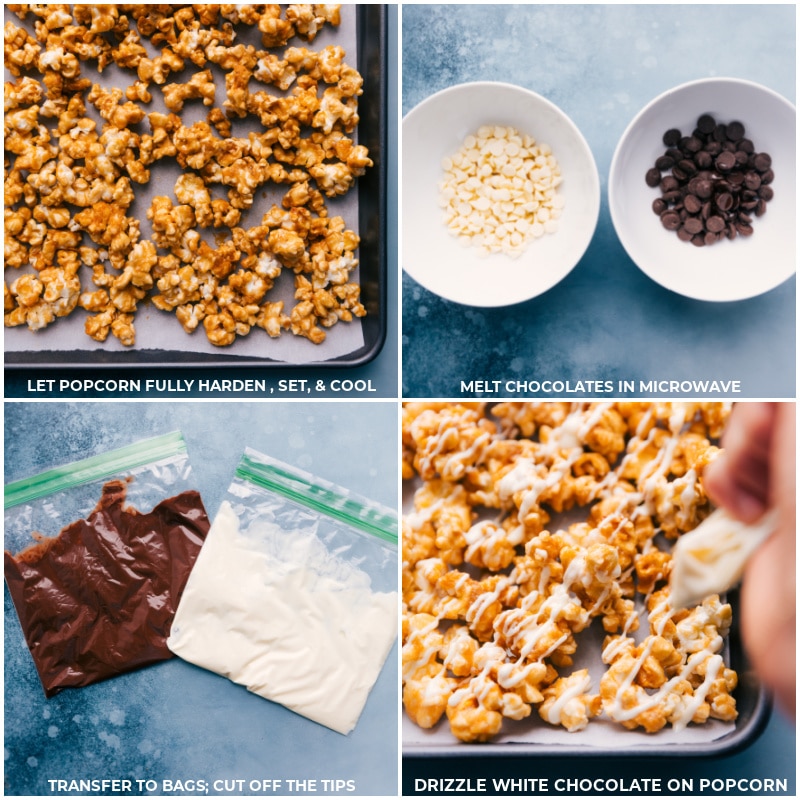
- When ready to add chocolate to the popcorn, microwave the candy melts in sturdy, heat–safe bowls instead of using plastic or melamine. To avoid scorching the chocolate, microwave in short bursts, stirring for at least 15 seconds between each microwave burst. Remember, the chocolate is still melting from residual heat even after it has been removed from the microwave.
Quick Tip
Using a candy thermometer takes out the guesswork and ensures you get the caramel mixture to the perfect temperature. Here is the candy thermometer I use and recommend. And once you have one, you can use it in all our favorite candy recipes. I’d recommend starting with this Buttercrunch Candy, Homemade Toffee, or Honeycomb Candy!
Zebra Popcorn Recipe Tools
- A medium-sized nonstick pot. This pan is for making the caramel sauce. You’ll want to use one larger than you may think because the mixture “grows” when the baking soda is added in. Trust me on this one!
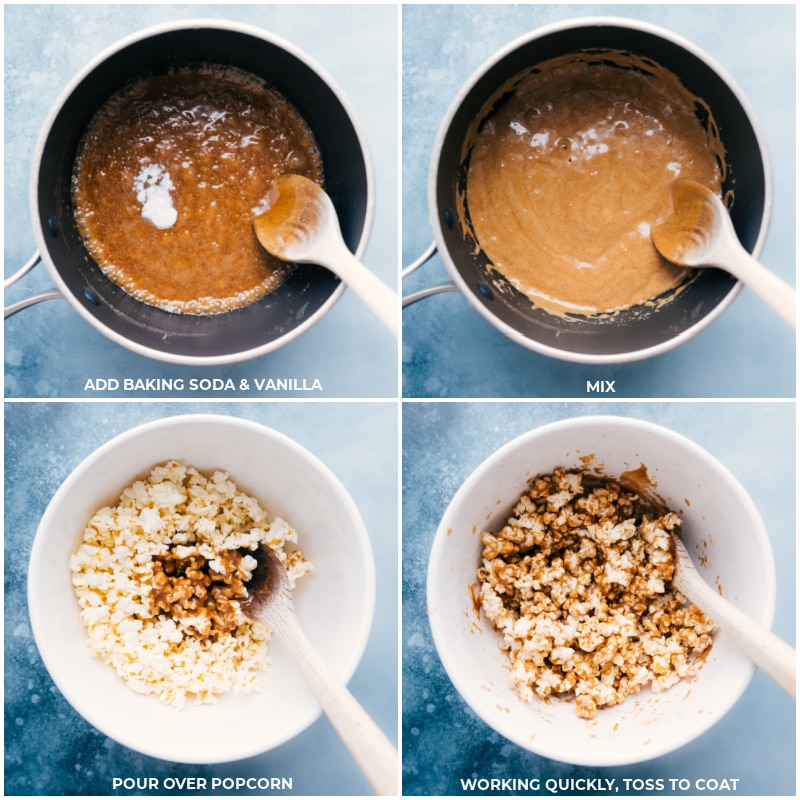
- A really large bowl or two smaller ones. We toss the popcorn with the brown sugar-caramel mixture. Use the largest bowl you have (or one that can easily accommodate all the ingredients) to allow plenty of room for tossing without spilling. If you don’t have a really large bowl, separate the mixture into two bowls.
- Use one extra-large (15×21 inch) sheet pan or two smaller ones. There is a lot of popcorn in this recipe, so you’ll need plenty of space for it all to lay in one even layer. If the popcorn is piled up, it won’t bake properly.
- Bake on a silicone liner or parchment paper. For even baking and to ensure the popcorn doesn’t stick to your pan, line the pan with a good liner.
Zebra Popcorn Ingredients
- Popcorn. Purchasing already popped popcorn makes this recipe come together a little bit quicker, but it’s a bit more spendy. If you’d rather pop your own, these are the packets we use (lightly salted plain popcorn). Of course, you can also use kernels in a popcorn machine or on the stovetop. Whatever you choose to use, measure out 10 cups of popcorn for this Zebra Popcorn Recipe and ensure no kernels sneak their way in!
- Baking soda. This ingredient reacts with the sugar and corn syrup to create small air bubbles. These bubbles will ensure the caramel coating the popcorn isn’t too hard (we don’t want to break a tooth!). Instead, the caramel coating the popcorn will be perfectly crunchy.
- Chocolate melts. We recommend chocolate made for melting like melting wafers for best results. These melts are found in the baking aisle of the grocery store. No need to splurge on super-expensive chocolates here–those are better for enjoying on their own!
- Oil. We recommend adding a touch of oil or shortening to the chocolate before melting. This helps to smooth out the chocolate and makes drizzling chocolate easier and look prettier.
Storage
Should Popcorn Be Refrigerated?
Nope! No need to refrigerate Zebra Popcorn.
How Long Does Zebra Popcorn Last?
Store leftovers (if there are any!) in an airtight container at room temperature (preferably in a dark, dry area). This popcorn will keep for about 3-4 days stored properly. After that, the chocolate begins to soften the popcorn.
More Chocolate-Coated Treats To Try
- Chocolate Covered Oreos with a white chocolate drizzle
- Almond Joy Cookies with a chocolate drizzle
- Chocolate Truffles coated in cocoa powder or powdered sugar
- White Chocolate Chex Mix snack mix coated in melted white chocolate
- Golden Oreo Truffles coated in white chocolate

Zebra Popcorn
Equipment
- 1 Large (15 x 21-inch) sheet pan or 2 medium sheet pans
- Parchment paper or silicone baking mat
- Very large bowl not metal
Ingredients
- Cooking spray
- 10 cups popped popcorn see note 1
- 8 tablespoons unsalted butter
- 1/4 cup light corn syrup
- 1 cup light brown sugar firmly packed
- 1/4 teaspoon salt see note 2
- 1/2 teaspoon baking soda
- 1/8 teaspoon cream of tartar optional, see note 3
- 1/2 teaspoon vanilla extract
- 1/2 cup dark chocolate melts see note 4
- 1/2 cup white chocolate melts
- 1 teaspoon vegetable oil divided
Instructions
- Set out all the ingredients; this recipe moves quickly! Line an extra-large 15x21-inch (or 2 large) sheet pans with parchment paper or silicone baking mat and set aside. Preheat oven to 200℉.Grab a very large ceramic bowl (large enough to very quickly toss popcorn with caramel sauce without spilling—I use the largest bowl I have! Avoid metal bowls as it can make the popcorn taste metallic) Generously spray bowl with cooking spray and set aside. Sift baking soda to make sure it isn’t clumpy.
- Pop popcorn, then remove un-popped kernels. Measure to get 10 cups popcorn and add to the very large greased bowl.
- Cut butter into tablespoon-sized pieces. In a pot over medium heat (don’t increase the heat even if process is slow!) add butter, corn syrup, brown sugar, cream of tartar, and salt. Stir with a silicone spatula, scraping edges of the pot as you stir, until butter is fully melted. Bring to a rolling boil, then stop stirring. Set a timer, letting mixture boil (still at medium heat) for precisely 5 minutes without stirring. (Or until it hits 235℉ on a candy thermometer). Remove from heat and stir in baking soda and vanilla extract. Watch out—the vanilla may sputter a bit and mixture will foam up! Immediately pour caramel mixture over prepared popcorn in the bowl. Working quickly, use the spatula to toss and coat popcorn evenly in caramel syrup mixture.
- Spread coated popcorn on the prepared sheet pan(s) in one even layer. Bake 1 hour, stirring every 15 minutes (if using multiple pans, rotate the pans from top rack to bottom rack.) Once done, remove and allow to completely cool, about 30 minutes.
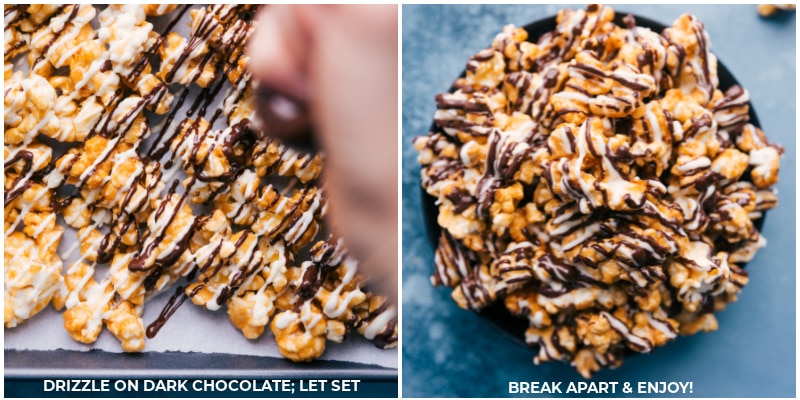
- In microwave, melt white chocolate melts with 1/2 teaspoon vegetable oil (see note 5) and drizzle evenly over the popcorn. (I put melted chocolate in a small resealable plastic bag, cut off the tip with scissors, and pipe it on.) Then, melt dark chocolate melts with remaining 1/2 teaspoon vegetable oil, transfer to a bag, and drizzle evenly over completely cooled popcorn.
- Let popcorn harden at room temperature, about 1 hour, then break up into clusters and put in a large bowl. Enjoy!
Video
Recipe Notes
Nutrition
Nutrition information is automatically calculated, so should only be used as an approximation.
