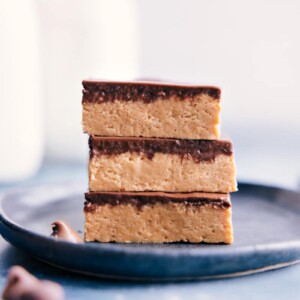
These easy, no-bake Peanut Butter Bars have a thick, sweet peanut butter base and a smooth chocolate topping—made with just seven ingredients!
Quick Tip
Looking for frosted Peanut Butter Bars? Try our famous Old Fashioned Peanut Butter Bars instead (also called Lunch Lady Bars)! Or, if you’re looking for a version of Healthy Peanut Butter Bars, try our Peanut Butter Banana Bars which are sweetened with ripe bananas and use blended up oats.

No-Bake Peanut Butter Bars
Homemade Peanut Butter Bars are the best! They’re super easy to make, need just a few ingredients, and no oven is needed.
These bars are thick, rich, and taste like peanut butter cups, but they’re even better! They’re creamy and gooey when freshly made, way better than store-bought candy.
Forget Reese’s, these bars are way tastier and only need seven ingredients!

Ingredients
Here’s what you need for this recipe, along with some tips and our favorite brands:
- Peanut butter: Any creamy kind works, but we prefer Skippy® Creamy Peanut Butter. Avoid the natural kind that needs stirring, it can make the bars too greasy.
- Graham crackers: Crush them up for flavor; I love Honeymaid® honey-flavored ones.
- Powdered sugar: Granulated or brown sugar won’t work; you need the light texture of powdered sugar.
- Unsalted butter: Use unsalted so you can control the saltiness.
- Salt: Even with unsalted butter, a bit of salt balances the sweetness.
- Chocolate: Use milk chocolate for sweeter bars like Reese’s® or semi-sweet/dark for less sweetness. Mix flavors if you like, such as half milk and half semi-sweet.
- Vanilla extract: Vanilla offers a nice finishing touch of flavor. It’s optional — these Peanut Butter Bars are still great without it.
Quick Tip
Use leftover graham crackers in these Graham Cracker Cookies or in a homemade Graham Cracker Crust!

How To Make Peanut Butter Bars
This recipe comes together quickly without too much effort, but the tips below will help to ensure perfect Peanut Butter Bars every single time!
- Let the melted butter cool. Once the butter is melted, it needs to cool back to room temperature. If the butter is hot, it will melt the sugar and crushed graham crackers, which will cause greasy bars.
- Blend graham crackers thoroughly. To make sure there aren’t large chunks of graham crackers in the bars, which will affect the texture, blend the graham crackers until they are crumbs. If any large pieces didn’t blend completely, add them back into the blender and blend again.
- Use good chocolate! High-quality chocolate makes such a difference in the taste of this recipe. My favorite brands are Ghirardelli® and Guittard® (not sponsored).
- Picking a pan size. For thicker bars, use an 8×8-inch pan. For slightly thinner bars, use a 9×9-inch pan. (Photos in the post show the thickness of the bars using an 8×8-inch pan.)
- Line the pan. Be sure to line the pan with parchment paper for easy removal of the bars once they’ve set. Leave an overhang of parchment paper so you can pull up on the overhang to remove all the bars — it’s so much easier to cut bars out of the pan rather than in the pan.
- Picture-perfect bars. To get clean slices of Peanut Butter Bars, run a knife under hot water for a few seconds, wipe to dry, make a slice, and repeat.
Quick Tip
It’s nice to have a powerful blender or food processor to quickly pulse the graham crackers to crumbs, but if you don’t have one, you can crush them in a bag with the bottom of a frying pan, a meat mallet, or a rolling pin.
Storage
Peanut Butter Chocolate Bars Storage
- These bars are great for making ahead of time. Just follow the instructions, cover them up, and let them chill in the fridge overnight.
- When stored right, these bars stay good for 5-7 days after you make them. If they’ve been in the fridge for a while, give them about 10-15 minutes at room temperature before cutting.
- You can freeze these bars easily. Wrap each one in plastic wrap, then put them all in a big plastic bag or a container that’s safe for the freezer. To thaw, just leave them in the fridge overnight. They’ll stay good in the freezer for up to 3 months.
More Peanut Butter Bar Recipes
- Chocolate Peanut Butter Pie with an Oreo cookie crust
- Buttercrunch Candy chocolate-topped peanut candy
- Tiger Butter Fudge with white chocolate
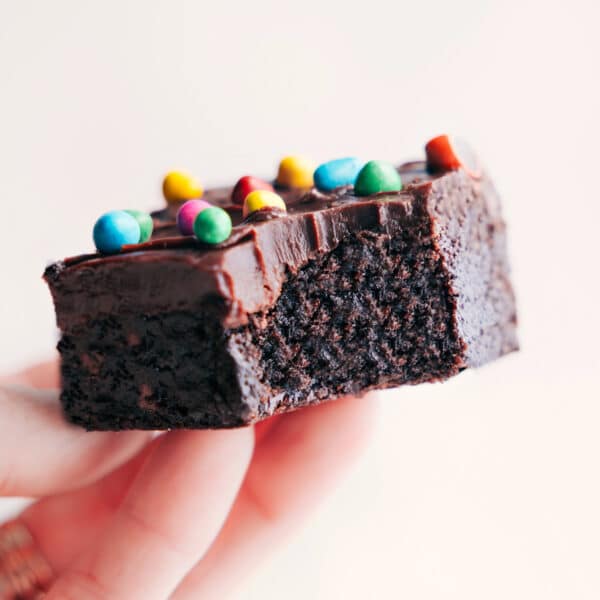
- Peanut Butter Cup Brownies with Reese’s cups
- Peanut Butter Rice Krispie Treats with a chocolate peanut butter topping
Peanut Butter Bars
Video
Equipment
- 8 x 8-inch baking pan or 9 x 9-inch
- Parchment paper or aluminum foil
- Blender or food processor
- Hand mixer or a wooden spoon
Ingredients
- 8 tablespoons unsalted butter melted
- 1/4 teaspoon salt
- 8 full graham cracker sheets 1 cup of crumbs
- 2 cups powdered sugar
- 1 teaspoon vanilla extract
- 1 cup creamy peanut butter plus 2 tablespoons, see note 1
- 1 cup chocolate chips semi-sweet or milk chocolate, see note 2
Instructions
- Line an 8×8-inch pan (for thicker bars) or 9×9-inch pan (thinner bars) with parchment paper or foil. Set aside. Melt butter in the microwave, then set it aside to cool to room temperature. (Hot butter melts the sugar and makes these bars greasy.) Crumble graham crackers into a blender or food processor and blend to get crumbs. Alternatively, add crackers to a gallon plastic bag, seal it without air, and crush crackers to crumbs with a frying pan, rolling pin, or meat mallet (see note 3).
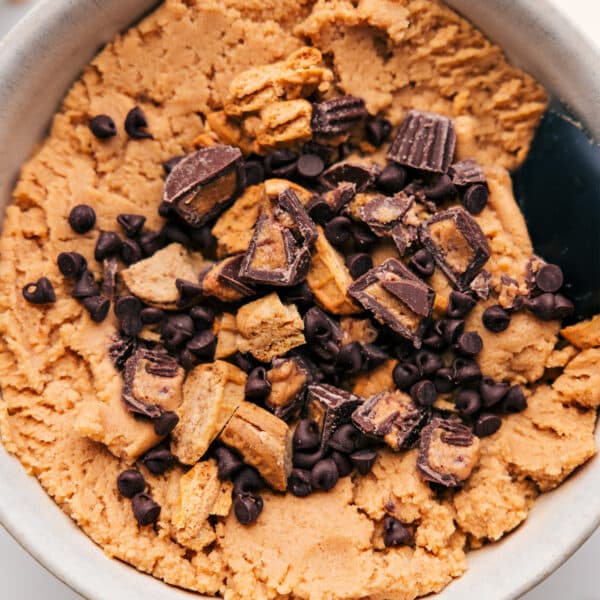
- Add melted (and cooled) butter, salt, graham cracker crumbs, powdered sugar, vanilla, and 1 cup peanut butter to a large bowl. Use a hand mixer or a wooden spoon to mix until you have a thick dough. Press dough into an even layer in the base of the prepared pan. Place in the fridge while preparing the topping.
- Meanwhile, add the chocolate chips and remaining 2 tablespoons of peanut butter to a microwave-safe bowl. Microwave in bursts of 15 seconds, stirring between each burst for 10 seconds until chocolate is melted and smooth. Pour melted chocolate over the peanut butter layer and tap the pan on the table a few times to get the chocolate in an even layer.
- Chill in the fridge until bars are firm, about 1-1/2 hours. Allow to sit at room temperature for 5–10 minutes before cutting. Cut into the bars with a hot sharp knife: Run the knife under hot water, dry it, then immediately cut the bars.
Recipe Notes
Nutrition
Nutrition information is automatically calculated, so should only be used as an approximation.


The video on this page is for “lunch lady peanut butter bars” made with oatmeal, but the recipe has graham crackers. I was looking for the recipe with oatmeal today but I can not find it! Did you take down the old recipe?!
Hey Kelsey, thanks for catching that, I’ve updated the video. The old oatmeal recipe was taken down. If you want the old recipe i’d be happy to email it to you!
Ok! Yes I would love to have the old one! Thank you!
I sent you an email!
Can the butter be substituted with canola oil?
Not in this recipe, sorry!