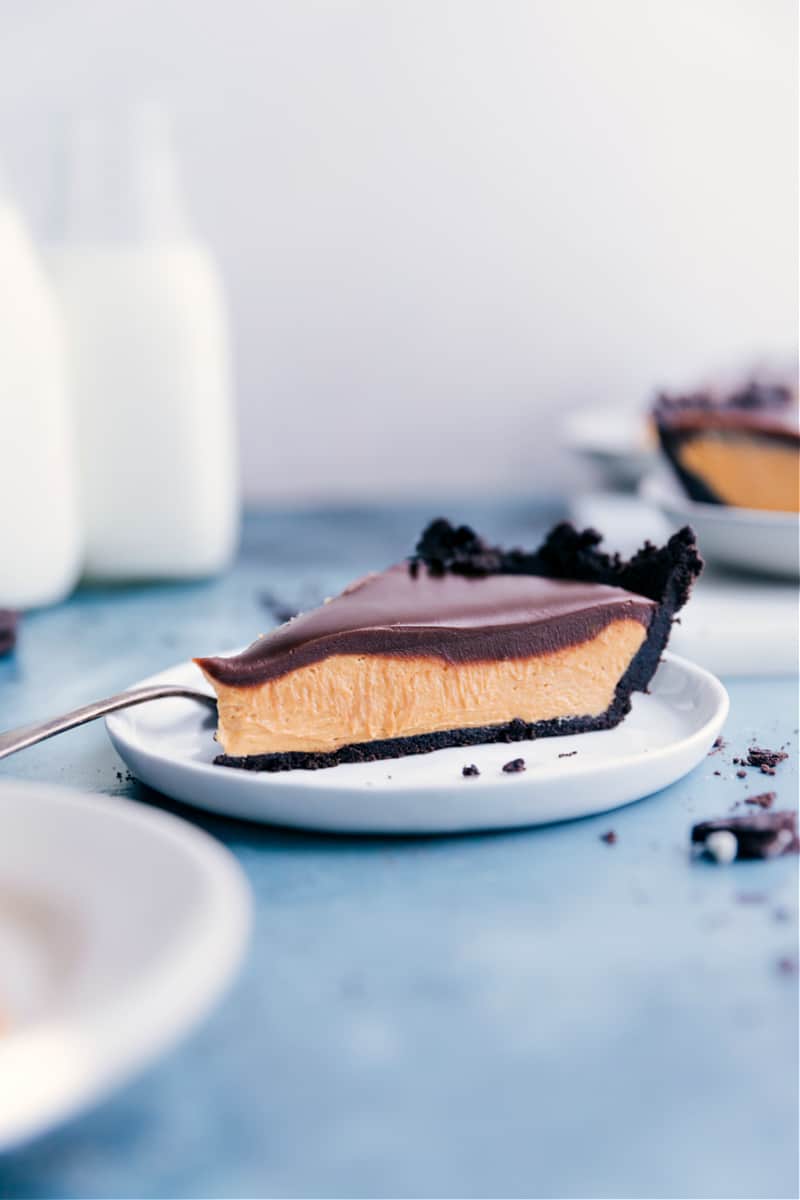
Chocolate Peanut Butter Pie starts with an Oreo crust, a sweet peanut butter filling, and a simple chocolate ganache topping—no baking needed!

author’s note
Peanut Butter Cup in Pie Form!
This No-Bake Peanut Butter Cheesecake is a family favorite—my family can finish one in no time! Today, I’m making an even easier version as a pie.
Like the cheesecake, it has an Oreo® crust, peanut butter filling, and chocolate ganache. But this filling is sweeter, with a more intense peanut flavor, similar to a peanut butter cup candy. The texture is lighter and airy, more like frosting than dense cheesecake.
Best of all, it sets in just a few hours. If you love peanut butter and chocolate, you’ll be obsessed with this Chocolate Peanut Butter Pie!
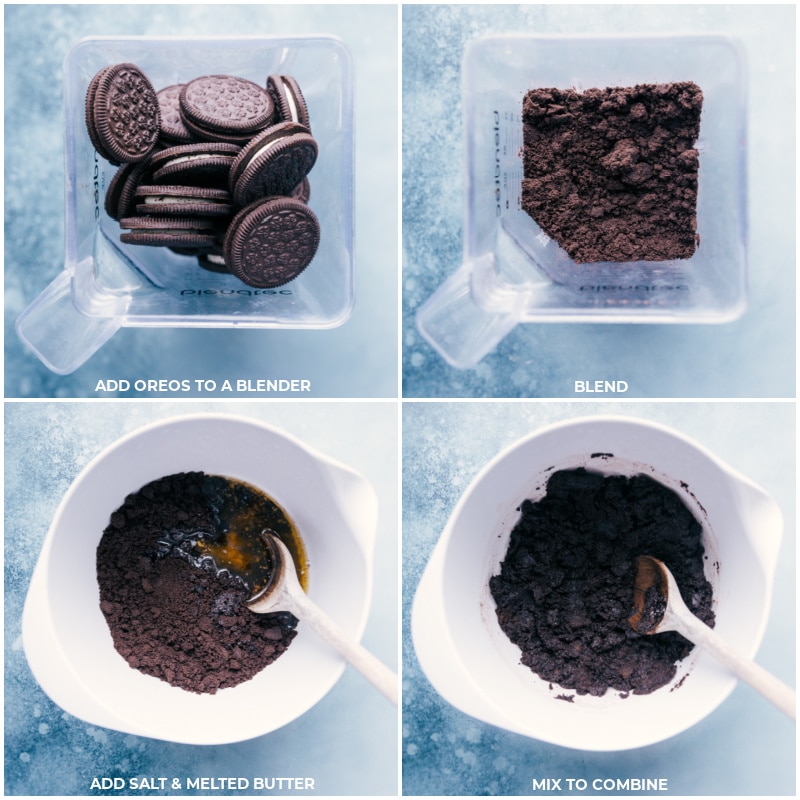
Oreo Crust
- Crush the Oreos well for a smoother slice. Larger chunks may still taste great but won’t slice as neatly.
- Let the butter cool before mixing to avoid a greasy crust.
- Keep the creme filling; it adds sweetness and helps hold the crust together.
- No need for sugar—the Oreo creme is sweet enough.
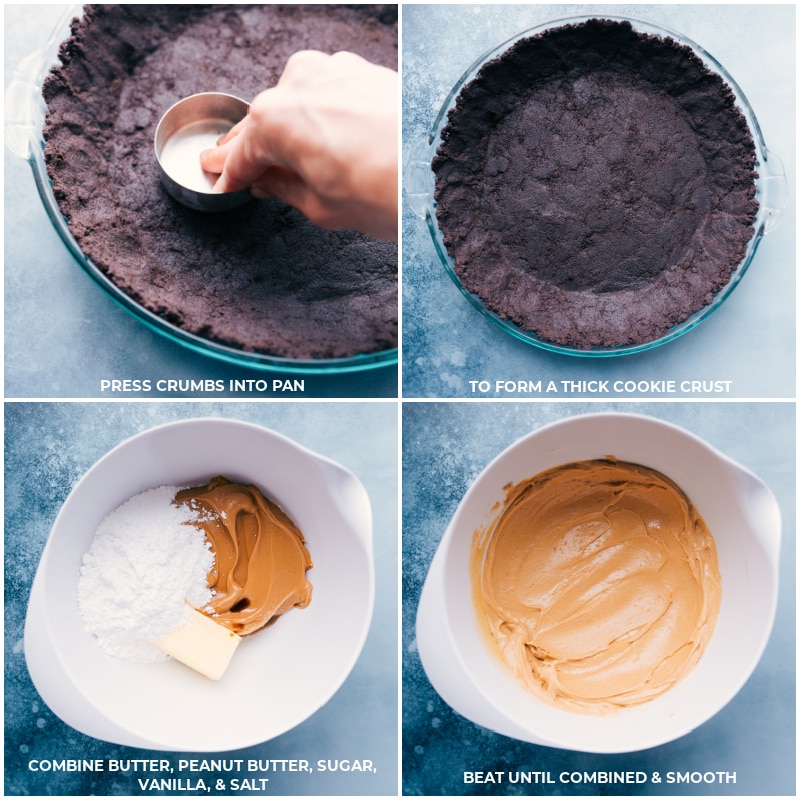
Peanut Butter Filling
- Use sweetened, peanut butter like Skippy® for a smooth, slightly sweet filling. Avoid natural, stir-type peanut butter, as it may cause separation.
- Use room temp butter, not melted, to keep the right texture.
- Skip crunchy peanut butter; you want the filling creamy and smooth.
- Only use powdered sugar in the filling—other sugars will make it grainy since the pie isn’t baked.
Quick Tip
Set butter out about an hour before making the recipe. It should be soft but not too squishy. If you need it faster, here are some quick methods.
Chocolate Ganache Topping
- Use high-quality milk chocolate, for a smoother melt and better flavor. Cheaper brands tend to be waxy and won’t melt as well.
- Let the mixture sit for 5 minutes after pouring the hot cream over the chocolate chips.
- Decorate! If the topping isn’t perfectly glossy, no worries—add a garnish like chocolate curls, chopped peanuts, or chopped Reese’s.
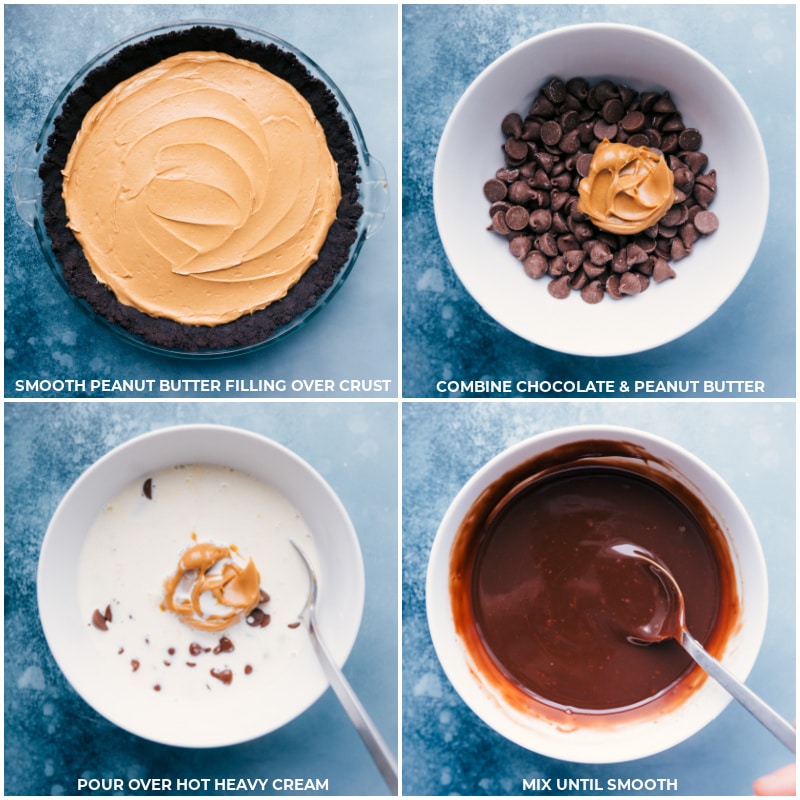
How To Make Chocolate Peanut Butter Pie
- Crust: Blend Oreos, mix with butter and salt, and press into a pie pan. Freeze while preparing the filling.
- Filling: Mix filling ingredients until smooth. Spread over crust and freeze.
- Topping: Heat cream, pour over chocolate chips and peanut butter, let sit, then stir until smooth. Pour over the pie and chill until set.
Shortcuts
- Use a store-bought Oreo crust to save time.
- Prepare the crust for your chocolate peanut butter pie ahead if needed.
- Skip the ganache and top with chocolate syrup, melted peanut butter, or crushed candy for a faster option.
Storage
Leftover Chocolate Peanut Butter Pie?
- To store the pie, cover it well with plastic wrap or foil and keep in the fridge for up to 5 days.
- To freeze, wrap the pie or slices in plastic, then foil, and freeze for up to 1 month. Let it thaw in the fridge before serving.
More Chocolate And Peanut Butter:
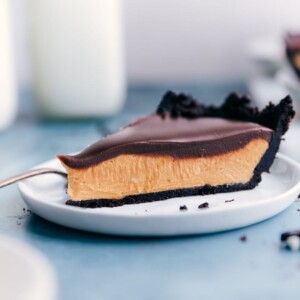
Chocolate Peanut Butter Pie
Equipment
Ingredients
- 25 Oreos
- 4 tablespoons unsalted butter melted
- 1/16 teaspoon salt
- 1-1/2 cups creamy peanut butter
- 8 tablespoons unsalted butter room temperature, see note 1
- 1/2 tablespoon vanilla extract
- 1 cup powdered sugar
- 1/8 teaspoon salt
- 1 cup milk chocolate chips or semi-sweet
- 2 tablespoons creamy peanut butter
- 1/2 cup heavy cream
Instructions
- In a blender or food processor, blend whole Oreos until they are all crumbs. Once fully crumbled, measure to ensure you have a full 1 and 3/4 cups of crumbs and put them in a bowl. Add in the melted butter and a tiny pinch of salt. Stir until a thick dough forms and press that mixture into a pie pan. Use the bottom of a cup to press the crust firmly into the bottom of the pan and up the sides. Place the crust in the freezer while preparing the filling.
- In a large bowl, combine all the peanut butter filling ingredients. Using a mixer, beat on low speed until mixture is completely combined and smooth. Don’t overbeat or beat at a high speed! Use a spatula to transfer the filling into the crust and smooth in an even layer. Place in the freezer while preparing the topping.
- Add chocolate chips and peanut butter to a heat-proof bowl. Heat the heavy cream in a microwave-safe container for 30–60 seconds until hot but not boiling. Pour the hot cream over the chocolate chips and peanut butter, cover the bowl with a sheet pan or pot lid, and let it sit for 5 minutes. Then, stir with a spoon until the mixture is completely smooth. Pour this over the peanut butter layer and gently spread into an even layer. Place the pie in the fridge and chill until firm, about 1–3 hours.
- Use a hot, sharp knife to slice the pie, running it under hot water and drying it with a towel first. Serve and return any leftovers to the fridge.
Video
Recipe Notes
Nutrition
Nutrition information is automatically calculated, so should only be used as an approximation.




Can I make this a day ahead? I’ve made everything but the granache. Should I wait to make that til tomorrow?
Yes, I’d add ganache the day of 🙂
Do you think you could freeze this once assembled? Any suggestions on thawing?
I think the crust and peanut butter layer would do fine, but don’t feel confident in the ganache freezing and thawing well. I’d freeze without the ganache (carefully covered). Thaw in the fridge overnight and then add the ganache the next day. (Crust will soften from being frozen and thawed, so if you are going to freeze, I would probably bake it at 350 degrees for 10 minutes before adding the peanut butter layer. Hopefully that would keep it from getting overly soft/soggy!)
Could this also be made in a soringform pan?
I don’t see why that wouldn’t work! 🙂