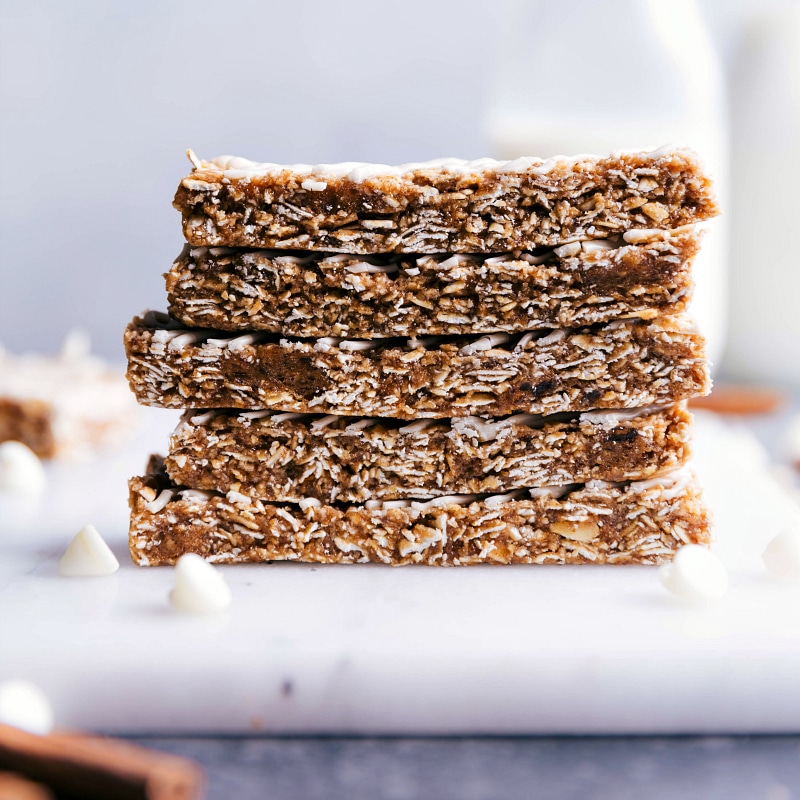
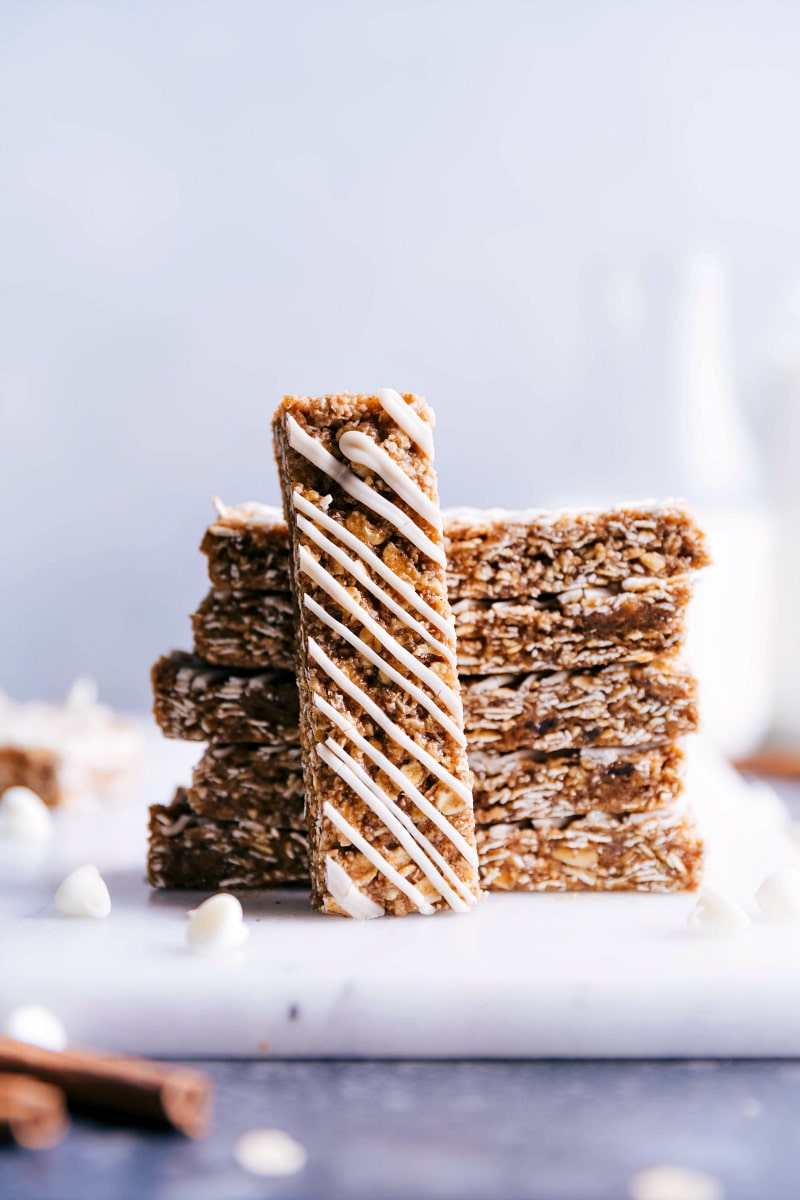
These Oatmeal Granola Bars are made to taste like an iced oatmeal cookie — in a more nutritious form of course! These bars are simple to make with no baking required!
Try some other favorite granola bar recipes next — Chewy Granola Bars with miniature M&M’s, Chocolate Granola Bar with three types of chocolate, or Homemade Granola Bars with almonds and chocolate chips.
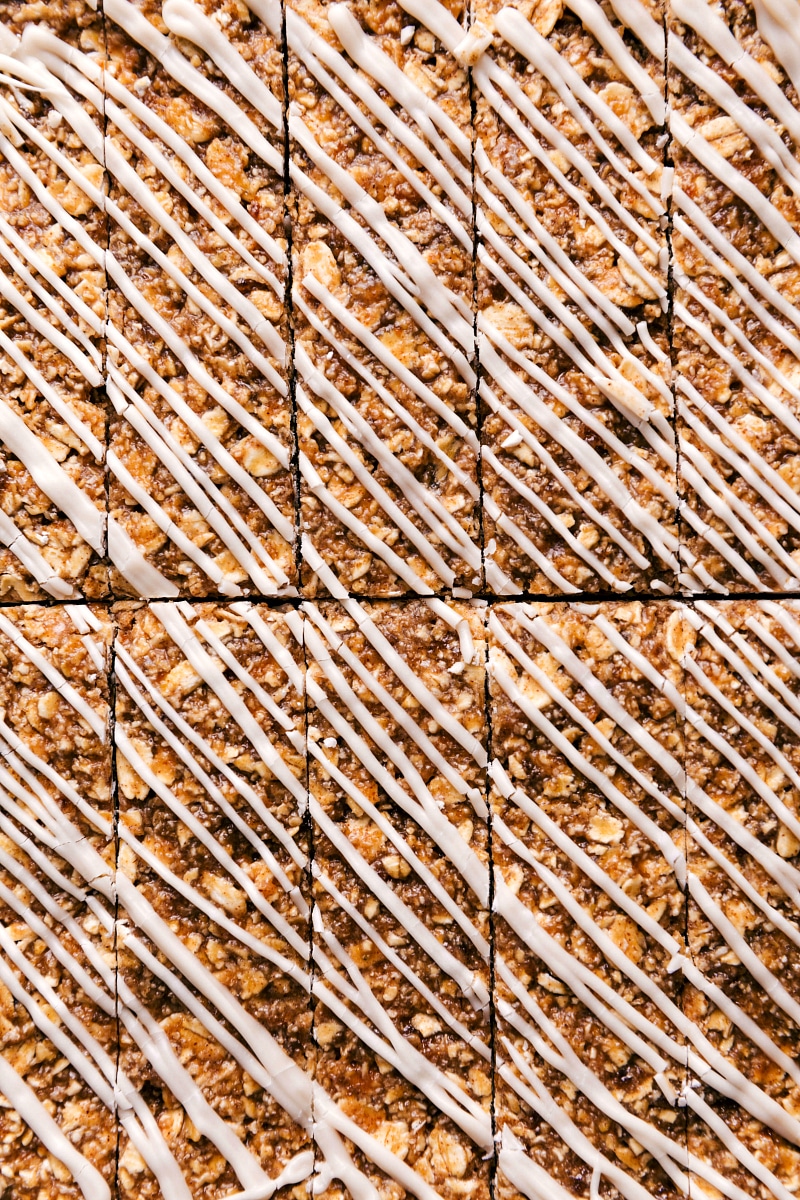
Oatmeal Granola Bars
The Clif® Kid Z bars are one of the all-time favorite store-bought bars. They’re soft, chewy, and reminiscent of a soft oatmeal cookie! The kids love them too, and it’s surprising how quickly a Costco-sized box disappears.
Since they aren’t the cheapest granola bars, it was time to try making something similar at home. While these bars turned out a bit different from the Clif Kid Z bars, they taste like an iced oatmeal cookie in a delicious, soft granola bar way. These bars are soft, chewy, sweet, and perfectly finished with sweet white chocolate icing. Honestly, these are even better than the Clif bars!
How To Make Granola Bars With Oatmeal
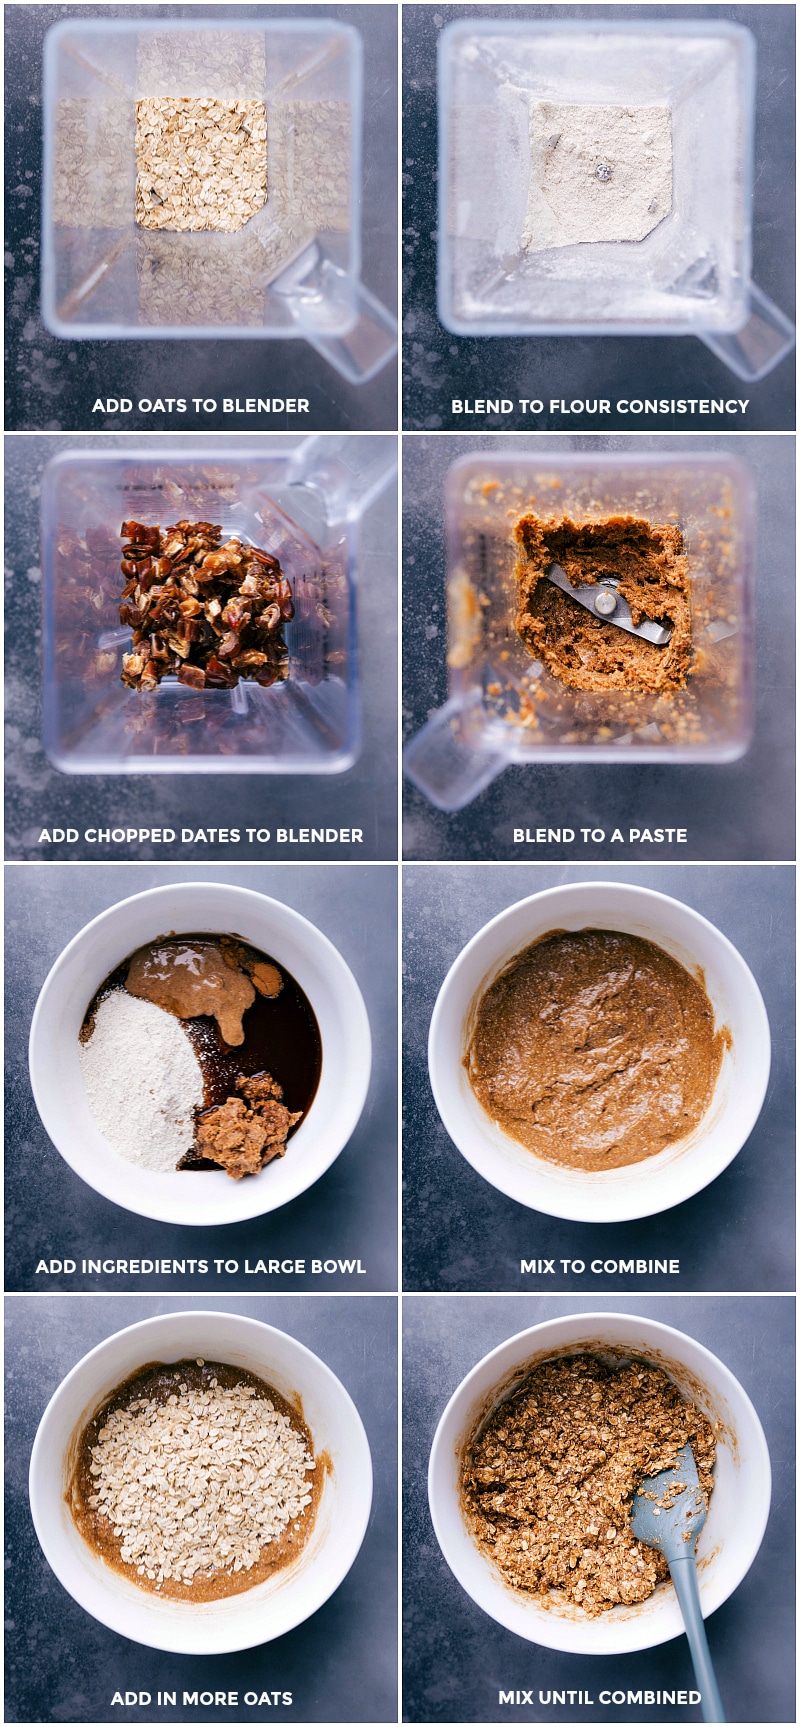
- Prep: Line an 8×8 pan with parchment. Leave extra parchment hanging over the sides for easy lifting later.
- Blend Oats: Turn 1 cup oats into flour-like consistency. Make sure no large chunks remain for a smoother texture.
- Blend Dates: Process dates into a paste and mix with oat flour. Soak hard dates in hot water first to soften.
- Combine: Mix in almond butter, syrup, vanilla, salt, cinnamon, and remaining oats.
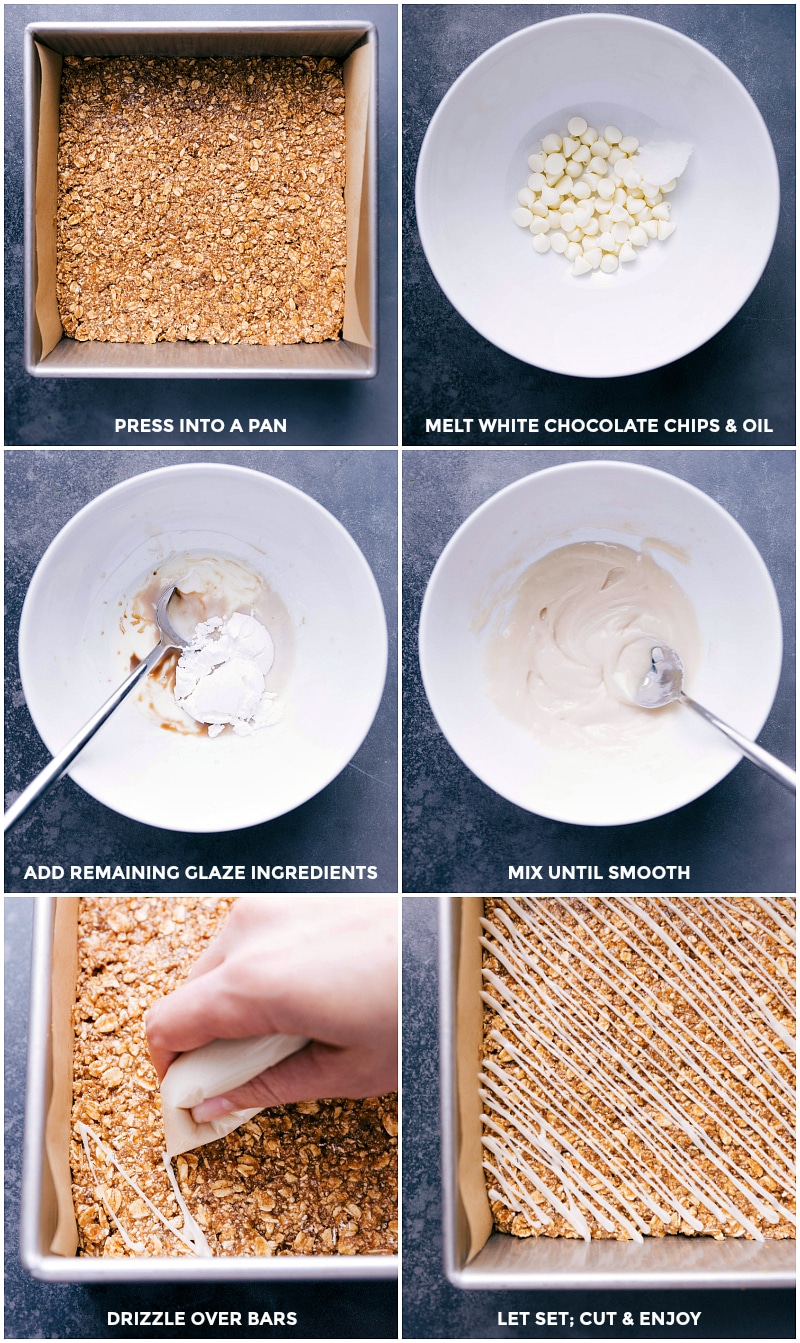
- Set: Press the mixture evenly into the pan and refrigerate for 1 hour. Firm pressing helps the bars stick together.
- Glaze: Melt white chocolate with oil, then blend in vanilla, sugar, and milk.
- Finish: Chill with glaze for 20 mins, then cut into bars. Use a sharp knife for clean cuts.
Oatmeal Granola Bars Tools Needed
- High-powered blender: Dates can be tough on a blender, even when fresh and soft. To break them down into a thick paste without burning out the motor, use a very high-powered blender (like Vita-Mix or Blend-Tec) and scrape down the sides as needed.
- Hand mixer or stand mixer: Mixing all the ingredients in a large bowl can be too much for a wooden spoon. An electric hand mixer or stand mixer works best to ensure everything is thoroughly combined for the right flavor.
- 8×8-inch baking pan: This mixture fits perfectly in an 8×8-inch baking pan.
- Optional but helpful: Line the pan with parchment paper for easy removal and less mess. A firm spatula is great for scraping the bowl and pressing down the mixture.
Oatmeal Granola Bar Ingredients
The ingredients in these bars greatly impact their flavor and texture.
- Old-fashioned oats: Half are blended into oat flour, while the other half remains whole, giving two textures from one ingredient.
- Deglet Noor dates: Dates provide natural sweetness and a chewy texture. Fun fact: dates are fresh fruit, not dried! Leftover dates can be used in a Cauliflower Smoothie or Gluten-free Zucchini Muffins.
- Almond butter: This adds flavor, nutrition, and helps make the bars filling. Choose a slow-roasted, lightly salted almond butter you enjoy on its own.
- Pure maple syrup: A natural sweetener made from boiled-down maple sap, not to be confused with pancake syrup, which is made from corn syrup and maple extract. Maple syrup adds both flavor and stickiness to these bars.
- Vanilla extract: Enhances the cookie-like flavor.
- Salt: Balances the sweetness and boosts flavor.
- Cinnamon: Essential for that classic oatmeal cookie taste.
Quick Tip
What makes granola bars stick together? Granola bars stick together due to sticky binders like almond butter, maple syrup, and blended dates, which act as natural adhesives in the mixture.
Oatmeal Granola Bar Tips
- Be sure to use old-fashioned oats. Quick oats and steel-cut oats will both create the wrong texture and won’t work properly in these bars.
- Use the right ingredients. Even “tried and true” substitutions (think honey for maple syrup or peanut butter for almond butter) don’t work the same in these bars — this recipe is fairly particular.
- Cut the bars with a large, sharp knife. Once the bars have firmed up, use the parchment paper overhang to remove the bars onto a cutting board and then cut with a sharp knife.
- Make gluten-free Oatmeal Granola Bars. While the ingredients in these bars are naturally gluten-free, make sure to check all your ingredient labels to verify they weren’t processed in a facility with gluten.
Storage
Granola Bars With Oatmeal Storage
After the bars have set, wrap each one in plastic wrap and store in a container or resealable bag in the fridge for up to a week—great for on-the-go snacks!
To freeze: Place bars on a lined tray in the freezer. Once firm (1-2 hours), wrap individually and store in an airtight bag or container for up to 6 months.
To thaw: Let sit for 30 minutes or microwave for 10-15 seconds.
More Nutritious Snacks
- Trail Mix made with five different variations
- Oatmeal Energy Balls with coconut and chocolate
- Chocolate Chia Seed Pudding naturally sweetened and naturally thickened
- Almond Granola with coconut flakes
- Overnight Oats with four different recipes
Quick Tip
Take your time pressing the granola bar mixture into the pan; the harder and firmer you press down, the better they’ll hold together.
Oatmeal Cookie Granola Bars
Equipment
- Parchment paper or aluminum foil
- Blender high-powered
- Hand mixer or stand mixer
Ingredients
- 2-3/4 cups old fashioned oats divided
- 1 cup Deglet Noor dates pitted, see note 1
- 1/3 cup roasted and salted almond butter see note 2
- 1/2 cup maple syrup see note 3
- 2 teaspoons vanilla extract
- 1/4 teaspoon salt
- 1 teaspoon ground cinnamon
- 2 tablespoons white chocolate chips
- 1 teaspoon coconut oil
- 1/4 teaspoon vanilla extract
- 2 tablespoons powdered sugar
- 1 to 2 teaspoons milk plant-based milk works great here
Instructions
- Line an 8x8 baking pan with parchment paper or foil, leaving an overhang for easy removal.
- In a high-powered blender, blend 1 cup (105g) of the old-fashioned oats until they resemble flour—a fine powder. If needed, stir and reblend to break up larger chunks of oats—it should look like flour. Now pour all the blended oats into a large sturdy bowl or a bowl attached to a stand mixer.
- See note 1 for prepping dates if needed. Ensure dates are pitted. (Sometimes dates labeled pitted still have a pit that sneaks in!) Using a sharp serrated knife, coarsely chop the dates. Add chopped dates to a blender and blend until a thick paste forms. This takes some patience; you will likely need to scrape down edges and stir a few times between blending. Once fully blended to a paste, use a spatula to scrape all of this mixture into the bowl with the oats. It’s thick and sticky!
- To the bowl with the blended oats and dates, add almond butter, maple syrup, vanilla extract, salt, cinnamon and the remaining 1-3/4 cups (178g) old-fashioned oats.
- Using a hand mixer (or paddle attachment on a stand mixer), beat until well combined and ingredients are incorporated. The mixture is a bit wet, but it sets up a bit in the fridge.
- Use a spatula to scrape out all the mixture from the bowl into the prepared 8x8 pan. Firmly press the granola bar mixture evenly into the pan. Cover and place in the fridge to chill and set up for at least 1 hour.
- Combine the white chocolate chips and coconut oil (measure oil when it is melted). Microwave the mixture in 15-second bursts, stirring between each burst for 10–15 seconds until completely smooth. Stir in the vanilla extract, powdered sugar, and milk. Stir until a thick frosting has formed and transfer to a small plastic bag. Cut off the tip and drizzle all over the bars. Return to the fridge (covered) until the glaze hardens, about 20 minutes.
- Using the parchment or foil overhang, remove bars to a cutting board. Use a sharp knife to cut into bars. Wrap each bar individually and store in an airtight container in the fridge.
Video
Recipe Notes
Nutrition
Nutrition information is automatically calculated, so should only be used as an approximation.





Has anyone tried these with raisins instead of dates?
Is there anywhere I can find nutrition information for these? My son was recently diagnosed Type I diabetic and we are trying to find some good, healthy snacks for him. I’d specifically need carb counts in these.
We’re slowly working through recipes to add nutrition facts, this is on the list, but in the meantime, I’d recommend MyFitnessPal! 🙂
I don’t care for dates. Can I substitute dried cranberries for the dates?
I haven’t ever tried that, so I don’t know how they’d work out in this recipe. Sorry to not be of more help!
I haven’t tried this recipe out yet but I just wanted to ask if I can replace the maple syrup with honey, will that make it too soft?
I wouldn’t recommend honey on this recipe, sorry!
Oh so yummy! I whipped all the wet ingredients together in my food processor. Easy peasy. Thanks for the recipe!
So glad these were a hit! Thanks Brooke 🙂
How long do they last in the fridge?
1-2 weeks 🙂