Once you try Homemade Marshmallows, you’ll never go back to store bought! Homemade Marshmallows are soft, sweet, and perfectly fluffy. And while they might seem intimidating to make, with the right tools, they’re surprisingly simple and straightforward.
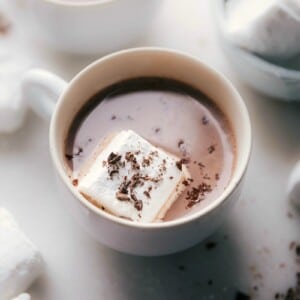
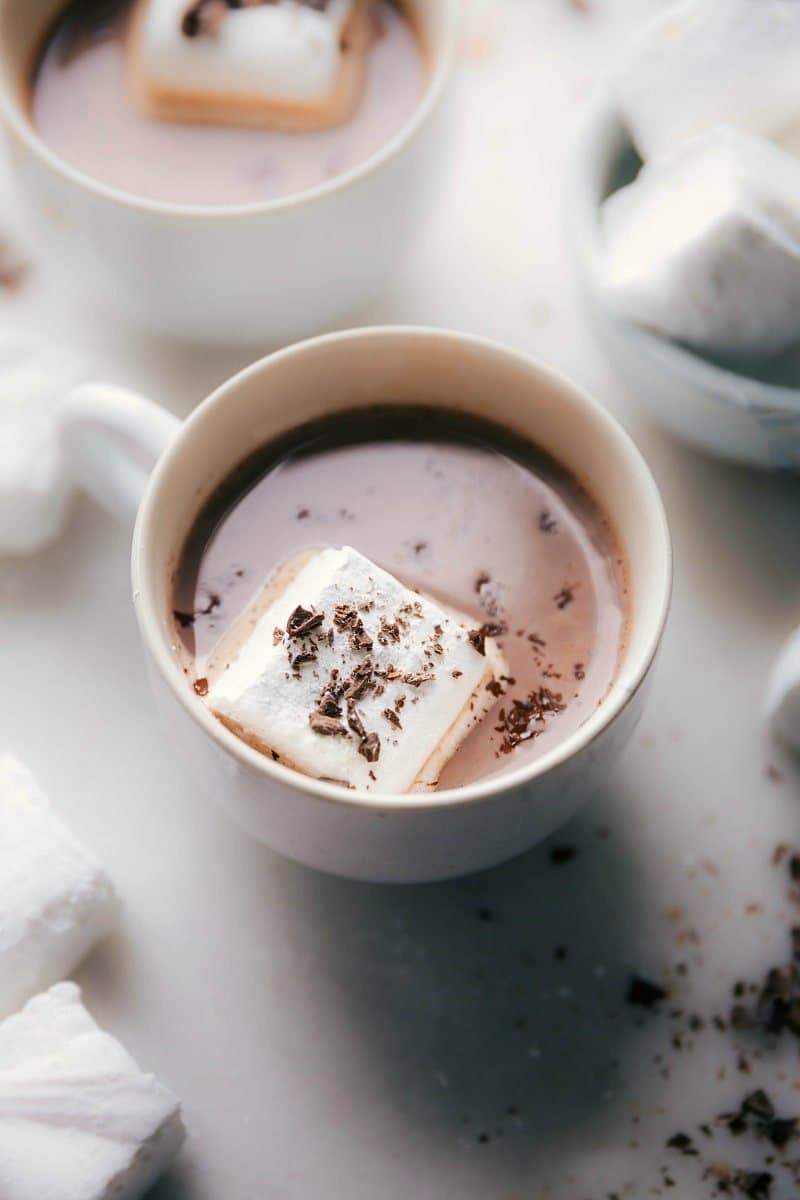
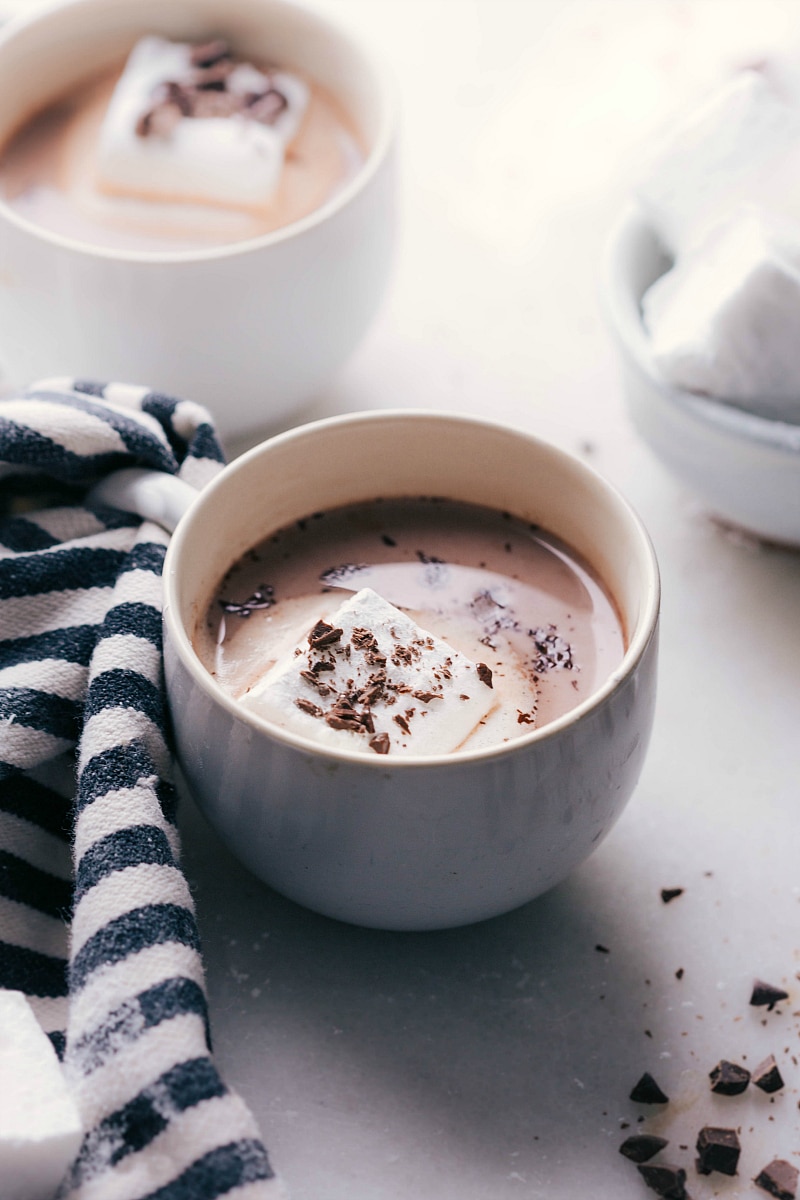
Use Homemade Marshmallows in a cup of homemade Hot Chocolate or serve them in a Hot Chocolate Bar!
Growing up, on the coldest winter days, we’d drink hot chocolate like it was going out of style. Not one, not two, but three cups were just about right after a couple of hours outside making snowmen and having snowball fights. While most of my siblings liked their hot chocolate plain, I always loaded mine up with marshmallows.
So naturally, when I make Homemade Marshmallows, I have to make some hot chocolate to go with them. IMO, Homemade Marshmallows in homemade hot chocolate is one of the ultimate cold weather treats! And if you have friends over, they’ll be SUPER impressed!
This recipe is adapted from one of my new favorite cookbooks: Pastry Love by Joanne Chang. Chang is a James Beard award-winning baker and known around the country for her eight acclaimed Flour bakeries in Boston. This book is one of the most beautiful cookbooks I’ve ever seen, with gorgeous, vibrant photos and very detailed recipes (which I think are a must for a baking book)!
If you’re looking for a Christmas gift for a baker, I’d recommend this book!
Tools needed for Homemade Marshmallows
(The links below are exactly what I use.)
- Candy thermometer: While a lot of online articles will tell you it’s possible to guess the stage of your candy by its appearance or overall timing, I do not recommend the guesswork. It’s so easy to mess up candy (or specifically, these marshmallows) without a thermometer. I highly recommend getting one before starting this recipe.
- KitchenAid® mixer: I’ve tried whipping these marshmallows with a hand mixer and will tell you that did not end well (I burned out the mixer’s motor!). A good stand mixer is a must for making marshmallows.
- 8×8-inch baking pan: The mixture will get transferred to a pan to set up overnight; I recommend an 8×8-inch pan for thick and fluffy marshmallows.
- Parchment paper: Without parchment paper, you may never get your marshmallows out of the pan, so don’t skip the parchment!
How to make Homemade Marshmallows
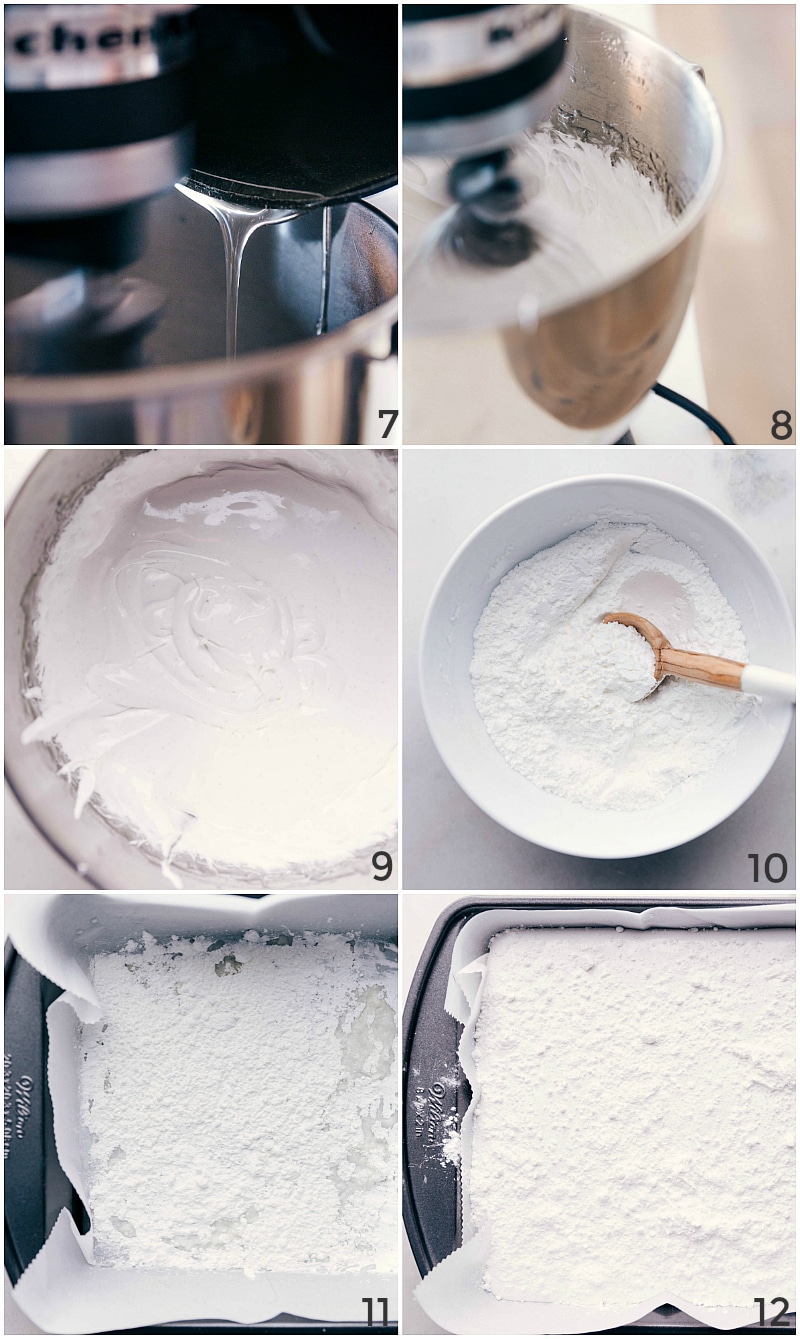
The descriptions below correlate to the two photo collages (one is above this text and one is further down in the post).
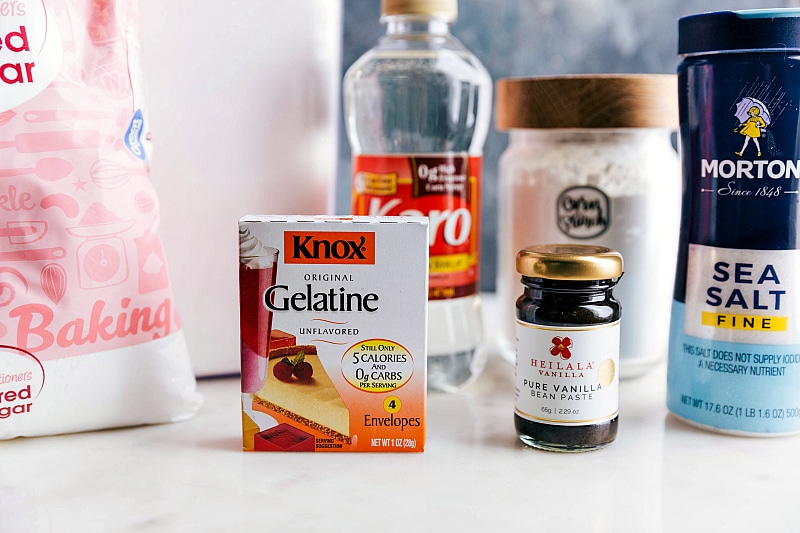
- This is the gelatin I use and recommend; we’ll use three packets total.
- Pour cold water into the base of your stand mixer and sprinkle the gelatin over. This is called blooming.
- The fully-bloomed gelatin is ready to go.
- In a separate heavy bottomed pot, add the remaining ingredients. Stir to combine.
- Place a candy thermometer in the mixture and stop stirring.
- Let boil until the mixture hits exactly 240 degrees F.
- Once the mixture hits 240 degrees F., drizzle it into the gelatin mixture while mixing at high speed
- Continue to beat at high speed for 10-15 minutes or until the mixture is no longer warm.
- This is how the mixture will look after being beaten for 10-15 minutes.
- Meanwhile, combine powdered sugar and cornstarch (this mixture will keep everything from sticking).
- Oil the parchment paper in the pan and then sprinkle that powdered sugar and cornstarch mixture on top
- Transfer marshmallow mixture on top and then sprinkle more powdered sugar and cornstarch on top. Cover and let stand overnight.
Quick Tip
gelatin is not the same as Jello® or other flavored gelatin desserts. Plain gelatin is the part that gels the mixture in desserts, without the sweetener and coloring. You can find unflavored gelatin in the grocery store near the other gelatin mixes.
Why is it called soft ball stage?
We cook the sugar mixture until the thermometer reads 240 degrees F. This is also known as the soft ball stage. This is the stage of candy making where a sugar syrup if dropped in cold water will form into a small and soft ball. If you removed that ball from the water, it flattens in just a few minutes. Hence the name — soft ball. (Nothing to do with the sport of softball!)
How long do Homemade Marshmallows last?
How to store Homemade Marshmallows
Toss the cut marshmallows with the powdered sugar and cornstarch mixture to keep them from sticking together. Then place them in an airtight container and store at room temperature.
How to use Homemade Marshmallows
- Add them to hot chocolate (my personal favorite).
- Make S’mores with them. They do toast differently than store-bought marshmallows, but they’re truly spectacular!
- Use them to make Rice Krispies Treats (you’ll need 16 ounces of homemade marshmallows).
- Make homemade chocolate cups filled with marshmallows. Line a miniature muffin tin with paper liners and brush melted chocolate over the bottom and up the sides. Let set. Fill the center with homemade marshmallows and press to fill. Pour melted chocolate on top and let set.
- Enjoy!
Marshmallow flavor variations
One of the best things about making your own marshmallows is that you get to choose the flavor, and there are so many different choices! Here are a few ideas:
- Add 1 tablespoon vanilla bean paste. The paste adds gorgeous specks of vanilla bean throughout and gives a slightly stronger vanilla flavor than regular vanilla extract. I also love using Mexican or Tahitian vanilla in these Homemade Marshmallows. Vanilla paste is more concentrated than vanilla extract, use 1 and 1/2 teaspoons of paste or 1 tablespoon of the various extracts
- Make peppermint marshmallows. Add 1 and 1/2 teaspoons vanilla extract to replace the vanilla bean paste, and 1 and 1/2 teaspoons peppermint (not mint) extract. You can also use red food coloring for these. This adds a festive, wintry taste to hot chocolate!
- Orange–chocolate marshmallows. Add the zest of an orange to the powdered sugar/cornstarch mixture and up to 1 teaspoon orange extract (with 2 teaspoons vanilla extract replacing the vanilla bean paste). Dip finished marshmallows in chocolate.
Flavoring notes
The rule of thumb for Homemade Marshmallows is to have a total of one tablespoon of flavoring extracts. You can mix and match extracts however you’d like as long as there is 1 tablespoon total.
Make sure to add the flavoring near the end. Because the sugar syrup has such a high temperature, it can cook the alcohol (and flavor) out of the extracts leaving your marshmallows pretty flavorless.
Another way to add flavor is to replace some of the liquid used to bloom the gelatin. You can use steeped tea or freshly squeezed (and strained) fruit juices. If using lemon or lime, I recommend replacing only 1/4 cup water with 1/4 cup lemon or lime juice. Once you’ve mastered making plain marshmallows, it’s fun to experiment with different flavors and variations.
How to package marshmallows
- Once your marshmallows are set, you can choose to dip half in melted chocolate (bittersweet, dark, semi-sweet, milk, white — whatever you like) or drizzle melted chocolate over the tops. You can then add sprinkles or crushed peppermint to the melted chocolate before it hardens if desired.
- Pile set up marshmallows to a white muffin liner and then wrap it all up with cellophane wrapping and a cute bow. (Similar to this)
- You can also put a few marshmallows in a zipper-top plastic bag with a few packets of hot chocolate and this free printable to staple on top. This makes a great gift!
Quick tips
- When putting the candy thermometer in the sugar mixture, make sure it’s not touching the bottom of the pot or you’ll get an incorrect reading.
- While it might not seem like a lot at first, the mixture expands a lot as it’s whipped, so I don’t recommend doubling this recipe. If you need more than 25 marshmallows, I recommend making separate batches.
- Don’t rush the process. Marshmallows need time to rest and fully set up, so plan ahead!
- Make sure to use a very sharp knife when cutting these marshmallows. And keep the sugar/cornstarch mixture handy — you’ll use a lot of it in dusting the knife, the surface you’re working on, and the cut marshmallows. It gets sticky!
More homemade Christmas treats
- Three-ingredient Christmas Candies peppermint hearts, reindeer noses, thin mint cups, and turtles.
- Scotcheroos chocolate peanut butter crunchy treats
- Carmelitas reader favorite
- Honeycomb only five ingredients!
- Toffee the best ever!
Homemade Marshmallows
Ingredients
Blooming Gelatin
- 3 1/4th an ounce packets (6 and 3/4 teaspoons) unflavored powdered gelatin
- 1/2 cup cold water
Stovetop Mixture
- 1 and 2/3 cups white sugar (superfine if you have it, but regular granulated also works)
- 1 cup light corn syrup
- 1/2 cup cold water
- 1/2 teaspoon fine sea salt
Add Later
- 2 teaspoons vanilla bean paste
- 1 teaspoon pure coconut extract (or an additional 1 teaspoon vanilla bean paste)
- 1/2 cup cornstarch
- 1/2 cup powdered sugar
- 1-3 teaspoons vegetable oil
Instructions
- BLOOMING GELATIN: Pour the 1/2 cup of cold water into a stand mixer fitted with a whisk attachment. Sprinkle the gelatin evenly over the water and set aside to bloom (soften and absorb water).
- STOVETOP MIXTURE: In a small heavy-bottomed saucepan, combine the sugar, corn syrup, 1/2 cup water, and salt. Stir together to moisten the sugar. Then, without stirring, bring to a boil over high heat. Insert a candy thermometer into the mixture, making sure it doesn't touch the bottom of the pot (this will give an incorrect reading). Cook the sugar syrup to 240 degrees F, (soft ball stage).
- STAND MIXER: As soon as the mixture reaches 240 degrees F, remove it from the heat. Turn the mixer on high speed and slowly stream the hot sugar mixture into the softened gelatin. Make sure to slowly drizzle the syrup on the sides so it doesn't splash all around and make a mess. Once all the syrup has been drizzled in, whip on high until it is cool to the touch, about 10-15 minutes. The mixture will turn from milky white to very fluffy and voluminous.
- FLAVOR: In the last minute or so of whipping, add in the vanilla bean paste and coconut extract.
- CORNSTARCH/POWDERED SUGAR: While the marshmallow mixture is whipping, sift together the cornstarch and powdered sugar in a small bowl.
- PAN: Line the bottom of a 8x8-inch square baking pan with parchment paper and then rub the parchment paper with a little vegetable oil. Sprinkle a few tablespoons of the cornstarch-powdered sugar mixture evenly across the parchment.
- TRANSFER: When the marshmallow mixture has thickened and cooled, scrape it into the prepared baking pan and smooth it out with a spatula dipped in water. Be prepared -- the mixture is extremely sticky! Dust the top with a few tablespoons of the cornstarch-powdered sugar mixture (don't use it all). Make sure all parts of the marshmallow cool completely, and then tightly wrap the pan with plastic wrap. Let it sit overnight at room temperature.
- CUT THE MALLOWS: The next day, run a paring knife along the sides of the baking pan and invert the marshmallow slab onto a cutting board. Peel off the parchment and use a sharp knife (dipped in hot water and then dried off) to cut the marshmallow into cubes about 1-½ inches square (5 rows by 5). Dip the knife in hot water and dry it off before every slice for easiest slicing. Toss each cube in the remaining cornstarch-powdered sugar mixture to coat.
- STORAGE: Marshmallows can be stored in an airtight container at room temperature for up to 1 month.
Nutrition
Nutrition information is automatically calculated, so should only be used as an approximation.





I’ve been dyinggggg to make homemade marshmallows and I’m sure they’re especially luscious in hot chocolate!
Love it.
Chelsea, these marshmallows are SO freaking amazing, I love it!
Ooh I have always wanted to make homemade marshmallows – these look fantastic!
I’ve never made marshmallows, so I definitely need all of these helpful tips.
So fun! I’ve yet to make homemade marshmallows. Bet it would be fun.
Have a wonderful day!
I loooove homemade marshmallows and now I’m totally craving hot chocolate.
I adore marshmallows and they are on my culinary bucket list for sure!
I love hot chocolate and usually try to resist marshmallows, but these? I won’t be able to. Bring on all the adorable, fluffy, homemade goodness!