You won’t miss the meat in these Vegetarian Gyros–they’re loaded with robustly-seasoned and perfectly roasted chickpeas, a medley of veggies, and our favorite Tzatziki sauce. This easy, weeknight meal can be ready in about 30 minutes or less if you’ve got an air fryer! (Air Fryer and Oven Instructions included.)
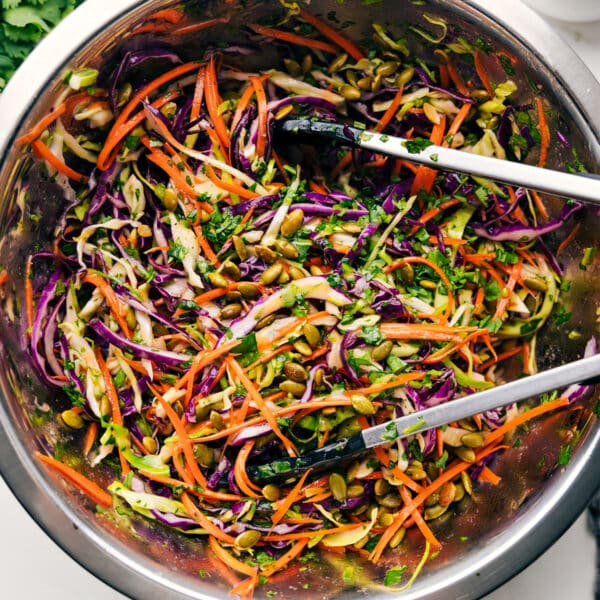
Pair these gyros with a good tasty, veggie-filled salad like this Greek Salad or this Mediterranean Pasta Salad.

Vegetarian Gyros
The other day, my husband and I were chatting about the place we want to visit next when travel restrictions lessen a bit and we both agreed Greece is the top spot on our bucket list. While my husband is more interested in history and architecture, I’ll admit the food is my biggest driving factor.
I love Greek food — the flavors, the freshness, the vibrancy, and don’t even get me started on feta cheese — yum!
While I’ve shared some Greek-inspired Gyros over the years (these Chicken Gyros are a family favorite), I decided it was time to share a vegetarian version that uses chickpeas as the base. I wasn’t totally sure how these would go over with the family, since they love chicken gyros so much, but everyone was obsessed with this recipe! Bonus — they’re actually a whole lot quicker to make than meat-filled gyros, which is nice for a quick weeknight dinner.

Let’s Chat Chickpeas
The base of these vegetarian gyros are chickpeas– also called garbanzo beans — they’re one and the same. While it may seem like these gyros might not be as filling without the meat, chickpeas are actually a great source of plant-based protein, making them very satiating.
For these Vegetarian Gyros, we tested the process of roasting the chickpeas both in the oven and air fryer. While they turn out similarly, the air frier chickpeas were the favorite and, honestly, I loved how quick it was. They roast quicker and you don’t have to wait for the oven to preheat. Below is a quick rundown of both methods for cooking chickpeas. If you do have an air fryer, you’ve got to try chickpeas in it! (By the way, here’s the exact Air Fryer I use and love).
To make the chickpeas in the oven: Toss chickpeas, olive oil, and seasonings on a greased tray until well coated; spread the chickpeas out in an even layer on the tray. Roast for 18-22 minutes. (We like them best at 20 minutes.) Roast until they’re crisp, but not hard.
To make the chickpeas in an air fryer: Heat the air fryer to 390 degrees F. Toss chickpeas, olive oil, and seasonings in a bowl until well coated. Add all the chickpeas to the air fryer basket and cook for 11-14 minutes (We like them best at 12 minutes) or until crisp, but not hard. Shake the air basket at the halfway point to ensure even frying.

Vegetarian Gyro Tips
- Thoroughly dry the chickpeas before roasting. Spices won’t adhere well to wet chickpeas, and they’ll end up steaming more than roasting.
- Make sure the chickpeas have plenty of room to roast. If the chickpeas are crowded on a sheet pan, they won’t get that nice browning and crisp exterior.
- Warm or char the pita bread. Warm pita not only folds nicer (and doesn’t rip in half), it also tastes better. See the “quick tip” box below for how I char the pitas.
- Serve buffet-style. This recipe makes a great meal to serve to a group — simply set out all the toppings and let people assemble their vegetarian gyros exactly how they’d like.
Quick Tip
To char pita bread: Spray both sides of the pita bread with olive oil cooking spray and “grill” the bread on the stovetop over the open flame (medium-low heat) until slightly charred, flipping with tongs as needed, about 10-15 seconds per side. Those of you with electric ranges can warm it (covered with a damp paper towel) in the microwave. It won’t char the bread, but it will keep it much more pliable.

Tzatziki Sauce
I like making this Tzatziki Sauce in advance because it becomes more flavorful as it sits in the fridge. It sure makes dinner assembly for these Vegetarian Gyros that much quicker later on.
A few tips for this sauce:
- Make sure to use good full-fat, plain Greek yogurt. Use full-fat yogurt to avoid watery or bland tzatziki. (We love Greek God’s® plain Greek yogurt best!)
- Squeeze liquid out of the cucumber. Cucumber has a very high water content and will water down the sauce or make it bland. Wring out excess liquid a few times with paper towels or cheesecloth before adding to the mix. (See “quick tip” below.)
Vegetarian Gyro Toppings
Beyond the chickpeas and Tzatziki sauce, which we’ve already discussed, you’ll want to add more toppings into the pita bread to bulk it up as well as add texture and flavor. Here are our favorite additions:
- Lettuce. We like using green leaf lettuce or butter leaf lettuce best.
- English or Persian cucumbers. Persian cucumbers are sometimes labeled as mini/salad cucumbers; see “quick tip” box below”
- Thinly sliced red onions. If you’re sensitive to the flavor of raw red onion, soak the diced onions in salted ice water for 10 minutes. Drain thoroughly before adding on these vegetarian gyros
- Halved cherry tomatoes.
- Feta cheese. Feta adds such a nice flavor and texture but also acts as a great seasoning since it’s fairly salty. If you don’t add feta cheese, you may want to top each gyro with a pinch of salt.
- Fresh lemon. Lemon pulls all the flavors together and adds a zip of freshness and tang.
Quick Tip
We use English/Persian cucumbers for the Tzatziki sauce and for topping these Vegetarian Gyros. Regular cucumbers don’t work as well because they lack flavor and are too watery.

Storage
- Once assembled these vegetarian gyros should be enjoyed immediately and don’t store well. However, you can store the individual components in an air tight container in the fridge for 4-5 days and assemble fresh whenever you’re ready to enjoy again.
More Vegetarian Meals
- Vegetarian Sushi Bowls with Sriracha-mayo sauce
- Vegetarian Tikka Masala with chickpeas!
- Sweet potato & black bean Vegetarian Tacos
- Caprese Quinoa Salad with a balsamic vinaigrette
- General Tso Chickpeas with lots of veggies

Vegetarian Gyros
Equipment
- Sheet pan (15" x 10")
Ingredients
- 1/4 cup grated English cucumber or Persian cucumber
- 1/4 cup plain Greek yogurt I love Greek Gods
- 2-1/4 teaspoons olive oil
- 3/4 teaspoon red wine vinegar
- 1 lemon
Instructions
- Preheat oven to 400℉. Drain and rinse chickpeas and dry in a salad spinner or with paper towels (wet chickpeas won’t roast as nicely). Generously grease a sheet pan with cooking spray.
- Add chickpeas to the prepared pan. Drizzle on oil, seasonings, salt, and pepper to taste (I add 1/2 teaspoon salt and 1/4 teaspoon pepper). With your hands, toss everything until well coated; spread chickpeas in an even layer (not overlapping) on the tray. Roast 18–22 minutes, tossing or shaking the tray at the halfway mark. (I like them best at 20 minutes). Roast until they’re crisp but not hard. Remove and set aside. (See note 2 for air frying directions.)
- Meanwhile, grate cucumber with the large holes of a cheese grater. Line a small bowl with a few paper towels (or a clean kitchen towel) and place grated cucumber on top. Squeeze out as much extra moisture as you can from the cucumber to keep the sauce from being watery. Once it’s drained, zest and juice lemon to get 1/4 teaspoon zest and 1-1/2 teaspoons juice. Add to a medium bowl with cucumber and the rest of the sauce ingredients. Season to taste with salt and pepper (I add 1/8 teaspoon salt and a pinch of pepper). Cover bowl and place in fridge until ready to serve.
- Spray both sides of the pita bread with cooking spray and “grill” bread on the stovetop over an open flame (on medium heat) until slightly charred, about 10–15 seconds per side (flip with tongs). Once charred, immediately fold in half and cover with a clean towel until ready to serve. Alternatively, warm (covered with a damp paper towel) in the microwave.
- Spread hummus or tzatziki sauce on one side of the warmed pita bread. Add half the chickpeas (press into sauce to help them stay better) and add desired toppings such as thinly sliced red onions, thinly sliced cucumbers, diced cherry tomatoes, and feta cheese. Drizzle tzatziki sauce generously over everything. If desired, squeeze fresh lemon on top. Fold up and enjoy immediately!
Recipe Notes
Nutrition
Nutrition information is automatically calculated, so should only be used as an approximation.


My family and I loved this!
I’m not a fan of Chickpeas but I was so surprised at how good this was.
I’ve made it multiple times and would make again.
This is great for a summer afternoon, very refreshing taste.
I am so thrilled to hear this! Thanks so much! 🙂
Thank you for the awesome recipe. Made a lovely lunch!
So glad to hear that! Thank you!
Will be making this soon with few subs i never had gyros before will dm you if i make this and let you know how it goes Thanks Ramya
Hope you love these! 🙂