Tiny Chocolate Chip Cookies are the best! They’re soft, chewy, chocolatey, and just plain fun. Honestly, why is everything better when it’s mini?


Author’s Notes
From My Little Baker to You!
This recipe comes from my 6½-year-old daughter. Okay, not the measurements because I’ve tested (and re-tested) those, but the idea was all hers.
She has become quite the little baker lately. Most nights she asks me to make a treat with her, and if she doesn’t, her brothers ask her to whip something up for them. They’re more than happy to enjoy the treats without doing any of the work, haha!
Her all-time favorite thing to make is what she calls “sprinkle” cookies. Everyone is obsessed with those. But after one too many batches of cake batter bark, we ran out of sprinkles the other night.
So she turned to me and said, “Mom, what if we make really teeny, itty-bitty, tiny chocolate chip cookies? With chocolate chips. And some with tiny M&Ms?” And that was all I needed to hear. I was in!
These really are so fun and absolutely delicious. I hope you love them!


Tips For Making Tiny Chocolate Chip Cookies
- Chill for thicker cookies: Longer chilling (up to 24 hours) deepens flavor.
- Weigh the dough: For truly uniform minis, weigh each ball (10g) so they bake evenly.
- Use a light-colored baking sheet: Dark sheets brown bottoms too quickly.
- Don’t over-bake: Pull when centers look slightly underdone; they’ll set on the sheet.
- Use soft, fresh brown sugar: Avoid hard, clumpy sugar!

More Cookie Recipes:
Desserts
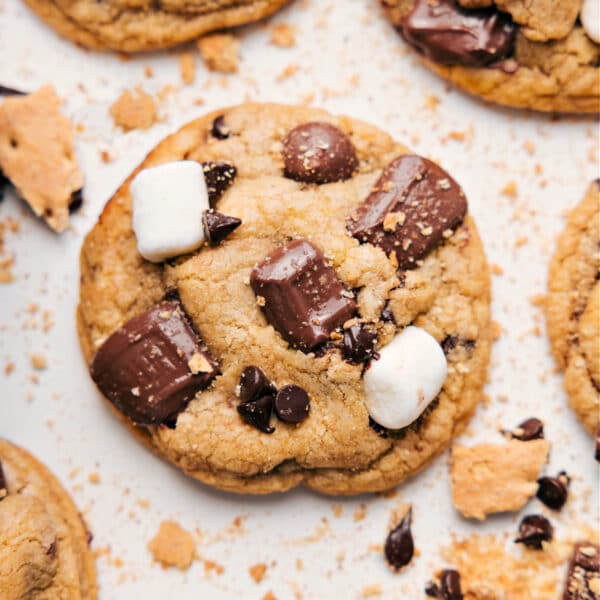
S’mores Cookies
Desserts
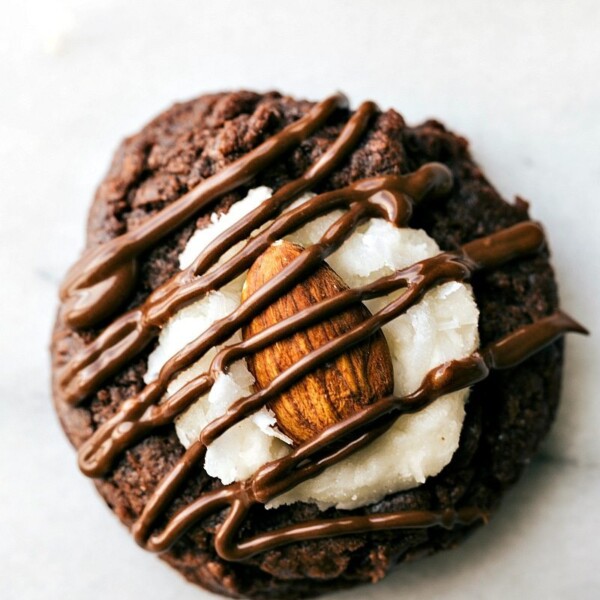
Almond Joy Cookies Recipe
Cookies
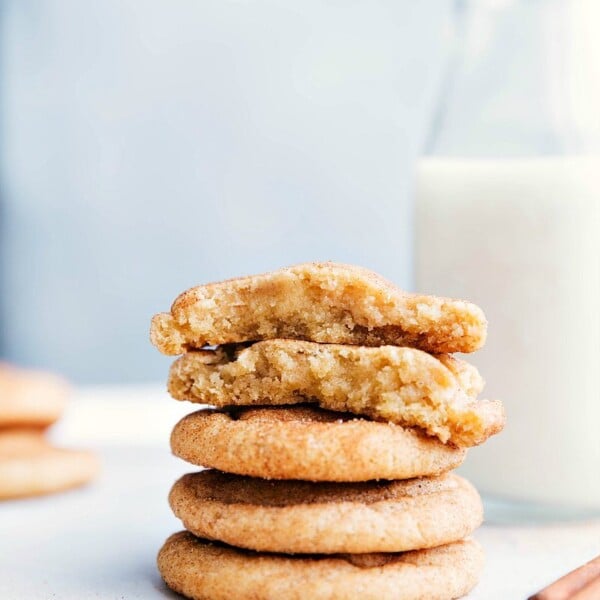
BEST Snickerdoodle Recipe
Breakfast
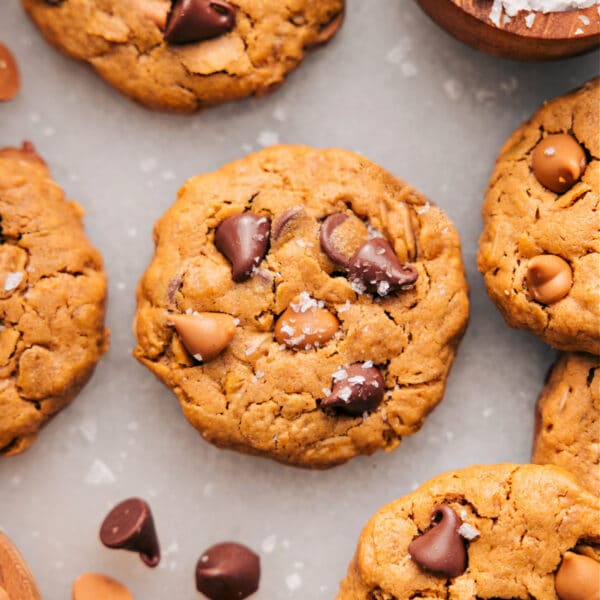
Breakfast Cookies

Tiny Chocolate Chip Cookies
Equipment
- Large sheet pan plus baking mat or parchment paper
Ingredients
- 8 tablespoons unsalted butter 1 stick
- 1/2 cup light brown sugar tightly packed
- 1/3 cup granulated sugar
- 1 large egg
- 1 teaspoon vanilla extract
- 2 tablespoons maple syrup see note 1
- 1 teaspoon cornstarch
- 1/2 teaspoon salt
- 1/2 teaspoon baking soda
- 1/2 teaspoon baking powder
- 1-3/4 cup flour
- 1 cup mini chocolate chips plus more for topping
- Flaky sea salt optional, for topping
Instructions
- In a large microwave-safe bowl, melt the butter. Set aside to cool to room temperature, as hot butter will melt the sugars and make the cookies greasy.
- Once the butter has cooled to room temperature, add both sugars and using a whisk, mix briskly for 30 seconds. Stir in the egg, vanilla, and maple syrup, then whisk again until fully emulsified, smooth, and creamy, about 1 minute.
- Add cornstarch, baking soda, baking powder, and salt. Whisk until combined. Add flour and chocolate chips. Switch to electric hand mixers and mix until just combined. Don’t over-mix.
- Cover and refrigerate dough for 20 minutes or until firm enough to roll. Roll dough into small balls (10 grams each or 1/2 tablespoon). Place on a parchment-lined pan and chill for another 10 minutes.
- Heat oven to 325°F. Line a baking sheet with parchment paper or a silicone baking mat. Arrange 14-18 cookies at a time, leaving enough space for some spreading.
- Bake for 6-8 minutes, until edges are just starting to brown. Remove while centers still look ever so slightly underbaked. They will finish baking on the tray.
- Remove from the oven and immediately press some extra chocolate chips on top. Cool on the tray for 5 minutes, then transfer to a wire rack.
Recipe Notes
Nutrition
Nutrition information is automatically calculated, so should only be used as an approximation.
Tiny Chocolate Chip Cookies Ingredients
| Ingredient(s) | Helpful Tip |
|---|---|
| Butter & Sugars | Use unsalted butter for better flavor control. Cool before mixing so cookies aren’t greasy. Light brown sugar adds mild caramel flavor; granulated sugar helps to crisp the edges. |
| Egg & Vanilla | Bring egg to room temp for even mixing. Pure vanilla gives the best flavor. |
| Maple Syrup & Cornstarch | Use pure maple syrup for subtle sweetness and moisture. Cornstarch keeps cookies soft and chewy. |
| Salt, Baking Soda & Baking Powder | Salt balances sweetness. Baking soda and baking powder work together for the right lift and texture. Make sure they’re fresh! |
| Flour & Chocolate Chips | Spoon and level flour for accuracy. Use mini chocolate chips, as regular chips can overpower these tiny chocolate chip cookies. |
Storage
Freeze dough, not baked cookies: Scoop onto a sheet pan, freeze until firm, then store in an airtight container or freezer bag for up to 3 months. Bake straight from frozen with 1–3 extra minutes or thaw in the fridge and bake as usual.
More On Maple Syrup
Pure maple syrup comes from the sap of maple trees and adds moisture, sweetness, and warm flavor to these tiny chocolate chip cookies. It also makes them extra soft and chewy. Don’t mix it up with pancake syrup, which has added ingredients.