Halloween Donuts are a blast to decorate with four fun and simple ideas, and they taste as amazing as they look!
Love Halloween? Me too! Check out these 15 Halloween Breakfast Ideas, Halloween Cookies, FREE Halloween Printables, and these simple Halloween Treats.


author’s note
A Donut Costume Party on a Plate!
I’ve always gone a little overboard with Halloween. Between decking out the house with spider webs, carving pumpkins with the kids, and planning themed party snacks, it’s safe to say it’s one of my favorite holidays. Every year I try to add at least one new fun food idea to the mix, and these Halloween Donuts quickly became a tradition.
What I love most is how easy they are to pull together. I’m not making donuts from scratch for these (though you totally could if you want to!). Instead, I grab a box of glazed, powdered, or chocolate-frosted donuts and focus all my energy on the fun part: decorating.
My kids love jumping in to make vampire fangs stick out of their donuts or trying to get the pretzel “legs” just right on the spiders. Watching their creativity makes these treats even more memorable.


Halloween Donut #1: Vampire Donuts
Ingredients needed:
- a dozen plain, glazed donuts (the ones pictured are Krispy Kremes; not sponsored)
- plastic vampire fangs, wash and dry thoroughly before using
- edible candy eyes, I like getting the small and large for a “scarier” looking vampire)
- red edible gel, you know, for the ghoulish dramatic effects
And now you’re in business for these donuts!
How to:
- Partially close and then press the fangs centered into the donut a little more than halfway down the donut.
- Pipe some edible gel from one side of the fangs down the donut. (Gel tends to run; use as little as possible.)
- Use edible gel to attach the eyes — put a little gel on the back of the eyes and press on the top half of the donut.
- Serve quickly after assembling. (These don’t do well being made ahead of time.)

Halloween Donut #2: Spider Donuts
Ingredients needed:
- Mini chocolate–frosted donuts generally in the treats/cookie aisle of the grocery store
- Edible candy eyes
- Pretzel twists
- Cream cheese frosting or similar prepared frosting
How to:
- Use a knife or your hands to break pretzels to look like spider legs. Heads up: there will be a lot of casualties and it’s fairly frustrating at the start, but it gets easier.
- Gently press the tops of the broken pretzels into the sides of the donut to look like legs.
- Pipe* a small amount of frosting on the back of the edible candy eyes and attach to the donut. Alternatively, you can melt chocolate and attach them that way.
*To pipe: Fill a small plastic bag with frosting or melted chocolate and cut off the very tip of the bag. Pipe frosting through the bag onto the back of the edible eye candies.
Quick Tip
When piping frosting, try these tips: (1) Fold the bag’s edge to avoid mess. (2) Twist the top to prevent leaks. (3) Make a tiny snip for better control.

Halloween Donut #3: Mummy Donuts
Ingredients needed:
- Mini powdered sugar donuts generally in the treats/cookie aisle of grocery store
- Small edible candy eyes
- White chocolate chips plus a little vegetable oil
How to:
- Microwave 1/2 cup white chocolate chips with 1/4 tablespoon vegetable oil for 30 seconds, stir, then 25 more seconds. Stir until melted, adding more oil if needed.
- Spoon melted chocolate over the top 2/3 of each donut. Tap to even out.
- Place donuts on a baking sheet and let dry. Repeat with remaining donuts.
- Put leftover melted chocolate in a plastic or frosting bag. Cut a small corner and pipe “bandages” on the donuts. Add sprinkle eyes while still wet.

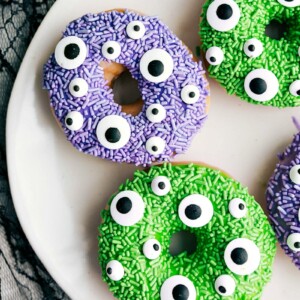
Halloween Donut #4: Monster Donuts
Ingredients needed:
- Edible candy eyes (I like getting the small and large for more variation in the “monster”)
- Green sprinkles
- Purple Sprinkles
- Red edible gel
How to:
Since this one is a *tiny* bit more involved; I’ve included the full procedure in the recipe card below.
More Halloween Fun:
Desserts
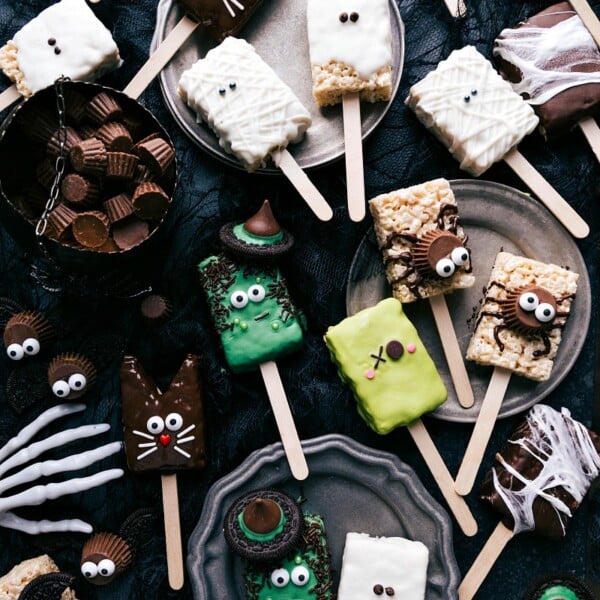
Halloween Rice Krispie Treats
Desserts
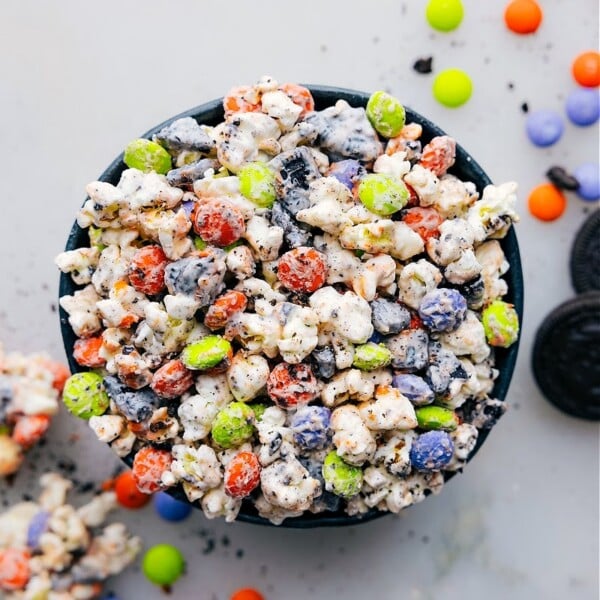
Halloween Popcorn
Halloween
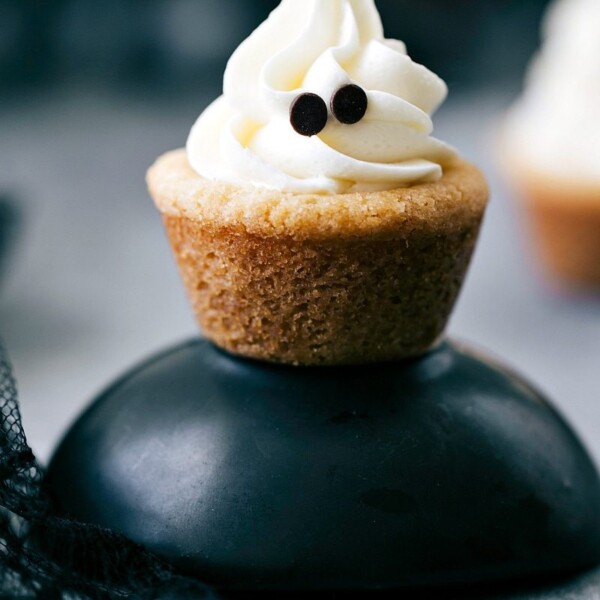
Ghost Cookies
Quick And Easy
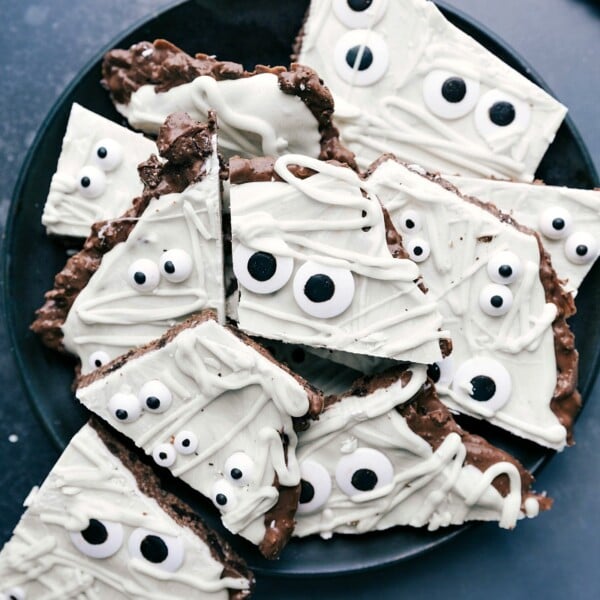
Mummy Bark
Halloween Donuts
Video
Equipment
Ingredients
- 12 prepared plain glazed donuts I use Krispy Kreme
- 2 cups powdered sugar
- 1/3 cup heavy cream or whole milk
- 1/2 teaspoon vanilla extract
- 1/8 teaspoon salt
- Colored jimmies sprinkles I use green and purple
- Candy eyeballs an assortment of small and large
- Edible gel
Instructions
- For monster donuts, whisk powdered sugar, heavy cream, vanilla, and a pinch of salt until smooth. Dip the tops of the donuts into the glaze, shaking off excess. Dip into sprinkles while still wet. Attach eyes with edible gel. Let glaze set for at least 20 minutes
- In addition to the monster, you can also make vampire, mummy and spider donuts. See the post above for instructions!
Recipe Notes
Nutrition
Nutrition information is automatically calculated, so should only be used as an approximation.


As Chelsea’s employee I have made these every year with my kids and they LOVE them! So easy, and so so cute!
That video was so well done! What fun!
Thank you Leigh!!