Chili Con Carne is a mix of slow-cooked beef, tomatoes, onions, and peppers with just the right amount of spice. Top with your favorite chili toppings!
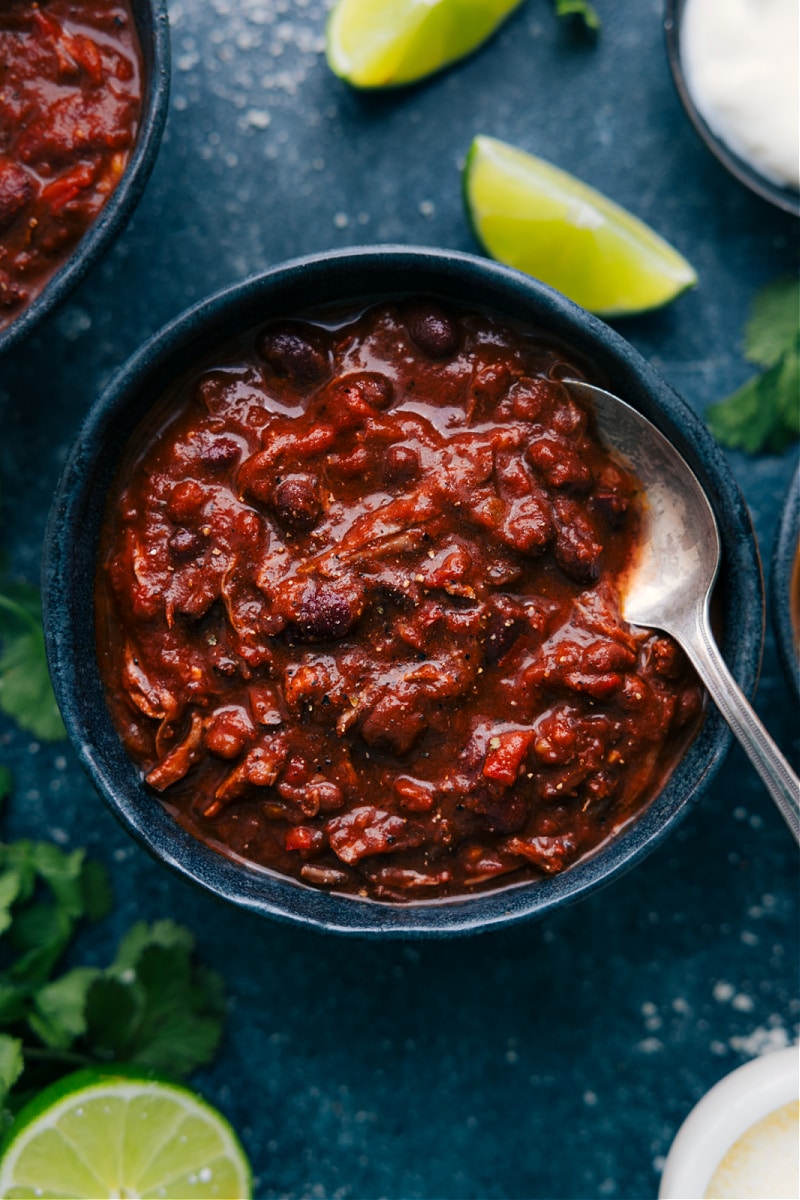
The Best Chili Con Carne!
My Crockpot Chili recipe, published years ago, remains a fan favorite with so many readers reporting winning chili cook-off contests with it.
For weeks, I’ve been hard at work on this new chili recipe and I’m confident it’s going to blow you away! With the same bold flavor and just the right amount of heat, this new recipe is sure to become a favorite.
And the best part? This recipe makes a massive batch, so you can feed a crowd, enjoy leftovers throughout the week, or freeze for later.
Quick Tip
Heads-up: This recipe is different from an authentic Texan chili which never includes beans or canned tomatoes and is made with cubes of beef. I don’t want to offend any true Texans!
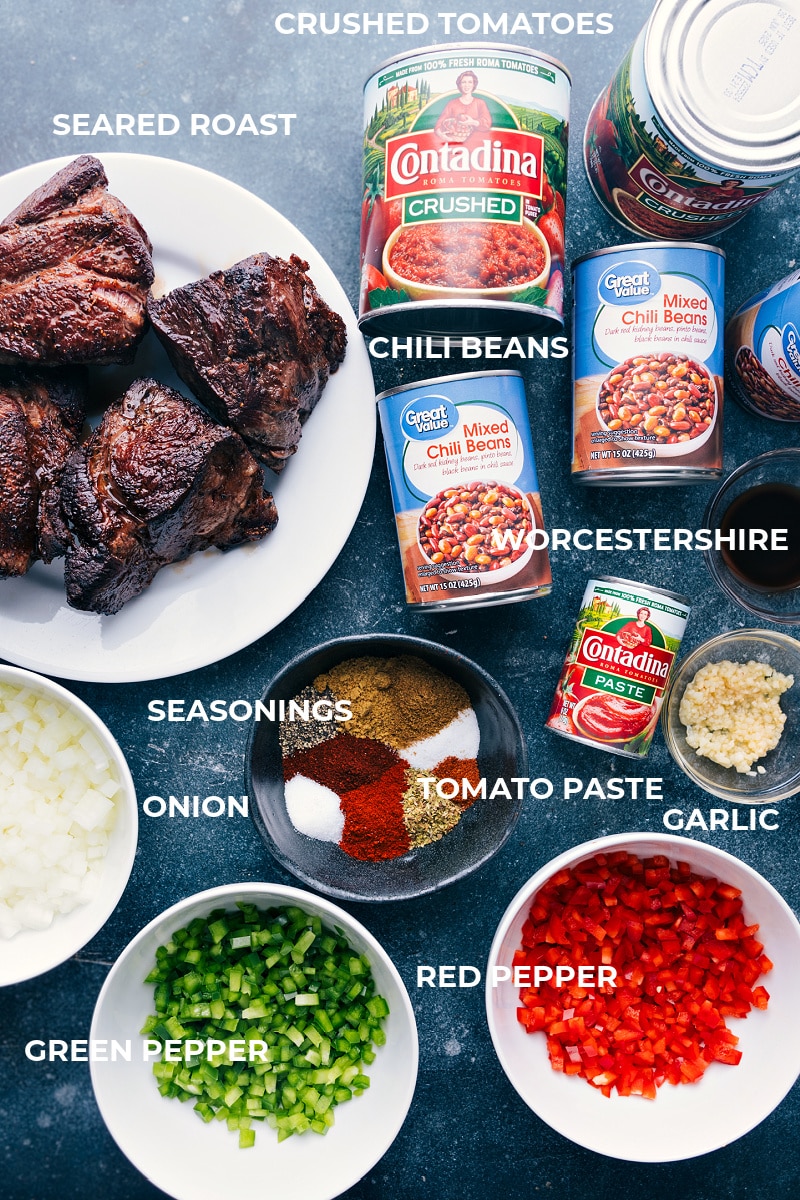
Chili Con Carne Ingredients
A few ingredients worth talking about:
- Chili beans are cooked in chili sauce with spices like chili powder, garlic, onion, and cumin, giving your chili a rich flavor with no extra effort.
- For the best flavor, I’m using chuck roast, known for its rich flavor and soft texture, perfect for a hearty chili.
- Choose good crushed tomatoes like Cento Marzano®, Carmelina Marzano Italian®, or Muir Glen® for a fresh, sweet, and balanced taste. These tomatoes are thicker and smoother, making a thicker chili base.
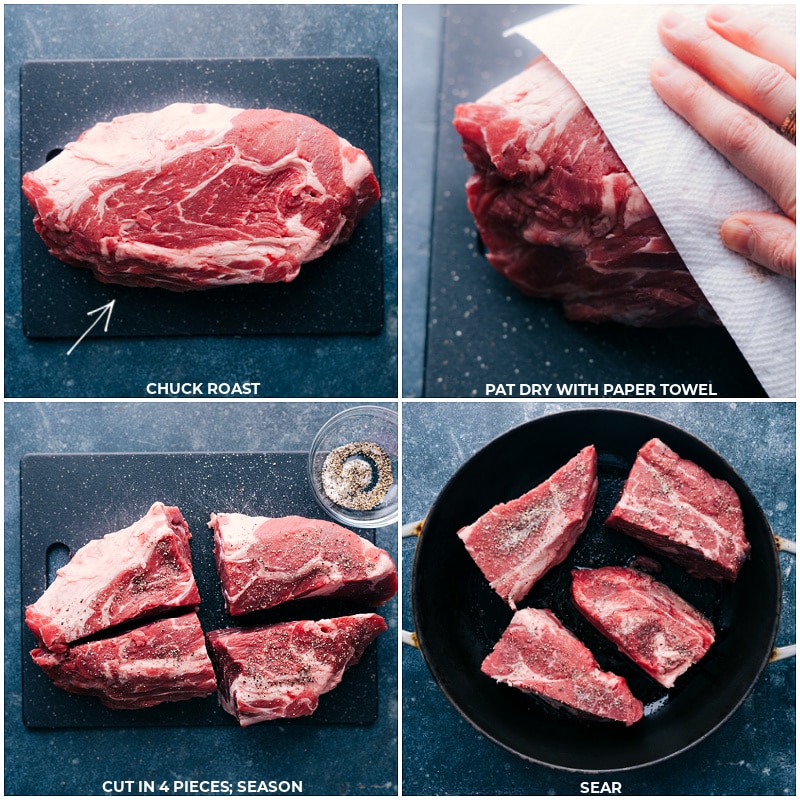
Why Brown The Beef First?
Browning the beef before adding it to this Chili Con Carne is an important step that adds a significant amount of flavor and complexity to the dish.
The process of browning creates a rich, caramelized crust on the surface of the beef that results in a much more robust and savory flavor.
Why? This is because the heat of the pan causes the meat to undergo the Maillard reaction, which creates new and complex flavor compounds. Then, by dissolving the bits (also known as fond) left on the skillet after browning into the sauce, you’re able to enhance the overall flavor of the chili.
Spice Levels
This chili has just the right amount of heat to balance its rich flavors, but for those who prefer a milder taste, the added toppings like cheese and sour cream help temper the spiciness.
To make the chili con carne less spicy, reduce or even fully omit the amount of cayenne pepper. Be sure to use canned chili beans with a mild sauce. You can also reduce the chili powder, but there will be some flavor missing.
To make the chili con carne spicier, increase the amount of cayenne pepper–up to a full teaspoon. If desired, you can also use a spicy variety of canned chili beans.
Quick Tip
Remember, adding more heat to a chili is easy, but fixing a chili that’s become too spicy can be difficult. Go slow and easy when amping up the spice!
Chili Con Carne Toppings
Here are some popular toppings for chili con carne:
- Grated sharp (or extra-sharp) cheese: A staple chili topping, shredded cheese adds so much! Grab sharp Cheddar from the block and freshly grate for this chili.
- Sour cream: Here’s another creamy topping that helps to balance out the heat of the chili. Lite or full-fat–either works great!
- Sliced jalapeños or diced onions: Jalapeños are perfect for those who like an extra kick of heat and a crunchy texture.
- Avocado or guacamole: Add a fresh, creamy flavor and a good dose of healthy fats.
- Fresh cilantro: This fresh and fragrant herb adds a pop of color and freshness.
- Fresh lime: Lime provides a nice touch of acidity and adds a nice vibrancy.
- Crushed tortilla chips: Add a crunchy texture and a hint of corn flavor with tortilla chips crushed and sprinkled on top.
What To Serve On The Side
- Rice: White rice or brown rice can be a great option to serve with chili con carne.
- Cornbread: A classic and delicious way to serve chili con carne, cornbread (or cornbread muffins) goes perfectly with the flavors of chili.
- Baked potatoes: A baked potato with a generous spoonful of chili on top is a hearty meal in itself.
- Salad: Serve a simple garden salad to lighten up the meal and provide some greens.
- Coleslaw: A side of tangy coleslaw can help cut through the richness of the chili.
- Grilled vegetables: Serve chili con carne with grilled vegetables, like zucchini or bell peppers, for a delicious contrast in texture and flavor.
- Garlic bread: A classic side, garlic bread is perfect for dipping into chili.
- Biscuits: Drop biscuits are a classic Southern side dish that go well with chili con carne.
Repurpose Leftover Chili Con Carne
Here are some fun ways to re-purpose your leftovers into unique meals throughout the week:
- Chili Mac: Mix the chili with cooked macaroni and top with grated Cheddar cheese.
- Chili-Stuffed Baked Potatoes: Scoop chili onto baked potatoes and top with shredded cheese and sour cream.
- Stuffed Bell Peppers: Hollow out bell peppers and fill with chili and cheese.
- Chili nachos: Layer tortilla chips with chili, shredded cheese, and your favorite toppings.
- Chili fries: Top hot french fries with chili and melted Cheddar cheese.
- Sliders: Spoon chili onto mini buns and top with shredded cheese, pickles, and other toppings.
- Chili dogs: Top hot dogs with chili, cheese, and your favorite toppings.
Storage
Storing Chili Con Carne
Chili Con Carne can be stored in the refrigerator for up to 5 days.
To freeze, let the chili cool to room temperature, then transfer it to an airtight container or freezer bag, removing as much air as possible. Label the container with the date and name of the dish. The chili can be frozen for up to 3 months. When ready to eat, let the chili thaw in the refrigerator overnight. Reheat in a saucepan over low heat until heated through, or in the microwave in 30-second intervals, stirring between each interval.
More Delicious Beef Recipes
- Beef Stroganoff with a savory and rich gravy
- Mississippi Pot Roast with Ranch seasoning mix!
- Crockpot Roast with potatoes and carrots
- Shredded Beef Enchiladas made in the slow cooker or pressure cooker
- French Dip Sandwich with au jus sauce

Chili Con Carne
Equipment
- 6-quart Crock-Pot 6-quart, see note 1
Ingredients
- 4 pounds beef chuck roast
- Salt and pepper
- 1 tablespoon olive oil
- 2 bell peppers finely diced
- 1-1/2 cups finely diced yellow onion
- 1 tablespoon minced garlic
- 3 (15-ounce) cans chili beans in mild sauce undrained
- 2 (28-ounce) cans crushed tomatoes see note 3
- 1 (6-ounce) can tomato paste
- 4 tablespoons chili powder see note 4
- 1 tablespoon dried oregano
- 1 tablespoon sugar
- 2 teaspoons cumin
- 2 teaspoons paprika
- 4 teaspoons beef bouillon powder
- 1/4 teaspoon ground cayenne pepper
- 2 tablespoons Worcestershire sauce
Instructions
- Pat beef dry with a paper towel. Cut the beef into 4 equal pieces. Set out a small bowl with 1/2 teaspoon each of salt and pepper. Season one side each piece of the beef.
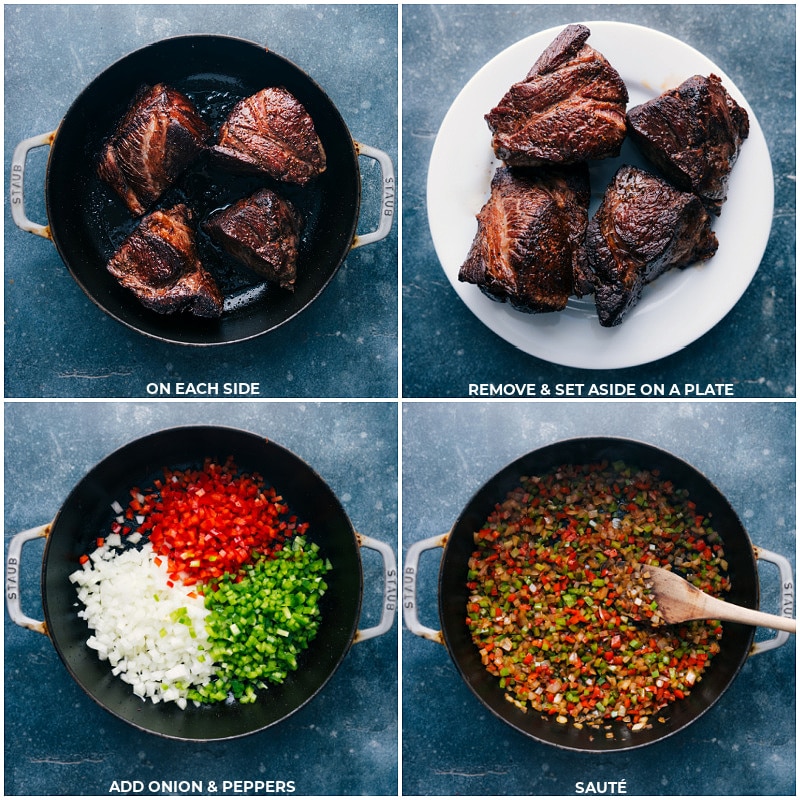
- Heat oil in a large pan over high heat. Once oil is hot, add the beef in a single layer. Allow it to sear and brown on every side, around 3–4 minutes per side. Rotate beef with tongs; you’ll know that each side has been seared perfectly if the beef releases from the pan easily and can be rotated without resistance. Once seared, transfer the beef to a plate and set it aside. Turn off heat and let pan slightly cool.
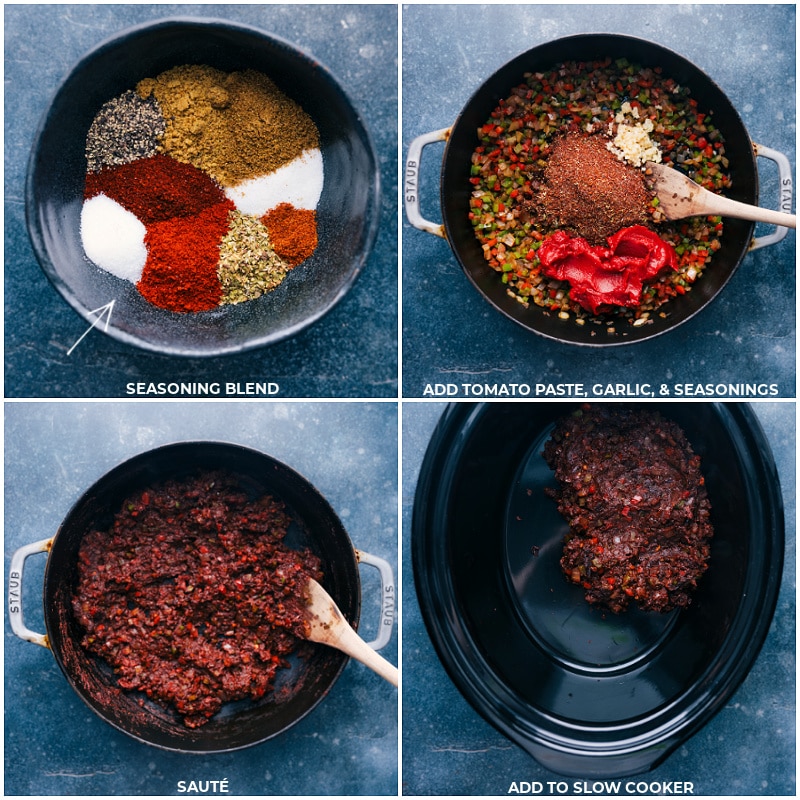
- Finely dice the bell peppers and onion, and mince the garlic. Return the pan to medium-high heat, adding a drizzle of oil if needed. Sauté the onion and peppers, stirring occasionally, until the onion turns golden, about 3–5 minutes. While they cook, measure out the seasonings. Add the garlic, tomato paste, and seasonings to the pan. I recommend adding 1-1/4 teaspoons of salt and 3/4 teaspoon of pepper as well. Sauté for another 2–3 minutes, until the tomato paste starts to darken. Turn off the heat and transfer the mixture to a Crock-Pot. If anything is sticking to the pot, deglaze it with some crushed tomatoes before adding them to the Crock-Pot.
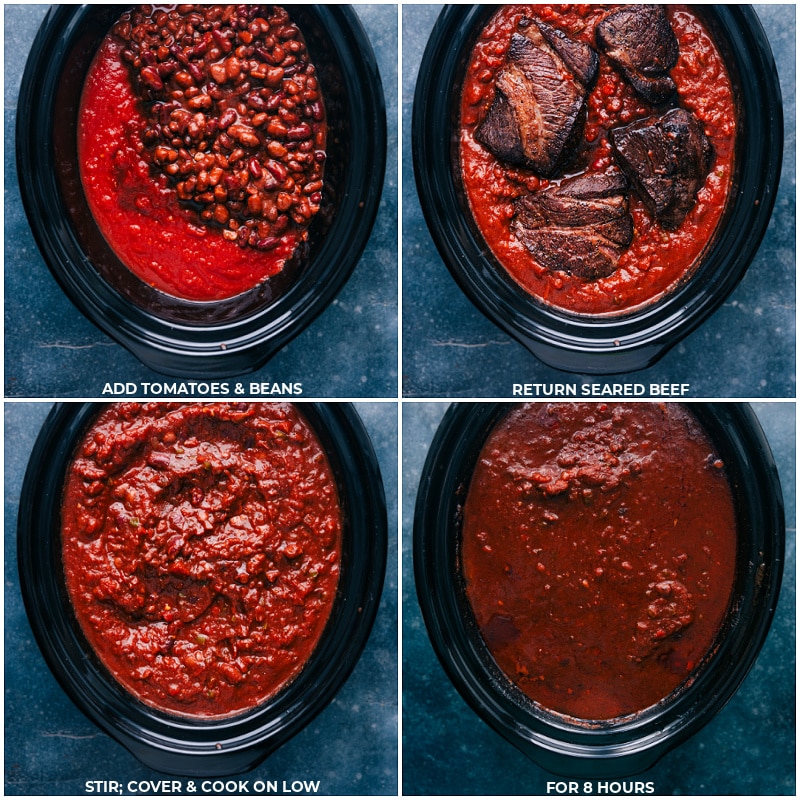
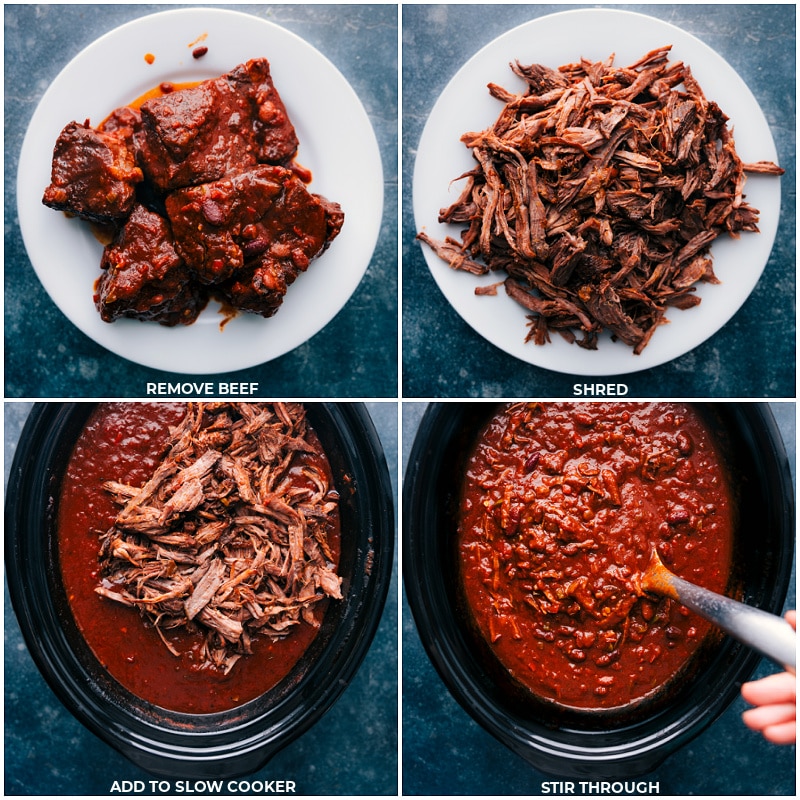
- Add the crushed tomatoes, all the undrained beans, and Worcestershire sauce to the Crock-Pot. Stir well. Add the beef, along with any accumulated juices on the plate, to the Crock-Pot. Press beef to submerge it below other ingredients. Cover and cook on low for 8 hours; high heat is not recommended. Remove beef from the Crock-Pot and shred with two forks, discarding the fat. Return beef to the Crock-Pot and gently stir through.
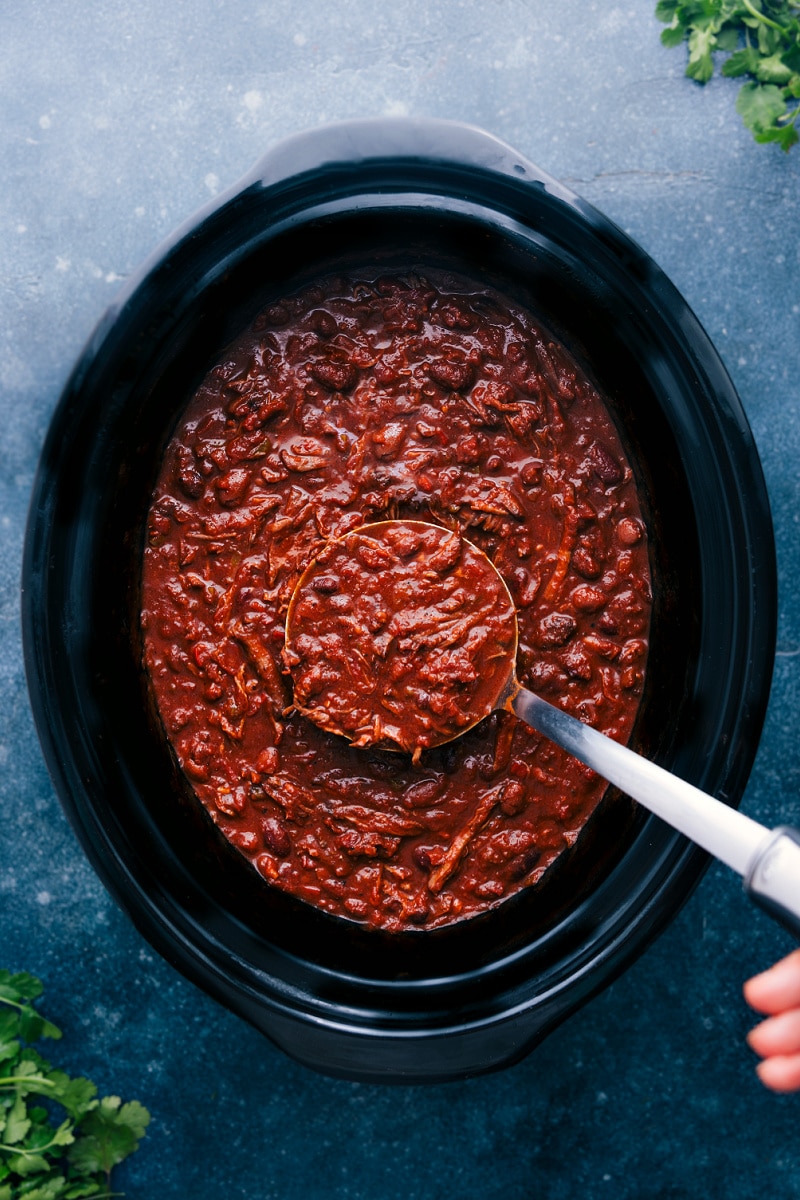
- Taste chili and adjust seasonings as needed. Ladle into bowls. Serve with your preferred toppings, I love sour cream and freshly shredded sharp Cheddar! You can also try guacamole, diced avocado, fresh cilantro, and fresh lime. Serve either with tortilla chips or cornbread for dunking. Enjoy!
Video
Recipe Notes
Nutrition
Nutrition information is automatically calculated, so should only be used as an approximation.







If you’re a fan of chili con carne, you’re going to love this recipe! I got a taste when Chelsea made it. Perks of being her husband:)