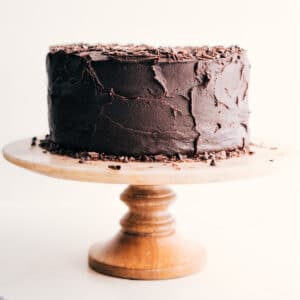
Chocolate Cake Recipe that’s ridiculously moist, deeply chocolatey, and finished with my favorite creamy chocolate frosting for the ultimate crowd-pleaser.


Author’s Notes
The “Best Thing I’ve Ever Eaten” Cake
My daughter is a total vanilla and sprinkles girl. My cake batter cookies, which she affectionately calls “sprinkle cookies,” have always been her top recipe on my site, and we make them a couple times a month at her request. (We bake them so often that I’m pretty sure every neighbor has received a plate at some point.)
She will always choose sprinkles and vanilla ice cream over chocolate, so when she took one bite of this chocolate cake and said, “Mom, this is the best thing I’ve EVER eaten. It’s better than sprinkle cookies,” I knew it meant something. If you know her, that kind of praise is a big deal, haha.
My husband and boys agreed it was the best cake they’d ever eaten, which just confirmed what I already knew. This is hands down the best chocolate cake recipe ever.
It’s based on the famous Hershey’s Perfectly Chocolate Cake, with a couple of key swaps. I use Dutch process cocoa instead of natural cocoa, and that one change makes the cake richer, smoother, and deeply chocolatey. And the frosting? I used my forever favorite. Nothing beats it!


Ingredients In This Chocolate Cake Recipe
| Ingredient | Why It Matters + Tips |
|---|---|
| Dutch Process Cocoa | Natural cocoa won’t give the same result here. Dutch process is key! |
| Boiling Water | Blooms the cocoa and intensifies the chocolate flavor. Hot coffee can be used for an even deeper flavor. |
| Oil | Keeps the cake soft and moist for days. Butter-based cakes tend to dry out faster. |
| Whole Milk | Whole milk gives the best texture. Avoid low-fat options. |
| Eggs | Room-temp eggs mix in smoothly and bake more evenly. |
| Heavy Cream (Frosting) | Makes the frosting rich and creamy. Milk is too thin for this texture. |

How To Make This Chocolate Cake Recipe
This is a simple, no-fuss cake that doesn’t require special techniques.
- Prep the pans and preheat the oven to 350°F.
- Whisk together the dry ingredients.
- Add the wet ingredients and mix until smooth.
- Whisk in the boiling water (the batter will be thin).
- Divide the batter evenly and bake until set.
- Cool completely, then freeze the layers before frosting.
- Make the chocolate buttercream frosting and assemble the cake.

Reader’s Notes & Tips
Tools For This Chocolate Cake Recipe
Check out my favorite kitchen essentials, gadgets, and cookware!
- 3-pack 8-inch cake pans I use in this recipe.
- A large mixing bowl I reach for constantly
- You don’t need any special equipment for mixing just a good whisk.
- Most importantly, the dutch process cocoa powder I use and love.

How to Prep Cake Pans for Easy Release
Because this chocolate cake recipe is so moist, pan prep matters.
- Grease pans generously.
- Line with parchment rounds: Check out this tutorial on how to cut the parchment perfectly every time.
- Grease pans again.
- Dust lightly with cocoa powder.

Storage
- Cake layers can be baked and frozen (wrapped well) up to 1 month.
- Frosted cake stores well in the fridge for up to 4 days. Let slices sit at room temp for 20–30 minutes before serving.
- This chocolate cake recipe stays moist even after chilling, which makes it perfect for parties.
More Rich & Chocolatey Treats
Desserts
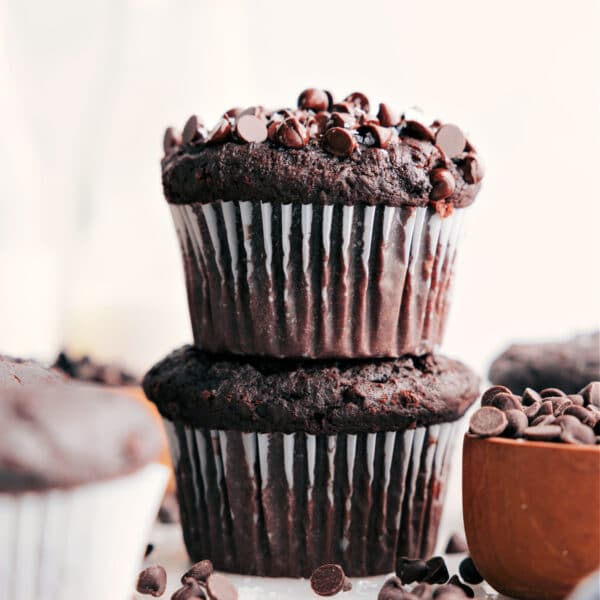
Chocolate Muffin Recipe
Desserts
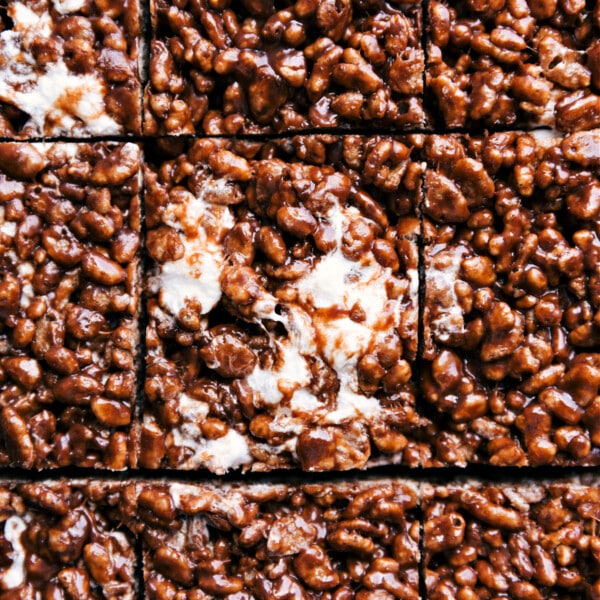
Chocolate Rice Krispie Treats
Desserts
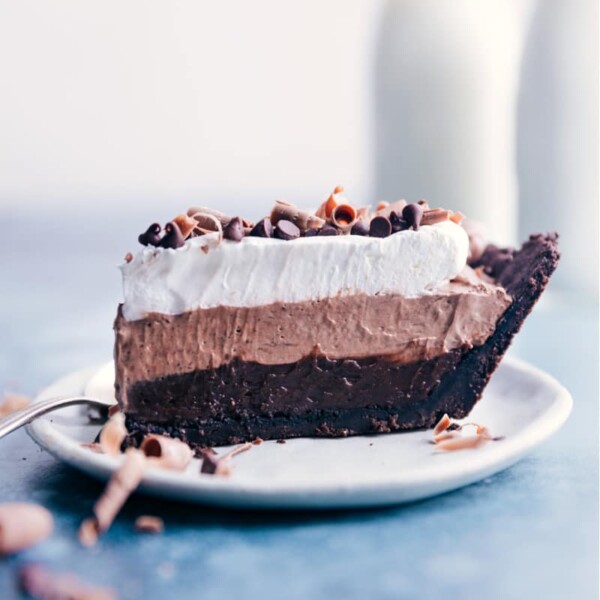
Chocolate Pudding Pie
Desserts
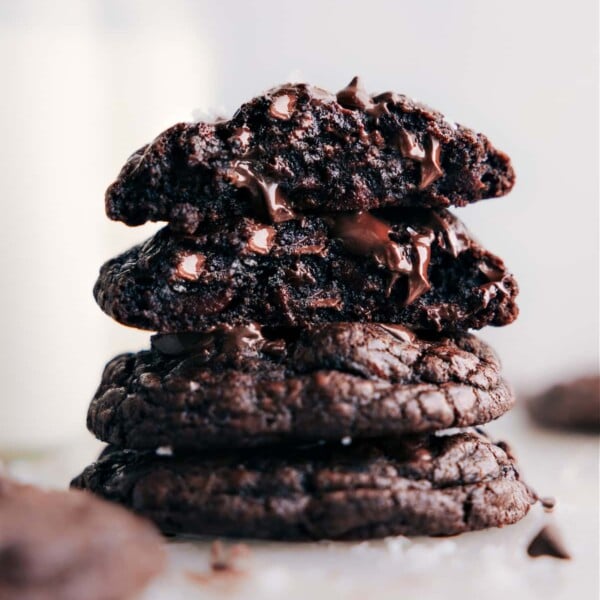
Chocolate Cookies Recipe
Chocolate Cake Recipe
Video
Equipment
- 3 8-inch round cake pans
- Parchment paper plus cooking spray
- Stand mixer or electric hand mixers
Ingredients
- 1-3/4 cups all-purpose flour
- 3/4 cup Dutch process cocoa powder see note 1
- 1-1/2 teaspoons baking powder
- 1-1/2 teaspoons baking soda
- 1 teaspoon salt
- 2 cups granulated sugar
- 2 large eggs at room temp
- 1 cup whole milk at room temp
- 1/2 cup vegetable oil or canola oil
- 1 tablespoon vanilla extract
- 1 cup boiling water
- 30 tablespoons unsalted butter at room temp
- 4-1/2 cups powdered sugar
- 1-1/8 cups Dutch process cocoa powder
- 8-10 tablespoons heavy cream
- 1-1/2 teaspoons vanilla extract
- 1/4 teaspoon salt
- 4 ounce milk chocolate bar optional, for decorating
Instructions
- Preheat oven to 350°F. Generously grease three 8-inch round cake pans with cooking spray. Line the bottoms with parchment paper rounds, then grease again. Lightly dust with cocoa powder and tap out the excess. Take your time with this step, this cake is very moist and needs well-prepared pans.
- In a large bowl, whisk together the flour, cocoa powder, baking powder, baking soda, and salt. Add the sugar and whisk again until evenly combined.
- Right on top of dry ingredients add eggs, milk, oil and vanilla. Whisk well to combine until lump-free (just about 30 seconds).
- Add boiling water and whisk just until incorporated. The batter will be very thin.
- Use a food scale to evenly divide batter into prepared cake pans.
- Bake cakes all on the same shelf in the center of the oven for 25-30 minutes or until a toothpick inserted into the center comes out clean.
- Remove from the oven, cool for exactly 10 minutes, then invert onto a cooling rack upside down. Cool completely. Line a plate with plastic wrap and invert the cake from cooling rack onto lined plate. Do this slowly and gently as the cake is very moist. Cover the cake with plastic wrap and freeze for 2 hours. I find this cake is hard to frost if it's not partially frozen. (I like to frost it fully frozen)
Frosting
- Frosting: Using a handheld or stand mixer fitted with a paddle attachment, beat the butter on medium speed for 2–3 minutes or until nice and creamy. Scrape down the sides of the bowl as needed.
- Add in the powdered sugar and cocoa powder. Mix on low until just incorporated. It will be very thick! Again, scrape down the sides. Add in the heavy cream, vanilla, and salt. Mix again on low until incorporated.
- Increase the speed to high and beat for 30–60 seconds until the frosting slightly lightens in color and becomes very creamy. If it’s too thin, add a bit more powdered sugar; if it’s too thick, mix in a little more heavy cream. Taste and adjust to your liking, adding a pinch of salt if it’s too sweet. Use immediately to frost the cake.
Decorate
- Spread a tiny bit of frosting at the base of the cake stand to hold a cake in place. Working with just one cake layer at a time, unwrap and place on cake stand. Frost in between. Add another layer, frost in between, and top with the final layer. Frost the cake with remaining frosting. You may have a touch leftover depending on how well frosted you like your cake. If desired decorate sides and edges with chocolate curls. I do this by grating a chocolate bar with a vegetable peeler right over the cake.


The cake was superior, but I didn’t freeze it and the cake turned out perfectly fine.
Oh I’m so thrilled this cake was a hit! Thanks so much for sharing!
This recipe was sooo good! I made it for my dad’s birthday when we didn’t really have any baking things (we were moving) so I had to make this cake as a sheet cake. But let me tell you, it was absolutely delicious. It was gone in literal days!! I WILL be making this again.
I’m so thrilled to hear this! I need to try this in a sheet cake! Thanks so much Anna!