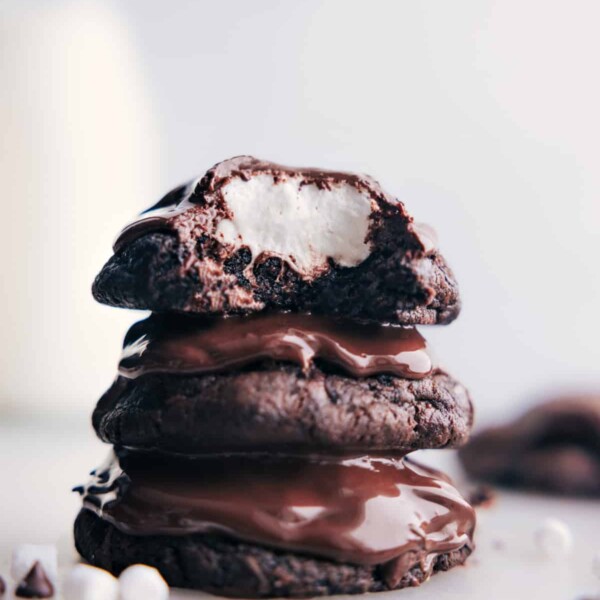
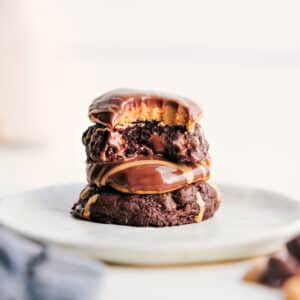
Buckeye Brownie Cookies are like your favorite fudgy brownie and classic buckeye candy rolled into one ridiculously good treat.


Author’s Notes
Buckeyes On The Brain
Okay, I’m clearly in my buckeye era right now. It all started when I shared these Buckeye Graham Crackers. Not only did I fall completely in love with them, but I made three batches in three days. Yes, really. I even brought them to an event, and even though there were plenty of treats on the tray, those were the runaway favorite. Everyone was obsessed.
That’s when it hit me: in all these years, I had never shared a classic buckeye candy recipe. So I fixed that and finally shared my perfect buckeye candies.
And once I had that recipe down, I couldn’t stop thinking…how good would those perfect buckeyes be on top of a brownie cookie? That was all it took. I was so excited to experiment that I could barely sleep.
And honestly, these Buckeye Brownie Cookies might be my favorite of all the new buckeye recipes. They remind me of my Buckeye Brownies (which my son’s friends claim is the best recipe on my site, haha!), so I really think you’re going to love these!


Buckeye Brownie Cookies Ingredients
| Ingredient | Helpful Tip |
|---|---|
| Cream cheese & butter | Let both soften fully so the cookie dough mixes smoothly. Be sure to grab full-fat, brick-style cream cheese. |
| Brownie mix & pudding mix | Use the exact sizes called for or the dough won’t form correctly. I like Betty Crocker’s Supreme Triple Chunk brownie mix best in these cookies. |
| Egg & vanilla | These help bring the dough together and add flavor. |
| Mini chocolate chips | If you don’t have mini, regular sized chips will also work! |
| Peanut butter filling & chocolate topping | Chill the Buckeye Brownie Cookies before topping so the peanut butter holds its shape and the chocolate sets nicely. |

How To Make Buckeye Brownie Cookies
- Make the dough: Mix softened cream cheese and butter, then add the egg, vanilla, pudding mix, and brownie mix until thick.
- Chill: Stir in chocolate chips and chill the dough for 20 to 30 minutes.
- Shape & bake: Roll into 2-tablespoon balls, flatten into thick discs, and bake
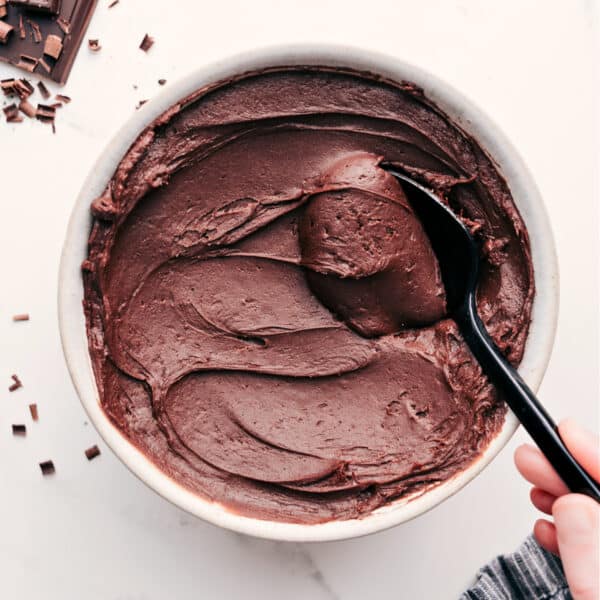
- Make the filling: Mix the peanut butter ingredients until smooth, then roll into small balls and gently flatten.
- Assemble: Add a peanut butter disk to each cooled cookie, melt the chocolate topping, then dip the cookies or spoon the chocolate over the centers.

Storage
What To Do With Leftovers
- Freezing dough: Scoop and shape the dough balls, freeze on a sheet pan until firm, then transfer to a freezer bag. Bake straight from frozen and add a minute or two if needed.
- Assembled cookies: Once topped with peanut butter and chocolate, these Buckeye Brownie Cookies are best eaten within 2 days.
- Plain cookie base: Store baked cookies (without the peanut butter and chocolate) in an airtight container at room temperature for up to 3 days.
- No long-term storage: Assembled cookies don’t store or freeze well, so add the toppings right before serving.
More Fun Cookie Recipes:
Buckeye Brownie Cookies
Video
Equipment
- Large sheet pan with silicone liners
- Hand mixer or a stand mixer
Ingredients
- 4 ounces cream cheese full-fat, brick-style, softened to room temperature
- 8 tablespoons unsalted butter softened to room temperature
- 1 large egg
- 1 teaspoon vanilla extract
- 1 (3.9-ounce) package instant chocolate fudge pudding mix use it dry (do not prepare)
- 1 (18-ounce) package brownie mix I like Betty Crocker Delights Supreme Chocolate Chunk, see note 1
- 1 cup mini chocolate chips
- 3/4 cup creamy peanut butter like Skippy
- 4 tablespoons unsalted butter softened
- 1-1/4 cups powdered sugar
- 1/8 teaspoon salt
- 1 teaspoon vanilla extract
- 1/2 cup milk chocolate chips
- 1-1/2 teaspoons coconut oil
Instructions
Cookies
- Preheat oven to 350°F. Line a large sheet pan with a silicone liner and set aside. Bring the cream cheese and butter to room temperature by either leaving out for 1 hour or by microwaving (unwrapped) cream cheese in increments of 5–10 seconds until soft. Separately microwave the butter for 5 seconds, flipping to the other side, and microwaving another 5 seconds. Be careful not to melt or overly soften either ingredient.
- In a large bowl fitted to a stand mixer (or use a hand mixer), cream together the cream cheese and butter until completely smooth. Add in the egg and vanilla extract. Beat until smooth and creamy.
- Add the dry pudding mix and brownie mix. Beat to combine. (The dough will be thick and takes a while to form into dough. This is intended. Just keep mixing and it will all come together)
- Stir in the chocolate chips. Cover the dough tightly and refrigerate for 20–30 minutes.
- Measure each dough ball to be a full, packed 2 tablespoons of dough (40 grams). Roll it into a ball. Shape dough balls into wide, thick discs about 2 inches wide and 1/2-inch thick. Place 6–8 cookies on the prepared cookie sheet, giving cookies ample room.
- Bake each batch for 10–14 minutes. Slightly underbaking these cookies gives them a chewy taste and texture like ultra fudge-y brownies, so err on the side of slightly under-baking. Remove from oven and let cool for 5 minutes on sheet pan before gently transferring to a cooling rack to finish cooling.
Filling
- In a large bowl, using electric hand mixers, mix peanut butter, softened butter, powdered sugar, salt, and vanilla until smooth. Roll the mixture into equal sized balls, making as many balls as you have baked cookies. Place one ball on each completely cooled cookie. Gently press to flatten the filling onto the cookie. Smooth the top with your finger so chocolate goes on nicely.
Chocolate Topping
- In a microwave safe bowl, heat the chocolate chips and coconut oil in 20 second bursts, stirring between each for 20 full seconds, until melted and smooth. Carefully dip each cookie into the chocolate, lifting gently and tapping to spread it out. If the peanut butter topping starts to slip off, use a spoon to lightly pour the melted chocolate over the top instead. Aim to just cover the peanut butter filling so a little of the filling still shows.
Recipe Notes
Nutrition
Nutrition information is automatically calculated, so should only be used as an approximation.
Tips For Making Buckeye Brownie Cookies
- Use cold hands: Roll the dough with cold hands so it stays firm.
- Weigh the dough: If you have a food scale, I SWEAR by that for cookies! Getting the weights consistent helps the cookies bake the same and look the same.
- Cool fully: Let cookies cool before adding the peanut butter so it doesn’t melt.
- Flat tops: Gently flatten the peanut butter on top so the chocolate goes on nicely.
- Warm the chocolate gently: Microwave for a few extra seconds if it starts to thicken.
- Chill to set: Refrigerate finished cookies briefly to set the chocolate.


These were great, but my husband thought it had too much of a coconut flavor. Should I add less or what is an alternative to the coconut oil? But they were great though!
I’m so thrilled to hear this! You can sub the coconut oil for any oil, like canola, olive, or avocado oil.
Delicious cookie/brownie/peanut butter goodness! It’s a bit more work for a cookie but I thought it was totally worth it. I used Ghiradelli chocolate chips and I think it enhanced the quality of the cookie. For the last step- I didn’t dip the cookie in the chocolate. I found it much easier to spread a spoonful on and use the back of the spoon to make a cute swirl. I also sprinkled with sea salt.
Yay! I’m so thrilled to hear this! Thanks so much Jentri!
I don’t see the oven temp for the cookies
350 degrees!