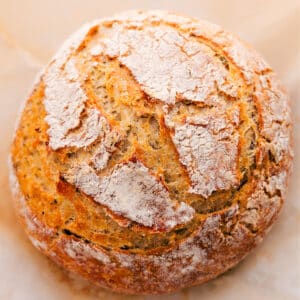
No-Knead Herb Bread is packed with fresh rosemary, thyme, and garlic for amazing flavor! This recipe is as easy as it gets—just mix the ingredients, let the dough rest overnight, and bake the next day.

Easy Herb Bread Recipe
Warm, crusty bread with tender, flavorful herbs in every bite—dunk it in a bowl of your favorite soup for the ultimate comfort meal.
Reasons To Love This Recipe:
- No kneading or fancy tools – No mixer, bread maker, or hassle required.
- Flexible timing – Bake when it works for you.
- Simple ingredients – You probably already have everything you need!

Ingredients
Here’s what you’ll need to make this no-knead Herb Bread:
- Yeast: I like to use instant or quick-rise yeast, but active dry will also work.
- Honey: Adds a little sweetness and helps the yeast grow.
- Warm Water: Should feel warm, not hot, to wake up the yeast.
- Flour: All-purpose flour creates a soft inside and a crisp crust. For a chewier texture, try bread flour.
- Salt: Adds flavor—don’t skimp!
- Garlic: Fresh minced or jarred garlic adds lots of flavor. Use garlic powder in a pinch.
- Rosemary & Thyme: Fresh herbs taste best, but dried ones work too.
- Black Pepper: Adds a little kick and depth. Feel free to leave it out!
- Olive Oil: Makes the crust smoother and adds richness.

Variations
Ways to Make Your Bread More Interesting
- Fresh Herbs: Add extra herbs for even more flavor.
- Olive Oil & Sea Salt: Drizzle olive oil and sprinkle sea salt flakes on top for a crispy crust and a subtle crunch.
- Add-Ins: Mix in nuts, seeds, or dried fruits like pepitas, poppy seeds, or sesame seeds for more texture.
Best Herbs To Add To Bread
Rosemary and thyme are my favorites, but here are other options to consider:
- Rosemary: Savory with a piney flavor.
- Thyme: Lightly lemony and versatile.
- Oregano: Bold and slightly bitter.
- Basil: Sweet and fragrant, perfect with savory dishes.
- Sage: Earthy with a mild bitterness.
- Marjoram: Sweet and floral, similar to oregano.
- Dill: Subtle anise flavor, great with stronger ingredients.
Chives: Mild onion flavor, a great match for grilled cheese! - Parsley: Fresh with a slight bitterness.
- Cilantro: Bright and citrusy, great with bold flavors.
- Tarragon: Licorice-like and complements stronger flavors.

4 Tips For Perfect Bread
- Pick the Right Pot: Use a heavy pot (at least 6 quarts) with a tight lid that can handle high heat.
- Let it Rise: For the best flavor and texture, let the dough rise at least 8 hours—up to 18 is even better.
- Preheat the Pot: A hot pot gives a crispy crust, and a hot lid helps steam the herb bread for a soft inside.
- Cool Before Cutting: Let the bread cool completely so it doesn’t turn mushy when sliced.

What to Eat with Herb Bread
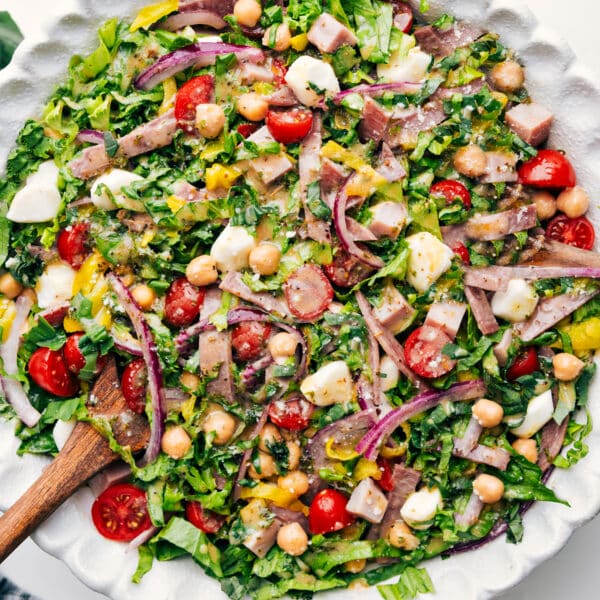
- Dunk it: Perfect with Vegetable Beef Soup or Crockpot Chicken Stew.
- Serve as a side: Great with salads or main dishes.
- Spread it: Add butter or your favorite spread for a quick snack.
- Make a sandwich: Use it for sandwiches or paninis.
- Top it: Toast slices and add avocado, hummus, or other spreads.
- Crostini or Bruschetta: Top with your favorite ingredients for an easy appetizer.

Storage
Storing Herb Bread
- Day 1: Leave it out, cut side down, on a cutting board to keep the crust crisp.
- After Day 1: Store in an airtight bag or container; toast to bring back crispness.
- Freezing: Slice, wrap each piece, and freeze in an airtight bag for up to 3 months. Toast slices straight from the freezer.
Quick Tip
If you don’t have a cast iron pot to bake the bread in, check out this method by The Kitchn on this post.
Herb Bread
No-Knead Herb Bread is packed with fresh rosemary, thyme, and garlic for amazing flavor. Mix it up, let it rest overnight, and bake it the next day!
Equipment
- Large cast-iron pot see note 1
- Parchment paper see note 2
Ingredients
- 2 teaspoons instant yeast
- 2 teaspoons honey
- 1-1/2 cups warm water see note 3
- 3 cups flour
- 1-3/4 teaspoons salt
- 2 teaspoons minced garlic
- 1-1/2 tablespoons finely chopped fresh rosemary or 1 teaspoon dried
- 1-1/2 tablespoons finely chopped fresh thyme or 1 teaspoon dried
- 1/4 teaspoon pepper optional
- 1 tablespoon + 1 teaspoon olive oil divided
- Butter optional, for serving
- Flaky sea salt optional, for serving
Instructions
- In a medium bowl, whisk together the yeast, honey, and warm water. Let it sit for 5 minutes until creamy or foamy. If the mixture doesn’t foam, the yeast may be dead, or the water might have been too hot. Start again if this happens.
- In a large mixing bowl, mix together flour, salt, garlic, rosemary, thyme, and pepper using a rubber spatula. Add the yeast mixture to the flour mixture and stir until a shaggy dough forms with no dry flour streaks. Use the spatula to pull the dough to one side and drizzle in 1 tablespoon olive oil. Turn the dough to coat it in the oil (it will be sticky). Cover the bowl fully with plastic wrap.
- Let the dough rest overnight at room temperature (around 70°F / 21°C) for 10–18 hours. For a quicker option, see note 4.
- Move an oven rack to the center position and preheat the oven to 450°F (230°C). Place the cast-iron pot (with lid) in the oven to heat for 30 minutes.
- Sprinkle 1 tablespoon of flour on a clean work surface. Use a spatula to scrape the dough out of the bowl onto the floured surface. Sprinkle 1 more tablespoon of flour on top. Gently fold the sides inward with a spatula or dough scraper, making 6 folds to form a rough ball. Transfer the dough ball onto a large piece of parchment paper, flipping it upside down so the seam side is down. Gently shape it into a rough ball. (Optional: Score the top with 3–5 slashes if you have a lamé).
- Carefully remove the heated pot from the oven, lift the parchment paper with the dough, and place it into the pot. Drizzle remaining 1 teaspoon oil on top. Cover with the lid and bake for 30 minutes. Then, remove the lid and bake for an additional 13–20 minutes, until the bread sounds hollow when tapped in the center and the top is a deep golden brown.
- Carefully remove the bread from the pot using the parchment paper, and slide it onto a wire cooling rack. Let it cool for a full 30 minutes before slicing with a sharp serrated knife (see note 5).
Final step! Please let us know how it was by leaving a review.
Recipe Notes
Note 1: Here is a great affordable cast-iron pot and here is my personal favorite pot! For alternatives to a cast-iron pot, see right above the recipe card.
Note 2: Ensure you use parchment paper, not foil or wax paper, as wax paper will melt in the oven.
Note 3: Test the water temperature by drizzling a few drops on your wrist. It should feel warm and comfortable, not hot.
Note 4: No-Knead Bread In a Hurry: After 2–3 hours, you can bake the bread immediately. The flavor and texture won’t be as developed as after a long rest but will still be tasty.
Note 5: Allowing the bread to cool is crucial to ensure it’s fully baked inside. Cutting too early can result in a mushy interior.
Storage: This bread is best on days 1 and 2. On the first day, leave it out uncovered with the cut side down on a cutting board to keep the crust crisp. After that, store it in an airtight container or bag. The crust may lose its crispness, but the bread will still be great toasted.
Nutrition
Serving: 1serving | Calories: 139kcal | Carbohydrates: 26g | Protein: 4g | Fat: 2g | Saturated Fat: 0.3g | Polyunsaturated Fat: 0.3g | Monounsaturated Fat: 1g | Sodium: 341mg | Potassium: 56mg | Fiber: 1g | Sugar: 1g | Vitamin A: 0.3IU | Vitamin C: 0.2mg | Calcium: 7mg | Iron: 2mg
Nutrition information is automatically calculated, so should only be used as an approximation.


Hi Chelsea,
We loved the bread but, although we followed the recipe exactly, it didn’t rise at all. Also, there was no way to fold it (Step 5) because it had the consistency of pancake dough rather than bread dough. Presumably the consistency and the lack of rise was because the recipe calls for a 1:2 water to flour ratio, which is much much more than we have ever seen for a bread recipe. So we are puzzled. Why is the water to flour ratio so high, and what does that contribute to the result?
With Warm Regards,
Marisol
Hi Marisol,
Thanks so much for trying the bread and for taking the time to write! I’m so glad you loved the flavor, but I’m sorry it gave you trouble. It should be much wetter and stickier than a traditional bread dough, but it still shouldn’t be as thin as pancake batter.
Since I’ve made this recipe many times with success, it sounds like something may have gone off along the way. A few common causes are flour measurement differences, using a different flour type, inactive yeast, or water temperature affecting the rise. Pancake-batter consistency especially makes me wonder if there may have been too little flour or a measuring issue.
Question really. I have a helper who comes for a few hours on Friday and Saturday. I would like to tweak this recipe to have a 22 hour break. Do you think refrigerating the dough for eight to ten hours would help?
Yes, I think that it would be fine to do that!
Delicious! My go-to bread recipe. Warm, cozy, melt-in-your-mouth goodness.
I’m so thrilled this Herb Bread was such a hit for you! Thanks Cynthia!
If I can’t bake it the next morning can I put it in my fridge in the morning and bake in the evening?
totally!
Made the dough last night and baked it first thing this morning! Came out absolutely beautiful! I have a teething 4 month old and a husband that works full time so I do not have time to be kneading and proofing all day, this was absolutely perfect for my lifestyle and delicious. I used garlic power instead of minced garlic and it came out wonderful. Thank you for sharing Chelsea(:
I am so thrilled to hear this! Thanks so much for your comment Jannera!