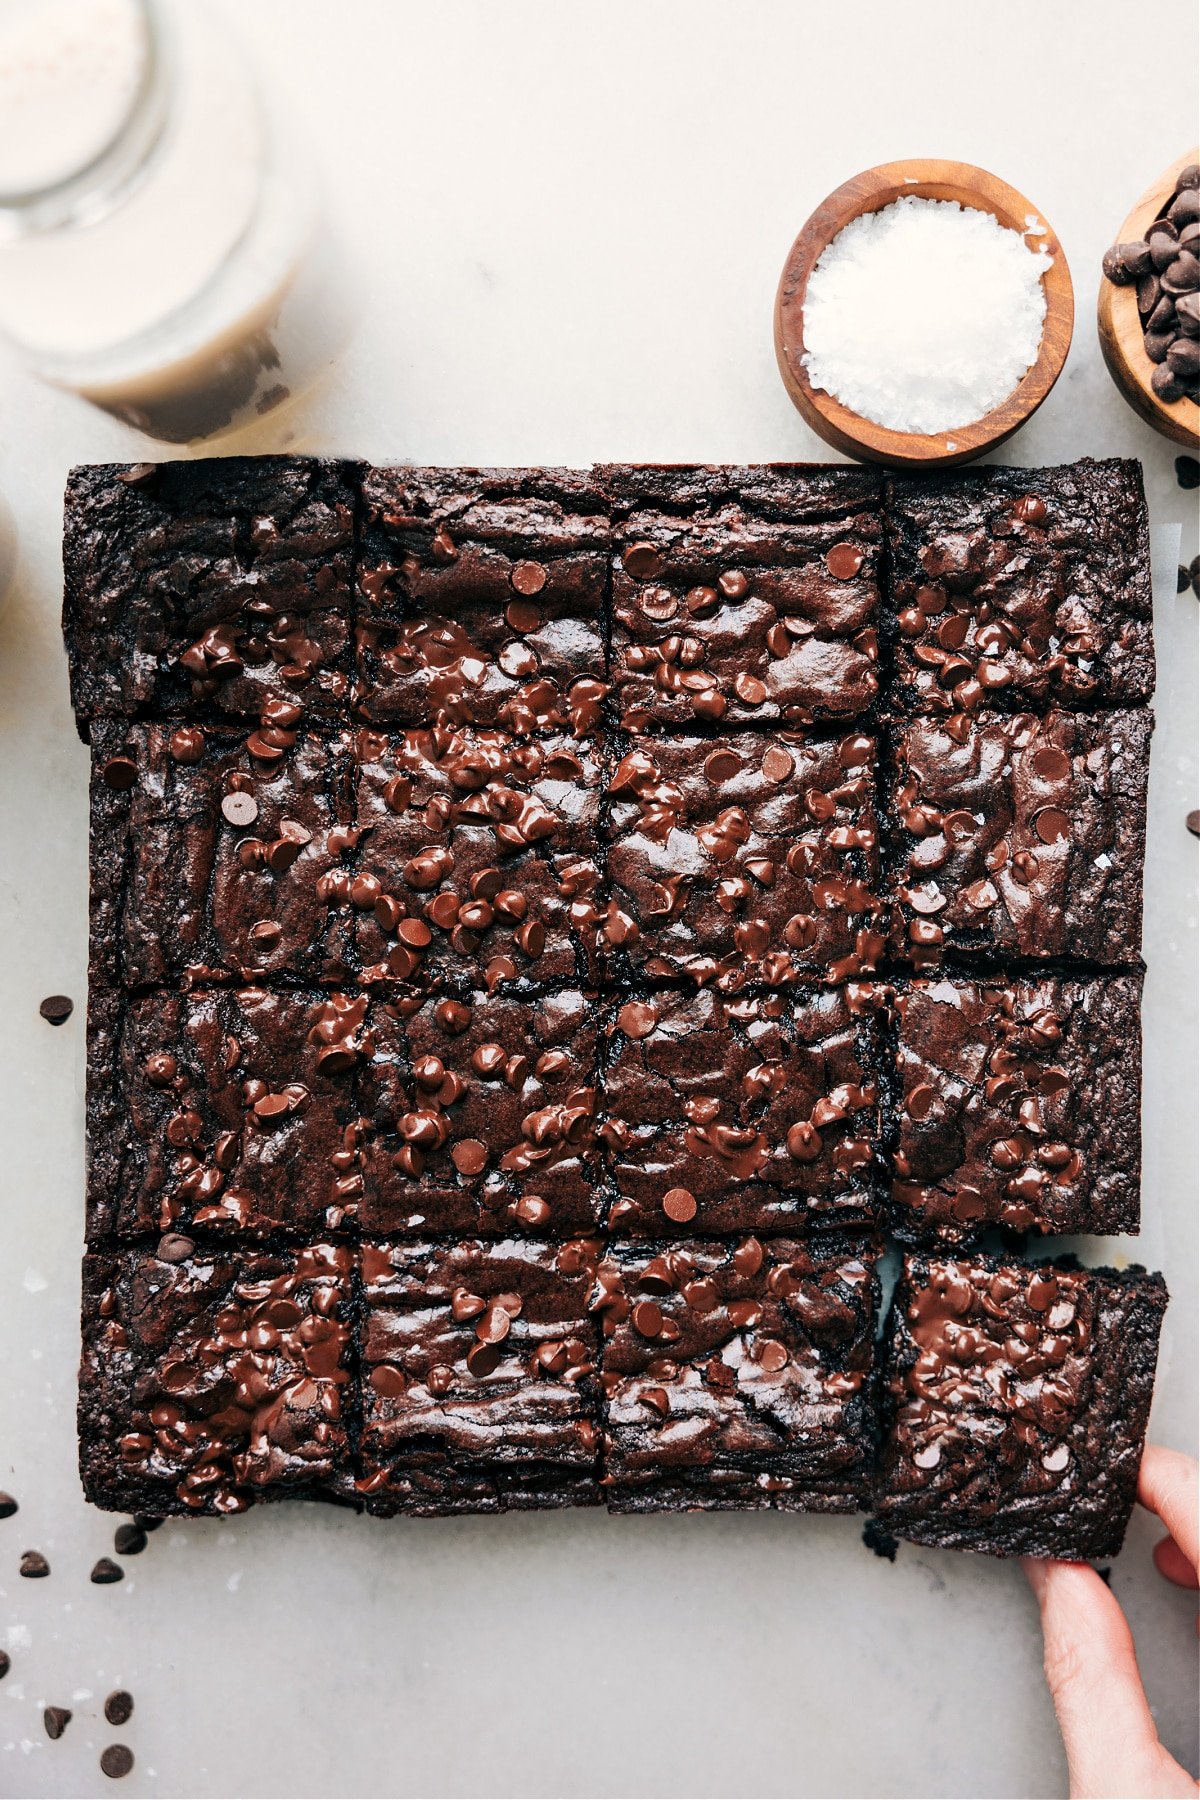
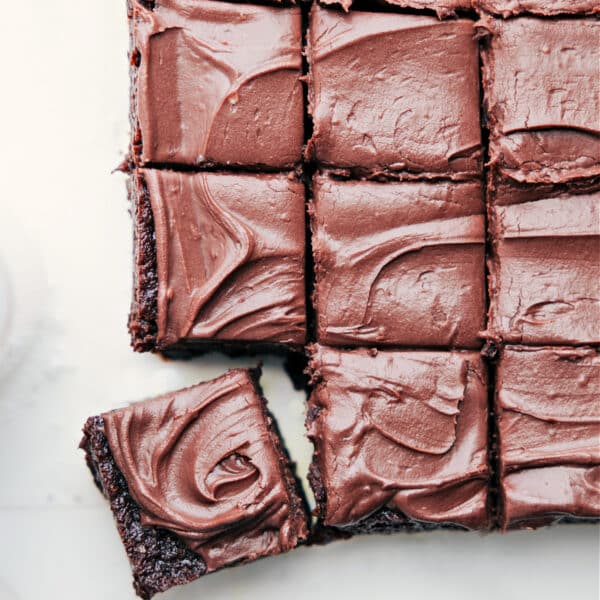
This is our favorite, ultra-fudgy, ridiculously chocolate-y, insanely rich Brownie Recipe! Plus, I’m sharing all the tips and tricks to prepare you to be the ultimate brownie maker — you’ll never want a boxed mix again!

If you prefer gluten-free recipes, try these gluten-free brownies instead, or for a more nutritious recipe, these healthy brownies are very popular and so tasty!

Homemade Brownies cut into squares

What to expect with this Brownie Recipe

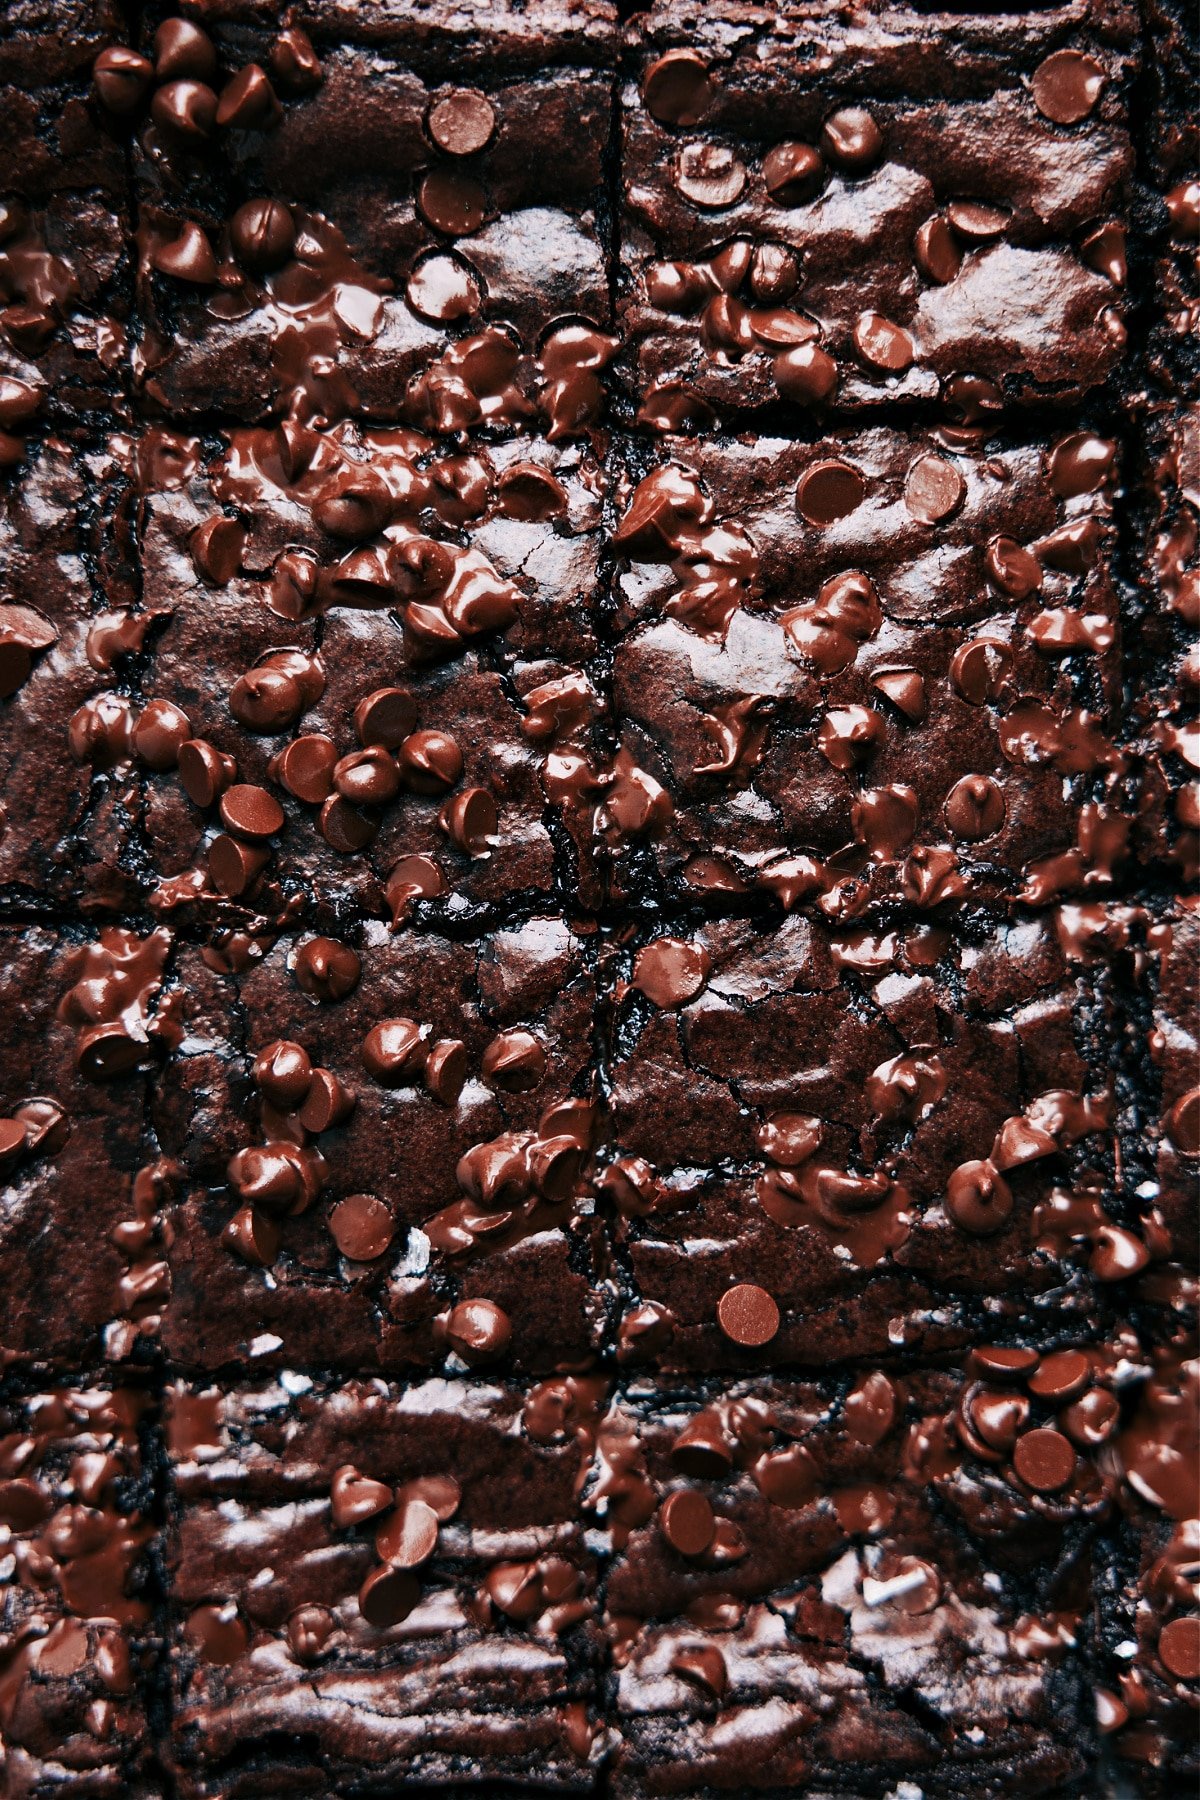
After working on this recipe (off and on) for over a year, it’s finally here — our ultimate Brownie Recipe! These brownies are rich, sweet, and extremely fudgy with that perfect crinkly top we all know and love.

While I’d like to call this recipe the “best brownie recipe” ever, I’m under no illusion that we all like the same type of brownies. So let’s start by telling you exactly what you’ll get with this recipe. 

These bars are incredibly rich and very sweet. They are for a total chocoholic and sweets lover. This Brownie Recipe is also very fudge-y, a bit gooey, and fairly dense; they aren’t at all cakey. Each piece is speckled with chocolate chips — plenty in every bite.

If you like light, cake-like brownies, you’ll want to look for a recipe that uses cocoa powder instead of melted chocolate and a higher proportion of flour. If you prefer dense and fudgy, even slightly gooey brownies, the recipe will have more eggs, butter, and melted chocolate. And that is what you’ll get with this recipe — the maximum amount of melted chocolate, butter, and lots of eggs!

While these homemade brownies blow boxed brownies out of the water, there’s nothing like the ease of a boxed mix. So, while these aren’t *quite* as easy, they’re still pretty simple — they’re made in one bowl and require less than 10 ingredients. I wanted to optimize for making this recipe as easy as possible while not sacrificing flavor or texture.

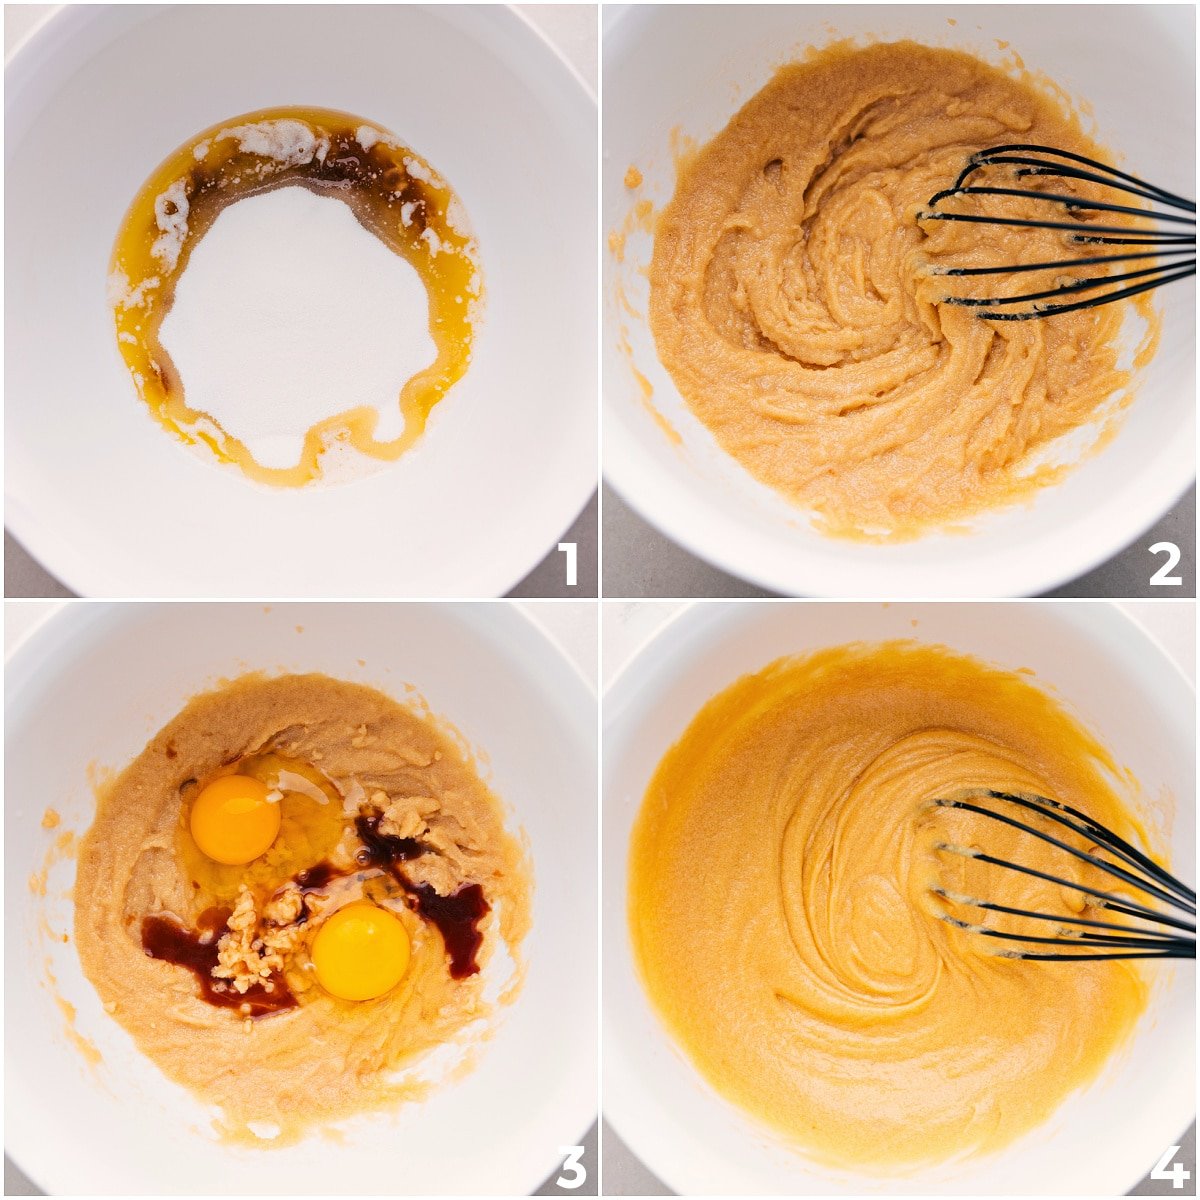
Mixing eggs for homemade brownies

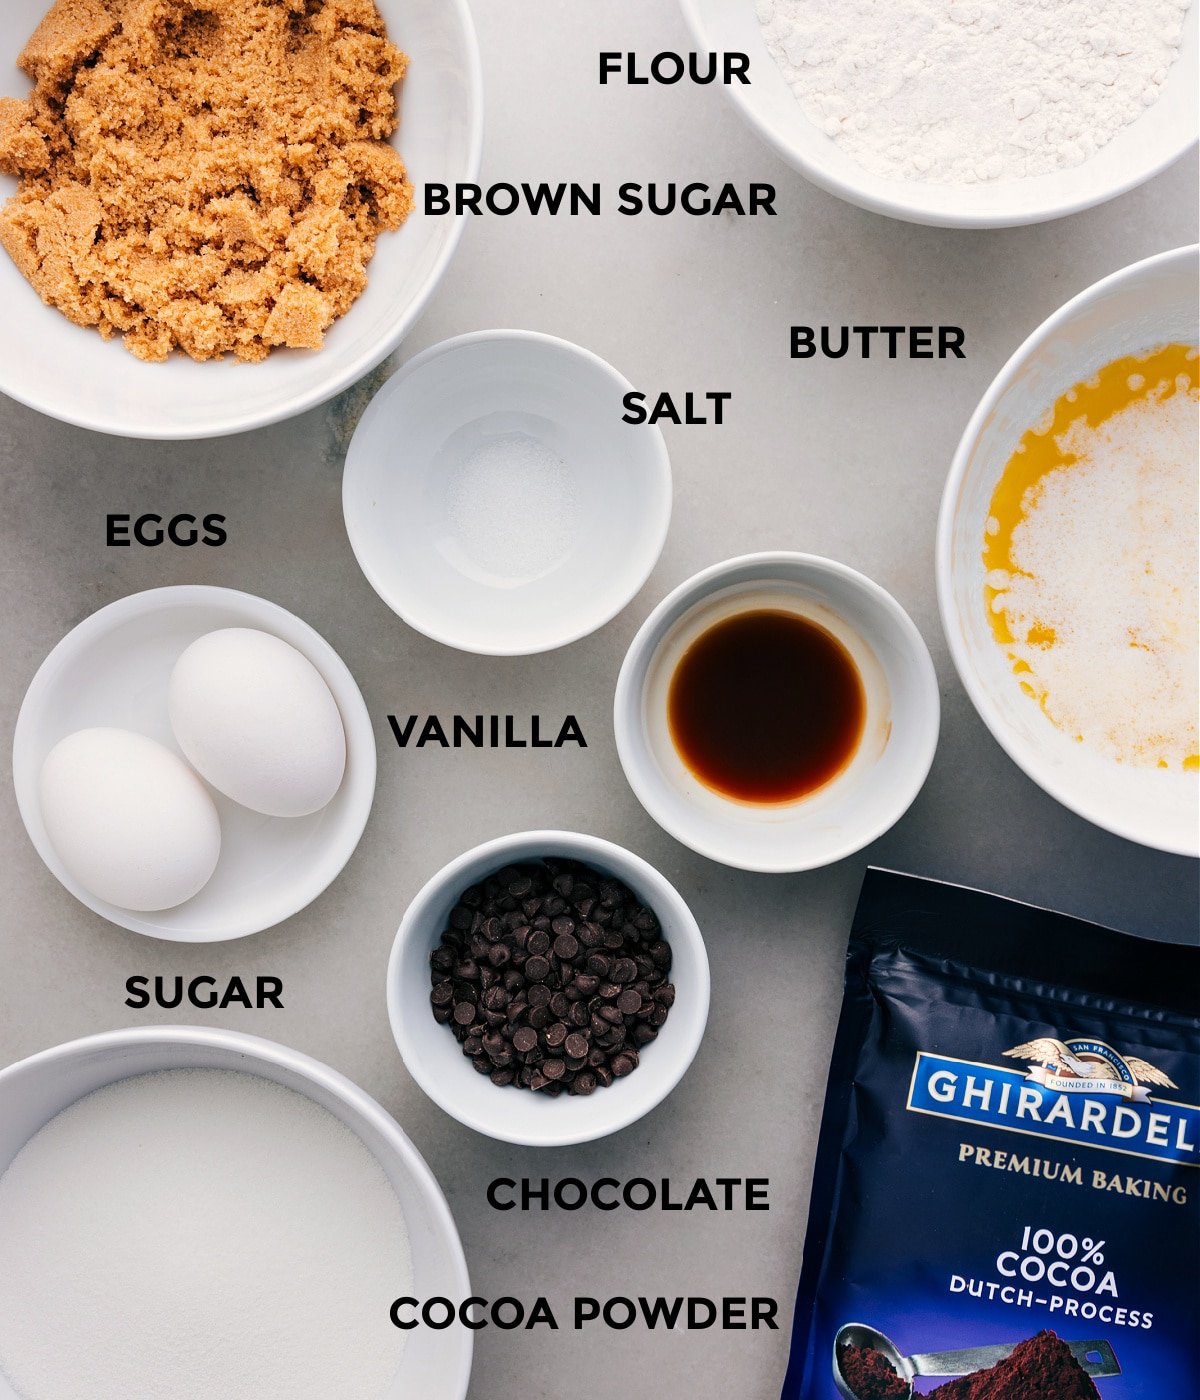
Let’s chat ingredients

The difference between mediocre and incredible brownies comes down to the ingredients used — the better the ingredients, the better the brownies will taste! I recommend using good chocolate, pure vanilla extract, and always use real butter (not margarine).

  • Eggs. We use four large eggs and one egg yolk in these brownies. The extra yolk adds a bit more richness and chewiness to the brownies. Use the leftover egg whites in this easy Egg Wrap.
  • Unsalted butter. There is a lot of butter in this recipe! While boxed mixes use oil, we use butter in these homemade brownies for extra flavor! I recommend unsalted butter so we can perfectly control how much salt is in this recipe.
  • Dark chocolate chips. One of the reasons these brownies are so fudgy and deeply chocolatey is the amount of actual chocolate in them. We’ve tested this recipe with dark chocolate and semi-sweet chips. Both are delicious, but dark chocolate was a bit more popular with taste testers. Semi-sweet chips result in a slightly richer brownie. When using dark chocolate, we don’t want a super dark/bitter chocolate, so I recommend using 53% cacao dark chocolate– which is actually still quite sweet. If you don’t love dark chocolate, use semi-sweet, but keep in mind, these brownies don’t taste bitter from the dark chocolate because of how much sugar is added in.
  • Unsweetened cocoa powder. Regular unsweetened cocoa powder is what’s in these brownies. This recipe was tested with Dutch-process (also called “Special Dark”) cocoa powder and the two aren’t perfectly interchangeable. If you only have Dutch-process cocoa powder, you can use it, but you’ll need to add 1 teaspoon baking powder to the brownie batter. (Dutch-process cocoa powder has the acid stripped out, so the baking powder adds the needed acid back in.) 

Process shots: melting butter and chocolate for this brownie recipe

Brownie Recipe Ingredients, Continued

  • White sugar. This Brownie Recipe was tested with brown sugar, but we preferred regular white granulated sugar.
  • Vanilla extract. This contributes flavor!
  • Flour. There isn’t a lot of flour in this recipe which ensures fudgy (not cakey) brownies. If you press a measuring cup into a bag of flour and scoop, you will pack in way too much flour– which results in cakey brownies with less flavor. Avoid this by properly measuring the flour — see the “quick tip” below. 
  • Fine sea salt. This may seem like a lot of salt, but it helps enhance flavors and balance sweetness. Keep in mind, not all salts are the same. I use fine sea salt in this recipe; if using table salt, you’ll want to use only 1/2 teaspoon salt.
  • Milk chocolate chips. We’re obsessed with loads of chocolate chunks in every bite, and we love good milk chocolate. That said, any chocolate works here — dark, white, semi-sweet, even peanut butter chips for a fun variation! Use your favorite. If you prefer less brownie sweetness, use semi-sweet or dark chocolate chips here. You could even use coarsely chopped (dry roasted) walnuts, pecans, or pistachios!

Quick Tip

To properly measure flour, spoon the flour into the measuring cup until it is overfilled, and then use the back of a table knife to level the measuring cup at the top. (Video visual here).

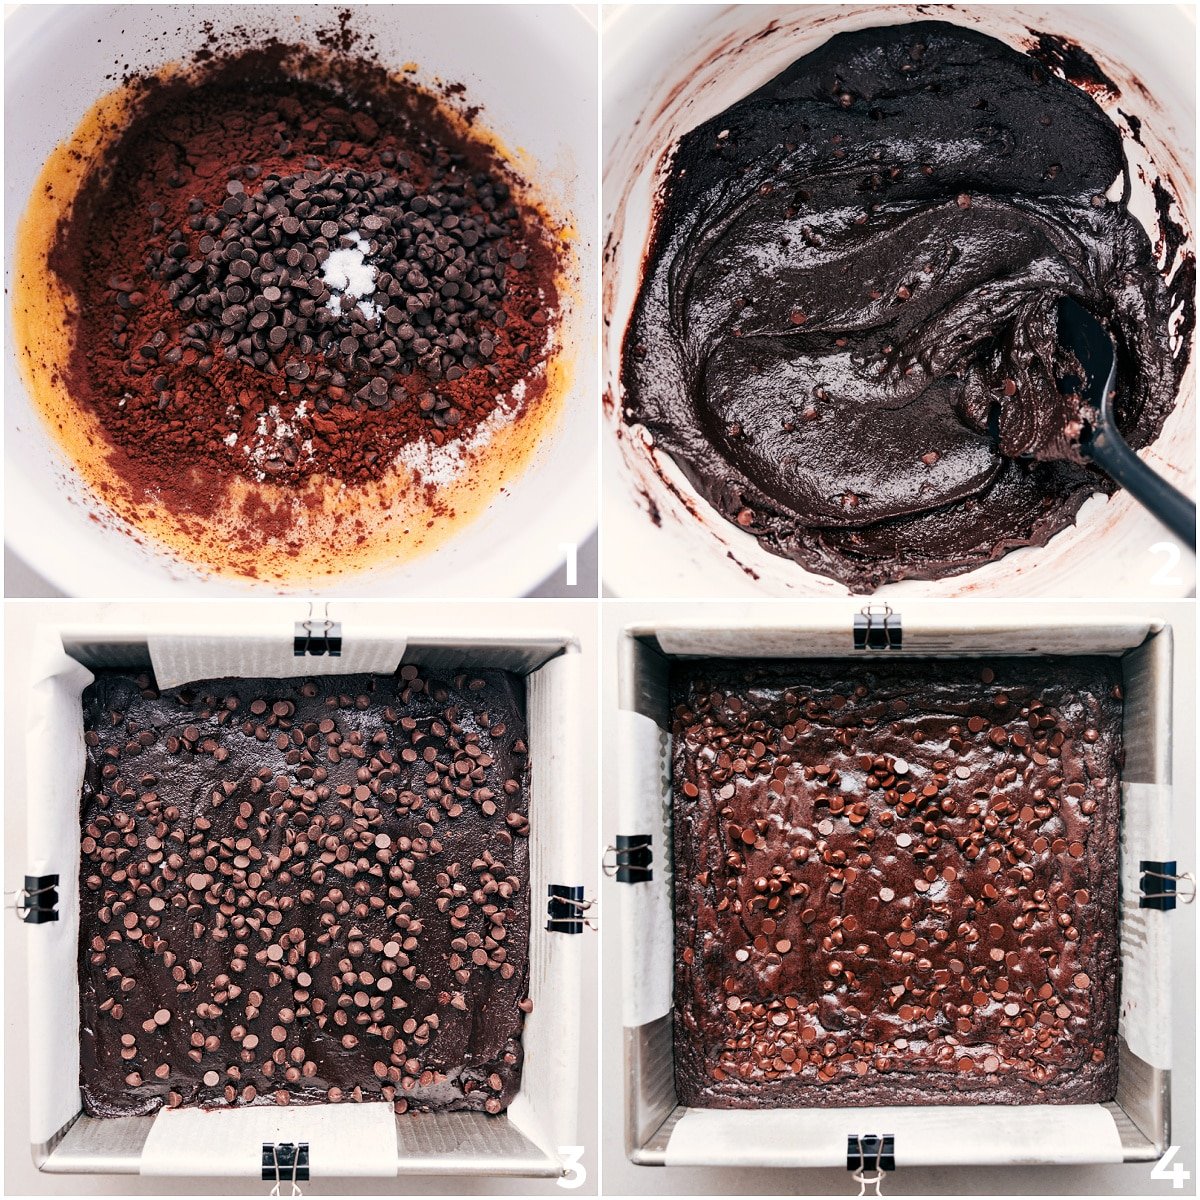
Process shots: adding cocoa and sugar to the brownie batter for this brownie recipe

Let’s Chat Brownie Pans and Baking

There are so many variables to consider when baking these brownies– like the type of pan, the actual temperature of your oven, altitude, humidity, etc. So I recommend checking the brownies at least 5 minutes before the recommended time on the recipe. Better safe than sorry!

  • Type of pan. The pan you used for this Brownie Recipe is very important to the end texture of brownies. Brownies baked in a metal pan cook faster than in a glass dish. Even the color of the pan can make a difference due to heat being reflected or absorbed (darker metal pans bake quicker).
    • Here are the exact pans I use (and highly recommend) for this Brownie Recipe. I don’t recommend using a glass pan; light-colored pans will produce the best results because they conduct heat the most evenly. With dark-colored pans, the edges tend to over-bake or even burn before the center is finished.
  • Oven temperature. A lot of ovens can get off temperature-wise. Even 25 degrees can make a difference, so make sure your oven is correctly calibrated. Wait for the oven to fully preheat before adding the brownies to the oven and place the pan in the center of the oven. I’ve also learned from experience that baking 2 trays at the same time is not a good idea; brownies need to be baked in the middle of the oven to cook through evenly.
  • Lined pan. Lining the pan with parchment paper ensures even baking as well as easy removal and quick clean-up. I recommend lining the brownie pan with parchment paper (and leave an overhang) before adding in the batter. Don’t use wax paper or tin foil — it will negatively affect the baking.

How To Know When Brownies Are Done Baking

  • Visual cues for doneness: The edges of the brownies should look baked through and the center should look set with a shiny, slightly crackling top. The center should not jiggle at all when moved.
  • Physical cue for doneness: A toothpick inserted into the center of the brownies should come out with a few moist crumbs. The crumbs on the toothpick should be moist, but not wet. If it’s at all wet, the brownies need a bit more time.

Quick Tip

Undercooked brownies have a shiny gloss while cooked brownies will look duller, darker, and matte.

Adding eggs to the brownie batter

Brownie Recipe Tips

  • Microwave the chocolate chips and butter in large, sturdy, heat–safe bowls instead of using plastic or melamine. 
  • To avoid burned chocolate and butter, microwave for 30 seconds at a time, and stir them for at least 20-25 seconds between each microwave burst. The chocolate is still melting even after it has been removed from the microwave. 
  • Add in the cocoa powder quickly. Once the chocolate and butter have melted, the mixture will still be warm and this is the perfect time to get the cocoa powder in. The heat helps to “bloom” cocoa powder; that will get this brownie recipe a richer taste.

Quick Tip

When cocoa powder is “bloomed” it’s dissolved in a hot liquid which releases flavor particles within the cocoa. This helps bring out the best flavor and release its deep-chocolatey potential. Think of it like steeping a cup of tea!

Process shots: finishing the brownie batter and smoothing it into the pan for this brownie recipe

Brownie Recipe Tips, Continued

  • Don’t overmix. If the flour is mixed in too aggressively, it will over-develop the gluten and cause the brownies to be less chewy and soft. Mix until no streaks of flour remain and then stop.
  • Wait for the brownies to thoroughly cool before removing them from the pan and cutting. Run the knife under warm water, dry on a kitchen towel, and repeat for each cut.
  • Serve slightly warm brownies with a big scoop of vanilla bean ice cream and some hot fudge sauce or this tasty caramel sauce — I’m not sure it gets much better than that! 

Baked brownies, cut into squares

Variations

Switch Things Up

  • Make it gluten-free: Try these Gluten Free Brownies.
  • Add frosting or a ganache on top: spread some ganache from this recipe on the top or spread some Chocolate Buttercream Frosting.
  • Salted Caramel Brownies: Swirl homemade or store-bought salted caramel into the brownie batter before baking and sprinkle flaky sea salt on top after for a sweet-salty contrast.

Brownies topped with ice cream and chocolate syrup

Brownie Recipe Storage

This Brownie Recipe is best enjoyed several hours after they’ve been baked. I know, they smell and look AMAZING right out of the oven, but they do need time to cool.

The texture (and flavor) of the brownies are best when they’ve cooled. They also cut out much nicer!

These brownies are best eaten within 3-4 days of being baked. Store any leftover (completely cooled) brownies in an airtight container at room temperature. Or, if you’d like them to be even fudgier, store them in the fridge!

Leftover brownies can be frozen, but they do lose flavor and texture upon being cooled.

5 from 2 votes

Brownie Recipe

This is our favorite ultra rich brownie recipe! Iโ€™ll share all the tips you need to become a brownie expert, so youโ€™ll never want to use a boxed mix again!
Prep Time: 25 minutes
Cook Time: 40 minutes
Setting Time: 3 hours
Total Time: 4 hours 5 minutes
Servings: 36 brownies

Equipment

  • Baking pan 9 x 13-inch, light-colored

Ingredients 
 

  • 4 large eggs
  • 1 egg yolk
  • 18 tablespoons unsalted butter
  • 2 cups dark chocolate chips 53% cacao, see note 1
  • 6 tablespoons cocoa powder see note 2
  • 2 cups sugar
  • 1 tablespoon vanilla extract
  • 1 cup flour see note 3
  • 1 teaspoon fine sea salt see note 4
  • 2 cups milk chocolate chips see note 5

Instructions 

  • Preheat the oven to 350โ„‰. Lightly grease a light-colored 9x13-inch metal pan with nonstick cooking spray (see note 6). Line the pan with parchment paper, not foil or wax paper.
  • Crack 4 eggs into a small bowl. Add 1 egg yolk. Discard the whites or save them for another recipe. Use a fork to briskly whisk the eggs and then set aside.
  • Add butter and dark chocolate to a large microwave-safe bowl. Microwave for 30 seconds; then stir with a wooden spoon for 20 seconds. Repeat, microwaving for 30 seconds and then stirring for 20 seconds until chocolate is fully melted. This takes about 80โ€“90 seconds in my microwave.
  • As soon as chocolate and butter have melted and incorporated, add in cocoa powder. Mix with a wooden spoon until fully incorporated. Next, add sugar. Stir until completely incorporated.
  • Use a spatula to scrape every bit of the whisked eggs into the bowl. Mix until fully incorporated. Add vanilla and fine sea salt (or 1/2 teaspoon table salt). Stir to mix. Finally, add flour and milk chocolate chips. Stir until just incorporated, and be careful not to overmix the batter. Use a spatula to scrape all of the batter into the prepared 9 x 13-inch pan and smooth the top.
  • Bake in a preheated oven for 35โ€“45 minutes, or until a toothpick inserted in the center comes out with moist crumbs. We prefer these brownies fudgy, which typically means 40 minutes in my oven. After baking, let the pan cool on a wire rack at room temperature for 2โ€“3 hours. They will be very fudgy at this stage and will continue to firm up as they cool, becoming quite firm after 3โ€“5 hours.
  • Using the overhang of parchment paper, lift the bars from the pan and use a sharp knife to cut the brownies. Run the knife under warm water, dry on a kitchen towel, and repeat for each cut.

Video

Recipe Notes

Note 1: I recommend using 53% cacao chocolate chips, which are not too dark or bitter, and work well in these sweet brownies. I use Nestleโ€™s 53% cacao dark chocolate chips, and youโ€™ll need a bit more than one 11-ounce bag to reach 2 cups. If you prefer, semi-sweet chocolate chips can also be used; they make the brownies slightly sweeter.
Note 2: Make sure to use unsweetened cocoa powder, not Dutch-process or Special Dark cocoa. If you only have Dutch-process cocoa, you can still use it but add 1 teaspoon of baking powder to the brownie batter. This is necessary because Dutch-process cocoa has the acid removed, and the baking powder provides the acidity needed for the brownies.
Note 3: To measure flour accurately, avoid pressing a measuring cup directly into the bag. Instead, spoon the flour into the measuring cup until it's heaping, then level it off with the back of a knife for the right amount.
Note 4: If using table salt, reduce to 1/2 teaspoon.
Note 5: I love milk chocolate chips in these brownies, but if you'd like to control sweetness, use semi-sweet or even add nuts instead. The amount can also be reduced to 1 cup if desired.
Note 6: Bake time will vary with a dark-colored metal pan or glass pan, so you'll just need to keep an eye on the brownies. Light-colored, shiny pans will produce the best results as they conduct heat more evenly.
Nutrition: The nutrition information is for 1/36 of the brownies. This is an appropriate size due to their richness.
Storage: Store brownies in an airtight container at room temperature or in the fridge. Brownies are best enjoyed within 3โ€“4 days of being baked.

Nutrition

Serving: 1serving | Calories: 211kcal | Carbohydrates: 26g | Protein: 3g | Fat: 11g | Saturated Fat: 8g | Trans Fat: 1g | Cholesterol: 42mg | Sodium: 88mg | Potassium: 112mg | Fiber: 1g | Sugar: 18g | Vitamin A: 223IU | Vitamin C: 1mg | Calcium: 47mg | Iron: 1mg

Nutrition information is automatically calculated, so should only be used as an approximation.
Meet Chelsea


Hello, and welcome to Chelseaโ€™s Messy Apron! Iโ€™m Chelsea, the recipe developer, food photographer, and writer behind the site. Iโ€™m passionate about creating simple, reliable, and delicious recipes that anyone can make.

Thanks for stopping byโ€”I hope you find something delicious to make!

More Recipes You'll Love

5 from 2 votes (1 rating without comment)

Leave a comment

Your email address will not be published. Required fields are marked *

Recipe Rating


8 Comments

  1. Zack says:

    5 stars
    Hi Chelsea! I love the thorough directions throughout the recipe, baking brownies is definitely a science ๐Ÿค“.

    I usually follow Alton Brown’s recipe where he bakes for 15 minutes at 300.. rests for 15.. then finishes in the oven for another 30 minutes or so. Have you tried resting the brownies mid-bake ๐Ÿค”

    Excited to test out your recipe later this week ๐Ÿ™‚

    1. Chelsea Lords says:

      Thanks Zack! It definitely is a science! ๐Ÿ™‚ I haven’t ever tried that with this recipe! Sorry, wish I could be of more help! I’d love to hear what you think of the recipe if you do try it! ๐Ÿ™‚

  2. neira says:

    I will have to reduce this recipe to 12 brownies. I really cannot afford all these ingredients for 36 squares. How do you suggest I do this? Is there anything that I can do? And, I can only afford cocoa powder: no chocolate chips or other chocolate. Help! Not sure how to proceed, or, is that some other recipe entirely?

    1. Chelsea Lords says:

      This recipe won’t work without the chocolate chips, I’m so sorry! ๐Ÿ™ I’d recommend a different recipe!

  3. Eva says:

    I am a big fan of your blog and though I like to only reply AFTER I make a recipe, Man oh man, I had to say something after seeing these brownies ;-). They look like dark chocolate heaven brownies!! Chelsea, out of curiosity, what is the brand of dark chocolate chips 53% cacao you tend to use? Thanks for this awesome recipe and your always detailed/thorough instructions.

    1. Chelsea Lords says:

      Awe thank you Eva! ๐Ÿ™‚ I appreciate your support over the years and trying so many recipes! I typically use Nestle’s dark chocolate in this recipe!

  4. Ramya says:

    will be making this soon can i use flax eggs and vegan butter as am a vegan i love brownies and chocolate soooooooooo much perfect for my birthday on 19 September and office snacks and home snacks while i work on the computer and phone will dm you if i make this and let you know how it goes Thanks Ramya

    1. Chelsea Lords says:

      Hope you love it! ๐Ÿ™‚