
Easter Cookies
These festive Easter Cookies are rich, sweet, soft, and chewy! Thanks to a "secret" ingredient -- molasses --they have a deep toffee flavor, with bright pops of sweet milk chocolate and crunchy Cadbury® eggs.
Servings: 21 -22 large cookies
Cost: $4.31
Ingredients
- 8 tablespoons unsalted butter melted
- 1/2 cup light brown sugar packed
- 1/4 cup dark brown sugar packed
- 1 large egg
- 1 teaspoon vanilla extract
- 1 tablespoon molasses Note 1
- 1-1/2 cups old-fashioned oats (don't use quick oats)
- 1/2 teaspoon EACH: baking soda, baking powder, fine sea salt
- 1 cup all-purpose flour Note 2
- 3/4 cup chocolate chips Note 3
- 1/2 cup mini Cadbury eggs Or Easter M&M's
Instructions
- MELT BUTTER AND COOL: In a very large, microwave-safe bowl, melt the butter. Once melted, set aside cool back to room temperature for 5-10 minutes. It's important that the butter isn't hot when you add in the sugar, or it will melt the sugar and make the cookies greasy.
- ADD WET INGREDIENTS: Once the butter has cooled to room temperature, stir in the light brown and dark brown sugar. Whisk until well combined, about a good minute of whisking. Add in the egg, vanilla extract, and molasses (scrape every bit of molasses out into the dough). Stir with a wooden spoon until smooth.
- ADD DRY INGREDIENTS: Add in the oats, baking soda, baking powder, and salt. Mix well. Add in the flour and mix until just combined-- don't overmix. Gently stir in the chocolate chips and Cadbury eggs.
- CHILL DOUGH: Cover the bowl tightly and chill for 45 minutes to 1 hour.
- PREHEAT OVEN: Preheat the oven to 350 degrees F. Line a pan with parchment paper or use a nonstick liner.
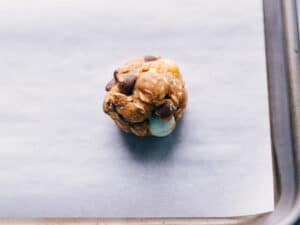
- ROLL DOUGH BALLS: Roll large balls of dough, a leveled 2 tablespoons in size (40g). You should get about 20-22 cookies from this recipe. Place 6-8 cookie balls on the prepared sheet pan to give the cookies plenty of room to spread. (They spread a lot!) Place the tray back in the fridge for 5-10 minutes (dough gets warmed from being handled).
- BAKE: Bake for 9-14 minutes, erring on the side of under-baking. (That keeps them soft and chewy. We like ours right at 10 minutes.) The cookies will continue to bake slightly out of the oven, so take them out as soon as the edges start to lightly brown.

- OPTIONAL: MAKE 'EM PRETTY: Remove tray from the oven and within 1-2 minutes of pulling out the cookies, press a few more chocolate chips onto the tops of the cookies--this ensures even placement of chocolate and also makes them look pretty. Allow cookies to cool on the baking tray for 5 minutes before transferring them to a cooling rack. Repeat, baking the remaining dough balls until all the cookies are baked (see instruction #10).
- STORAGE: We like these cookies best on days 1 and 2 of being made. They are the softest and chewiest on day 1 and get more crunchy, less chewy every day after that. They last up to a week, but they begin to lose texture and flavor. To store: Place in an airtight container and keep at room temperature. Wait until cookies are completely cooled before adding to the container.
- FREEZING DOUGH: While freezing baked cookies works okay (there is some texture loss), I prefer to freeze the dough instead! Place the cookie dough balls on a large sheet pan and freeze until solid. Once solid, transfer the frozen balls to an airtight container/bag separated by parchment paper (so they don't all stick together in one clump); freeze for up to 3 months. To bake: You can bake straight from the freezer; just add 1-3 minutes onto the cooking time. (Or thaw the dough in the fridge and bake according to directions.)
Video
Notes
Note 1: Use dark molasses (also sometimes labeled as "robust" or "full-flavored"). I have tested these cookies with Brer Rabbit® and Grandma's® and would recommend either. Don't leave this ingredient out-- the cookies aren't the same without it. In a pinch, use pure maple syrup.
Note 2: If you press a measuring cup into a bag of flour and scoop, you will pack in way too much flour, resulting in the wrong texture of cookie. To accurately measure the flour, spoon the flour into the measuring cup until its overfilled. Then use the back of a table knife to level the measuring cup at the top. (Video visual here).
Note 3: Use whatever chocolate chips you prefer. We love milk chocolate, but it makes for a very sweet cookie. Semi-sweet or dark chocolate work great and are less sweet. White chocolate chips can also be used here.
Nutrition
Calories: 170kcal | Carbohydrates: 25g | Protein: 3g | Fat: 7g | Saturated Fat: 4g | Trans Fat: 1g | Cholesterol: 22mg | Sodium: 11mg | Potassium: 63mg | Fiber: 1g | Sugar: 13g | Vitamin A: 166IU | Vitamin C: 1mg | Calcium: 23mg | Iron: 1mg